In this tutorial you will learn how create a greeting card in photoshop.
Step # 1 – Creating the Paper
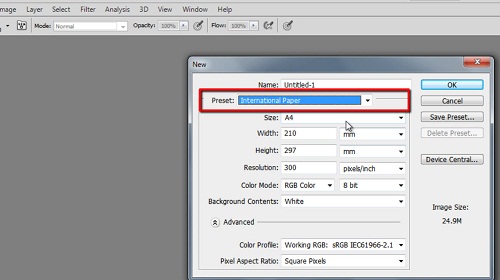
Start Photoshop then click “File” and then “New”. In the window that appears you need to select the paper size, here we are making an A5 card, by folding over an A4 page. Select the “Preset”, “International Paper” from the drop down box and below this in the “Size” box select “A4”. Click on “Image” in the main toolbar, go to “Image Rotation” and choose “90 degrees Clockwise”. Now click “View” and “New Guide”, we want to split the page in two with the guide so select “Vertical” and enter a position of “14.85” (exactly half the height of an A4 page) and click “OK”. Repeat this exact process again for a second Photoshop document.
Step # 2 – Creating the Cover
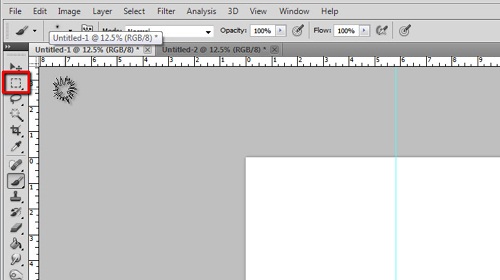
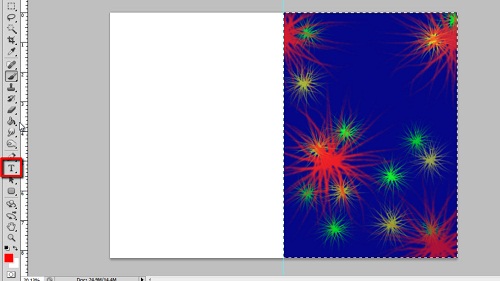
Navigate back to the first document where we are going to create the cards cover on the right side. From the toolbar on the left select the “Rectangular marquee tool” and drag it over the entire right side of the document. Now, select the “Fill” icon from the toolbar and at the bottom select a color. We are making a firework design cover so we’ll choose a nice dark blue. Click in the selection to make the background color.
Step # 3 – Adding Some Smaller Fireworks
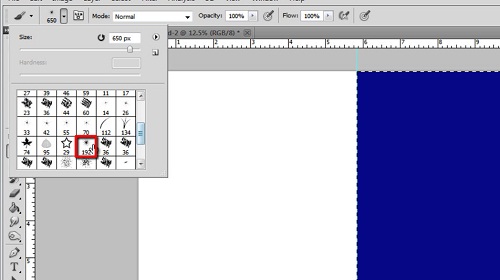
Now click on the brush tool and click on the icon to the right of the brush icon in the toolbar at the top. You will see a list of brush options, you need to select the one called “Fuzzball” which is about halfway down the selection. Select a brush size on the slider, select around “650” pixels – these will be our smaller fireworks. Choose a color in the color selector at the bottom – bright works best. Dot a few of the ‘fireworks’ around the image. Try to leave an area at the top clear.
Step # 4 – Adding More Fireworks
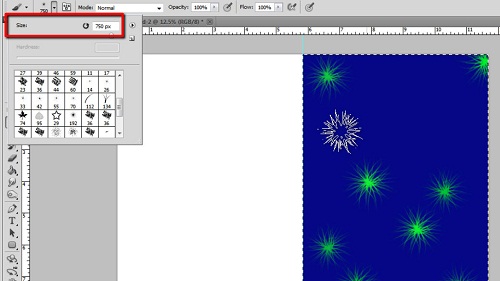
Select a new color (again, should be bright) and change the brush size to something a touch larger – try 750. Dot some fireworks around, then select a new color for your largest fireworks and select a brush size of around 2000. Dot some around, again trying to leave a space at the top clear.
Step # 5 – Adding the Cover Text
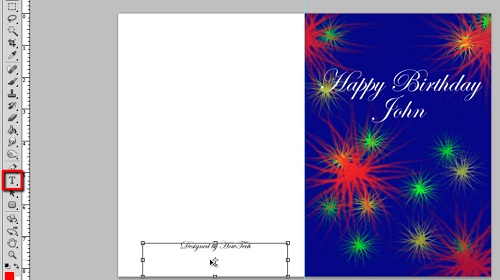
From the tools on the left select the text function and drag a text box onto the page, enter your desired text then select it. Choose a font that looks celebratory – such as the “Edwardian Script ITC” we are using here. Select a font size, here “72” and a color, white works well. Finally centralize the text. Use the move tool if you need to adjust its position.
Step # 6 – The Back Cover
A nice touch can be adding your name to the back page. Click the text option from the tools again and drag a box onto the left hand side of the page, change the color to black (or whatever your preference is), reduce the size and enter some text. Use the move tool to drag the text to the bottom of the page. Save this document as “front”.
Step # 7 – The Inside
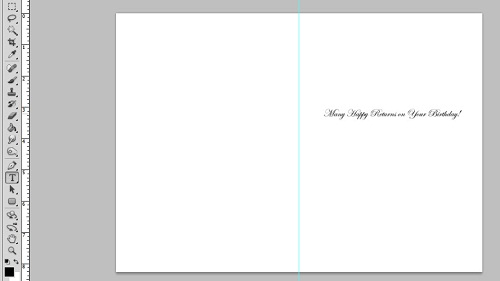
Navigate to the second document you created. The left side of this page should remain blank, as is the custom with greeting cards. Select the text option from the toolbar and drag a new textbox onto the right side of the page. Select a text color and size, here the same as the previous text works, and enter a personal message. Space is left at the top and bottom for the handwritten greeting and signature. Save this document as “inside”. Remember when you are printing to do it double sided and that is how to create a greeting card in photoshop.
 Home
Home