In this tutorial, we will teach you how to design a wall clock from scratch in Photoshop.
Step 1 – Setting up Sizes
To design a wall clock, first of all, we have to set the document size. An average wall clock can be of eight by eight inches, so let’s change the dimensions accordingly.
To design a wall clock, first we have to divide the page into two parts. You can see the Ruler on the left side and on the top of the canvas. If not, then press Ctrl +R to view the ruler. Next, go to the View option, move over New Guide and select the vertical ruler, keeping the position to 4 inches. You can do the same for the Horizontal guide as well.
Now, design a background. Select Rectangular Marquee Tool drag it into a vertical rectangle shape. Fill the color #fed207 and transform the shape by Ctrl + T. To make a one side pointed click right and choose perspective. Drag one point to another from the bottom. Copy this shape to remaining three sides.
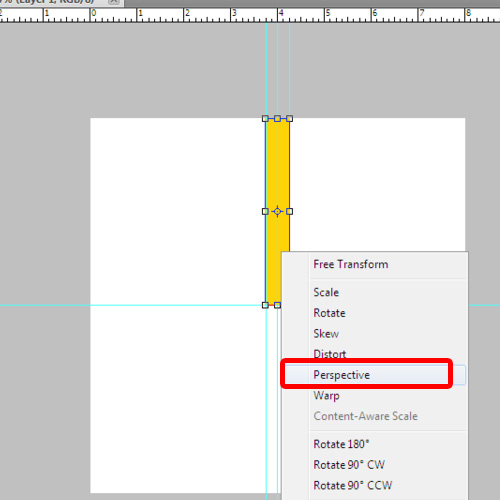
Step 2 – Filling Blank Spaces
Next, fill the blank space by applying the same step. Copy the shape Ctrl + J and place it diagonal by doing transform Ctrl + T. Set to the right place.
Repeat this step until you are not done with your background design.
Now, to make a circle, select Elliptical Marquee Tool. Make a circle, fill the color #f1d13a. To make a little realistic let’s apply blending options. Select the circle layer, click right Blending Options.
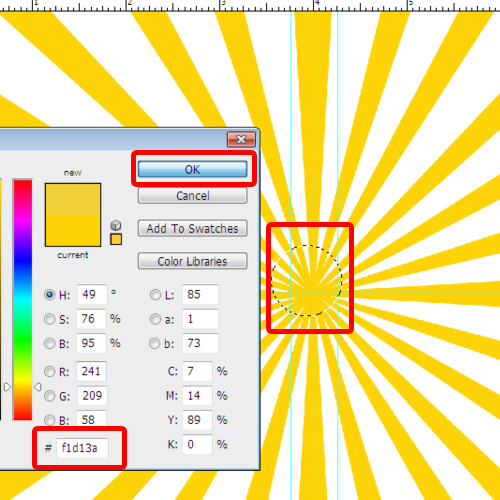
Step 3 – Outer Glow
Give Outer Glow, select the color #eded6d, set the size to 87px and spread 12%
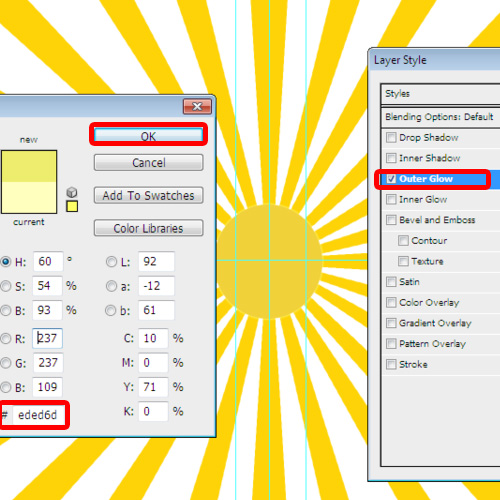
Step 4 – Finalizing background
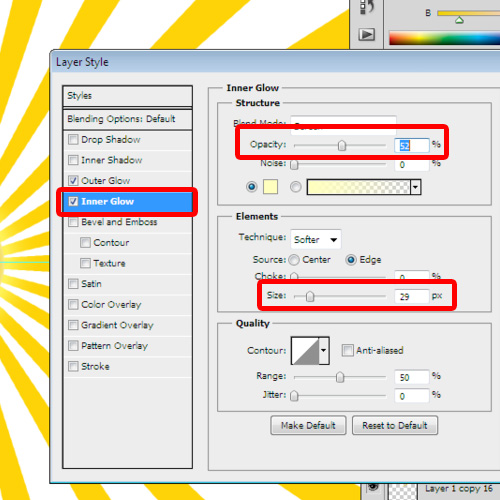
For Inner Glow, select the color #ffffbe, set the size to 29px and opacity 52%
Here you are done with your background design. Now, let’s place the digits.
Step 5 – Placing Digits
Make a new layer, grab a Text Tool (T). Select the font, color and point size.
Font color #705209, size 48.
Make a new layer for each digit from 1 to 12. Place in a sequence by keeping in mind that negative space should be balanced.
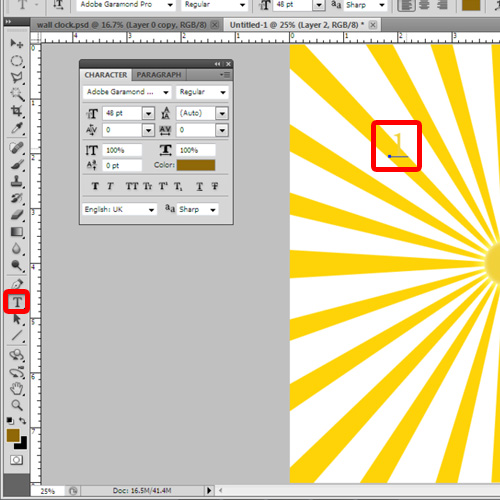
Just to enhance a wall clock, increase the digit 3 to 110pt size or it’s upto you which ever digit you want to increase.
Step 6 – Placing Borders
To give a border, make a new layer, fill the color #fed307. Bring this layer at the back of the white background. To make border visible we have to resize the white background by Ctrl + T to transform. Resize the rectangular shape. Here you can see your yellow borders now.
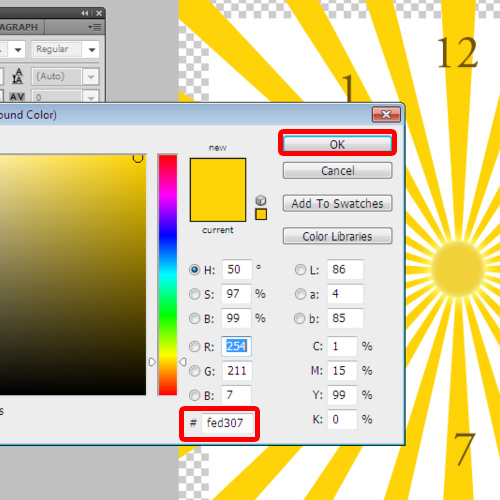
Step 7 – Clock Needles
Now, it’s time to make a clock needles. Select a Rectangular Marquee Tool. Make a rectangle box and fill the color # ae7d05. To make one side pointed like needle transform it Ctrl + T, click right to choose perspective. Drag one point to another from the bottom.
To make another needle, copy the first needle by pressing Ctrl + J. Make this needle lengthier than the previous needle.
Bring circle layer on the top so that the needles can be at the back.
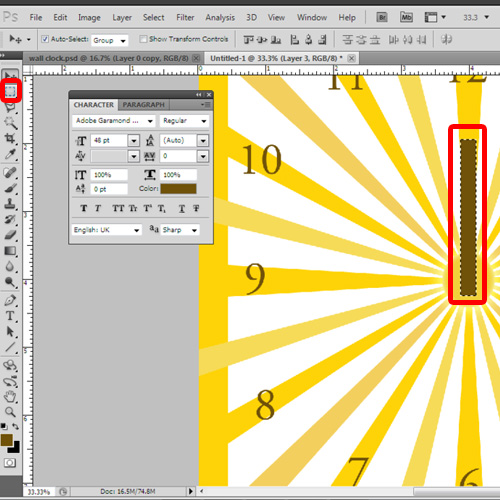
And this was how we can design a wall clock in photoshop.
 Home
Home