In this tutorial, we will teach you how To Edit .swf Files. We have already created a .swf file on our computer. For the purpose of this tutorial, we will be editing and making changes to this file only.
Step 1 – Import to Stage option
Follow this step by step guide to learn how To Edit .swf Files.
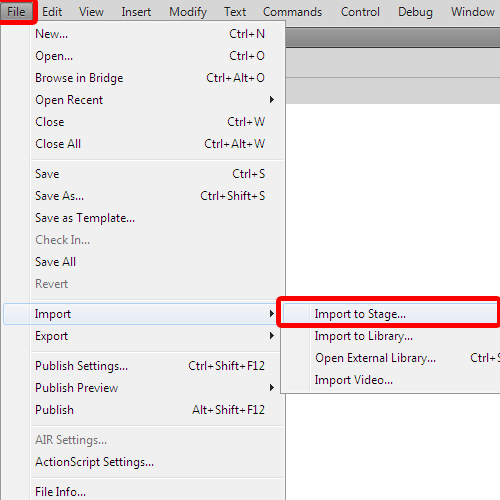
First of all, go to the file tab and from imports, select the “import to stage” option. You can always use the “ctrl+r” shortcut key to import .swf files.
Step 2 – Clear Keyframe
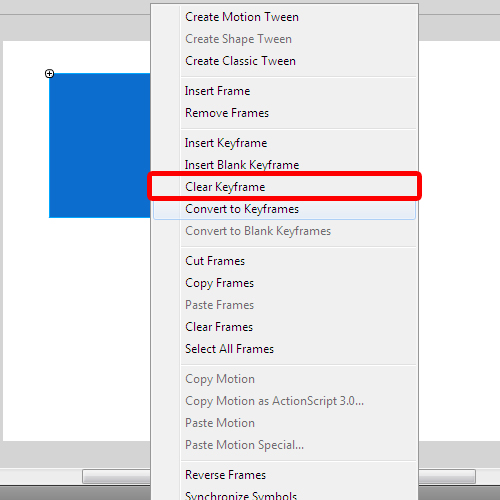
Once the import window opens, select the swf file before you hit the enter key. Once the file will be imported, we will go the layer 1 region and select all the frames between the starting and the ending point. Once done, right click there and from the drop down menu, select the clear keyframe option.
Step 3 – Change position of the shape
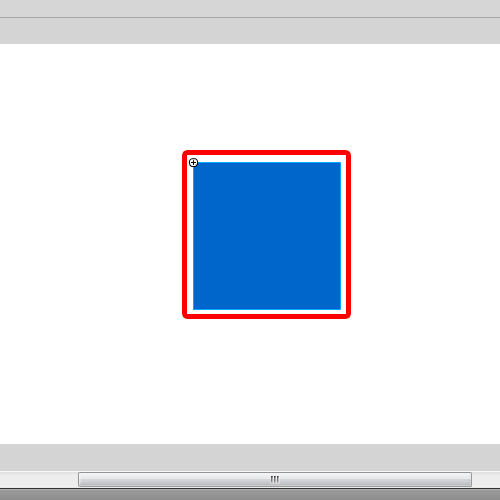
In this tutorial, we are going to work with the rectangle in the swf file. We will select the ending point and then drag the rectangle in order to change its position to the center.
Step 4 – Change the starting point
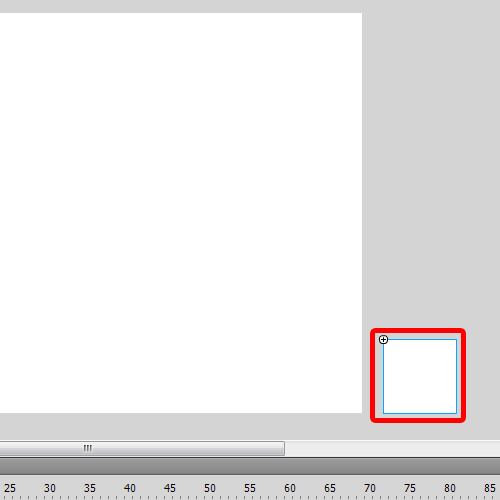
Next we will go back to layer 1 and select the starting point of the tween. We will drag the rectangle out of the import stage in order to change its position.
Step 5 – Create classic tween
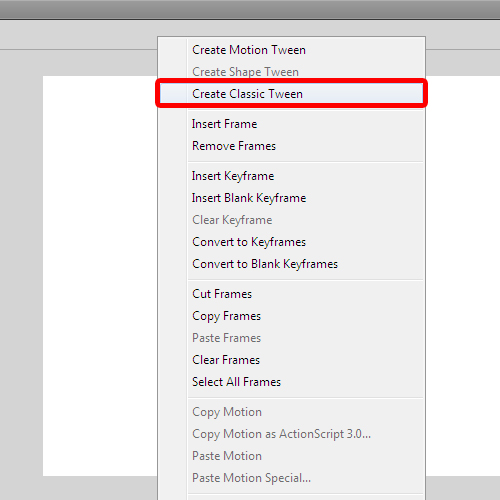
Then we will right click on the 15 second frame and select the “create classic tween” option from the menu.
Step 6 – Adjust tweening
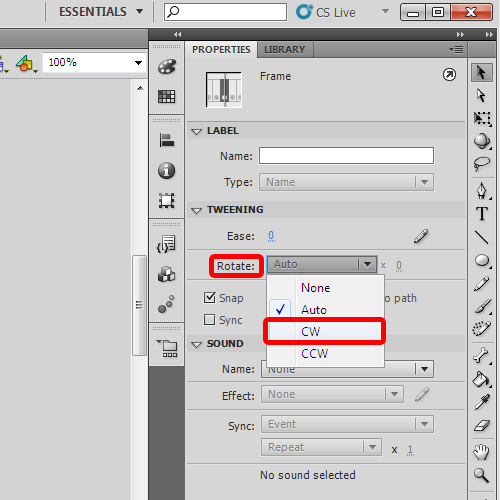
Next, adjust the tweening option by changing the rotate option to Clockwise denoted by CW.
Step 7 – Open preview dialog box
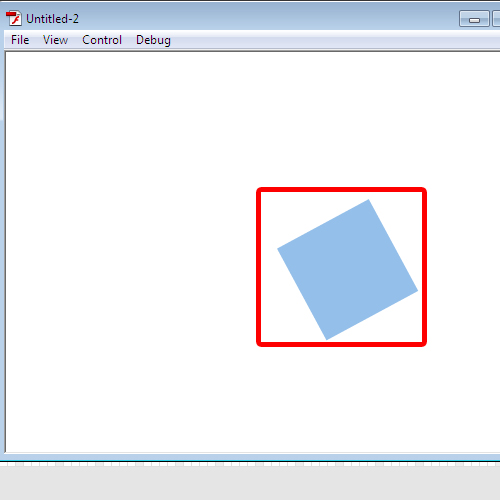
Now, simply come back to the starting point and hit the enter key on your keyboard to see the preview of the tween. Press the ctrl + enter key in order to open the preview dialog box.
In this manner, you can edit .swf files.
 Home
Home