While using Illustrator you can create drawings of different images by either replicating them or creating new ones from scratch. Therefore, in terms of illustrations Adobe Illustrator cs5 is very useful. Over here the tutorial given below teaches how to create a hat in this software.
To learn how to create a hat in Adobe Illustrator look at the steps given below.
Step # 1 – Make two ellipses
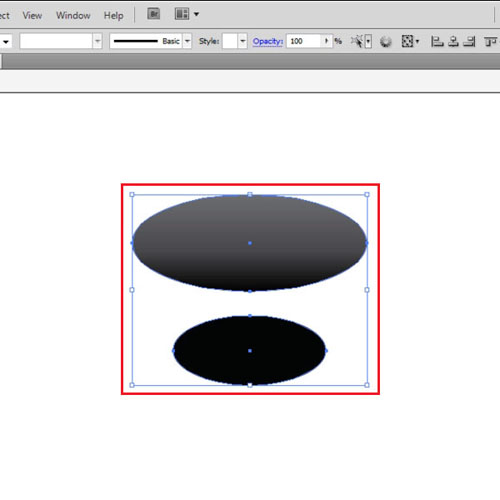
Start off by making an ellipse from the shape tools and filling it with a gray – black gradient. Copy and paste it by pressing “ctrl + c” and “ctrl + v”. Reduce the size of the copy and add a black fill in it.
Step # 2 – Align the ellipses
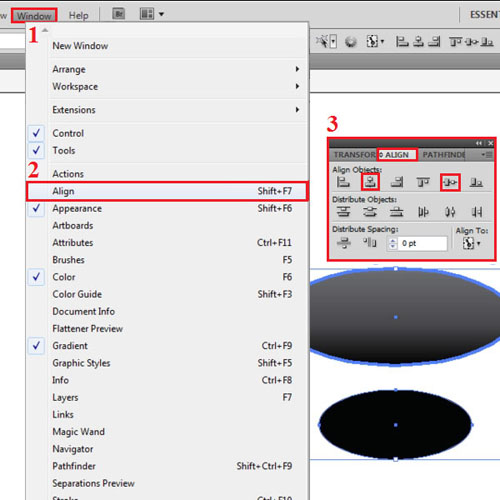
Select both of the shapes and open the “align” panel from the “window” menu. Click on the bigger ellipse again and press the “horizontal align center” and “vertical align center” buttons on the panel to place the smaller circle both horizontally and vertically in the center of the larger one.
Step # 3 – Add the “outer glow” effect
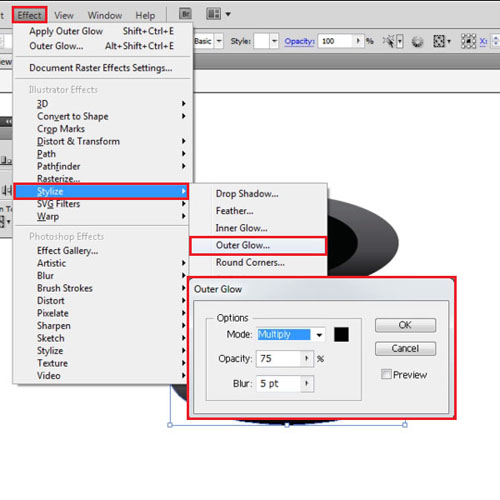
Copy and paste the larger ellipse and add the outer glow effect to it by going to “effect>stylize>outer glow”. Adjust its settings as shown below.
Step # 4 – Remove the effect from the copy
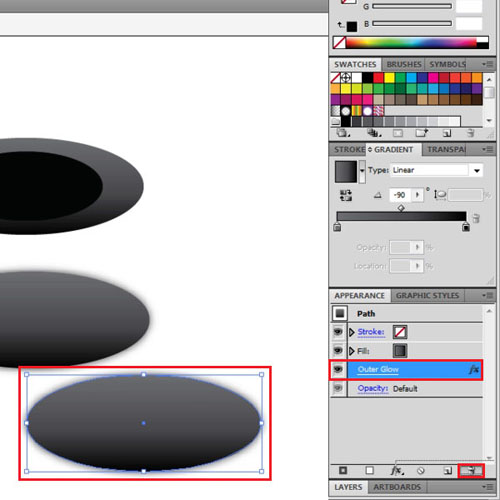
Copy and paste this ellipse twice and remove the “outer glow” effect from it from the “appearance” panel.
Step # 5 – Divide the shapes
Overlap both of the copied shapes as shown, select them and from the “pathfinder” panel choose the “divide” option. Once you do, use the “direct selection tool” to delete all except the intersecting portion.
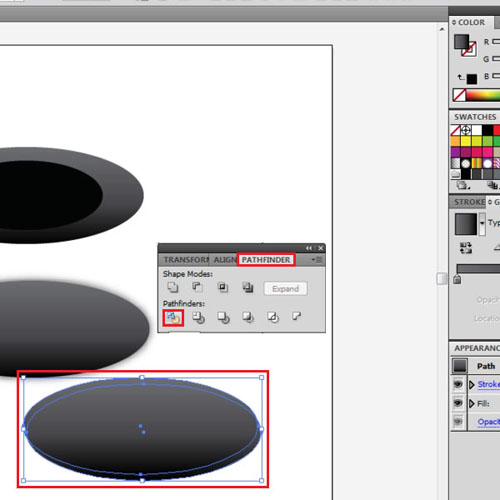
Step # 6 – Adjust the sickle shape
Add a lighter gradient to this sickle shape and align it by sending the ellipse with the effect at the back. Adjust the shapes to create the rim of the hat.
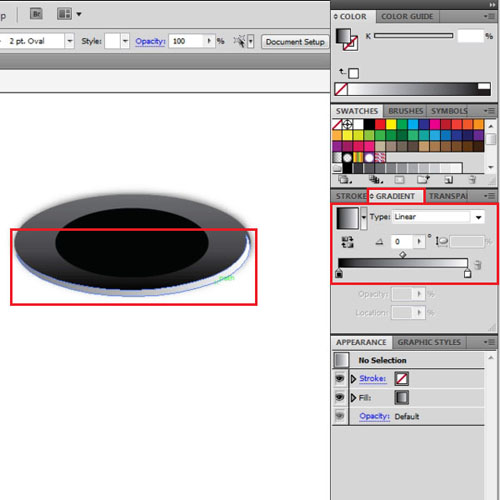
Step # 7 – Make the body
To make the body, draw a rectangle with the same width as the smaller ellipse. Copy the smaller ellipse; intersect it with the rectangle, with both of their fill as black. Press the “unite” button on the “pathfinder” panel. Add gradient to it and apply the “outer glow” effect to the body as well.
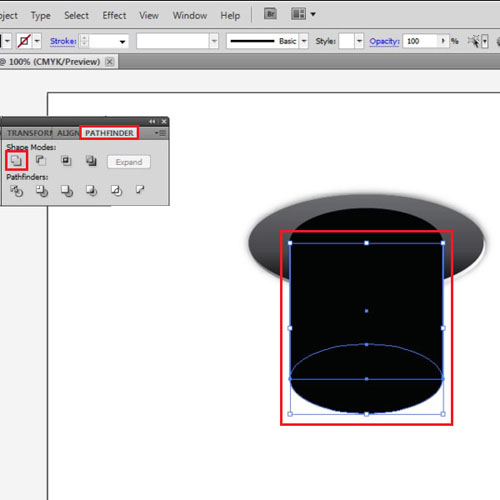
Step # 8 – Make a colored strip
Make a colored band on the body of the hat. Draw the shape with the “pen tool” and fill it with a purple gradient with three color stops.
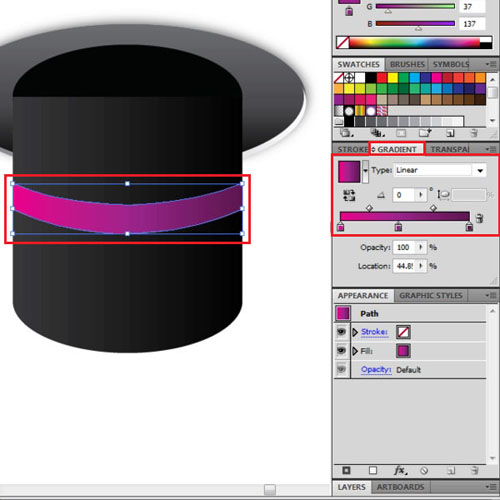
Step # 9 – Make the lower edge
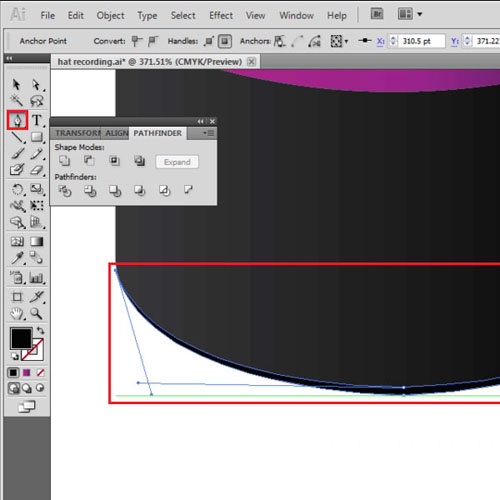
Next, make the lower edge of the hat by means of the “pen tool” and add a black fill to it.
Step # 10 – Make the shadow
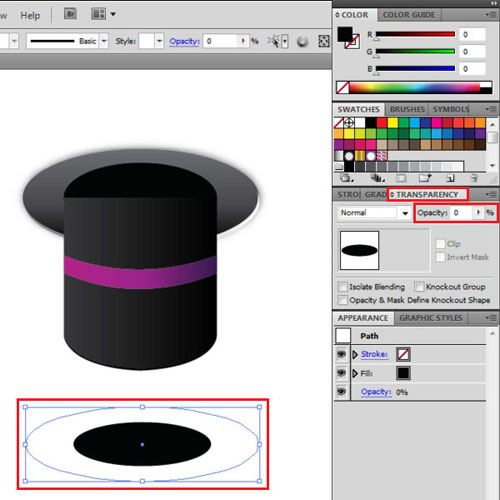
Create the initial shape of the shadow using Illustrator by making two overlapping ellipses and changing the opacity of the larger one to “0”.
Step # 11 – Adjust blend settings
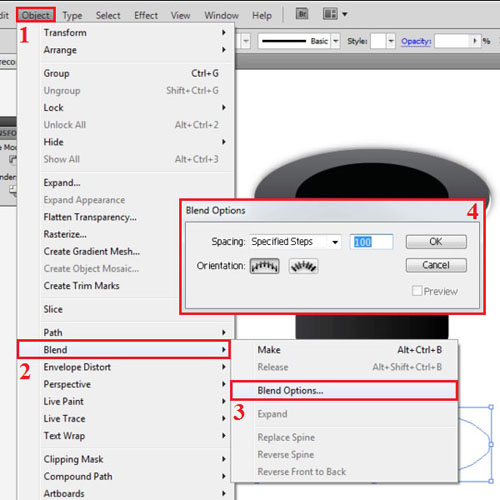
First alter the number of specified steps by going to the “object” menu, dropping down to “blend” and selecting “blend options”. From the popup options menu that emerges enter the specified steps as “100”.
Step # 12 – Make the blend
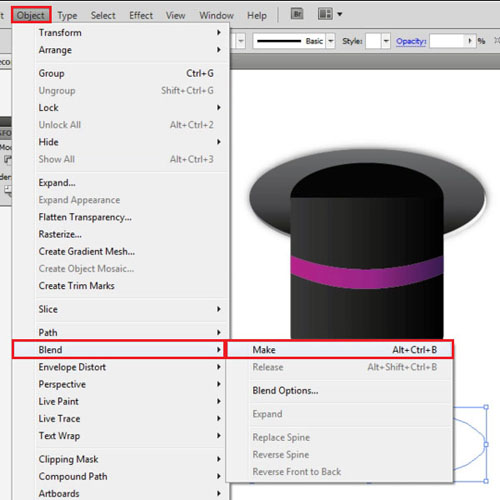
Now go to the “object” menu, drop down to “blend” and select the “make” option. Reduce the opacity of this shape.
Step # 13 – Create a background
Before you make the background, place the shadow that you made below the hat; adjust the positions of the shapes such that the rim is in the front then the body and then the shadow.
Adjust the size of the rim to give it perspective.
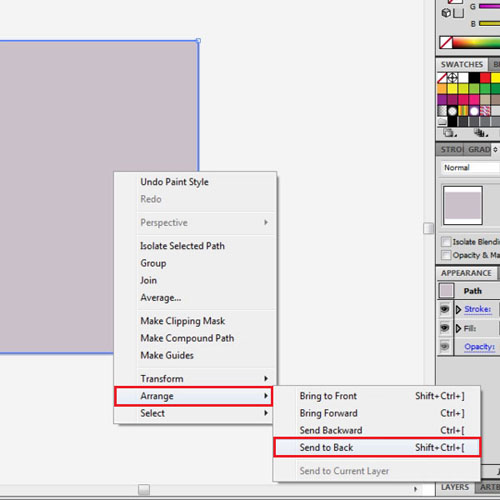
Create a light gray background by making a rectangle the size of the canvas, adding a fill into it and sending it at the back. In Illustrator cs5 you can send anything at the back by right clicking on it, going to “arrange” and pressing the “send to back” option.
 Home
Home