Text in Illustrator can be given different effects so as to reach a desired output. The letters entered can be divided and given a folded paper texture in Adobe Illustrator.
To learn how to create such texture in Illustrator, follow the steps below.
Step # 1 – Enter text
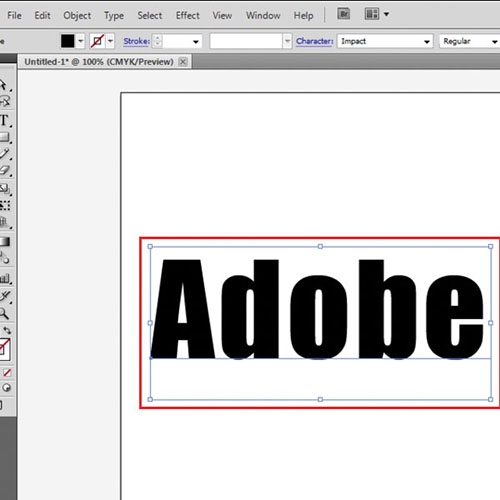
Begin creating the folded paper texture on your text by entering text in font type and size as per your liking. It is better to have text with a greater font size. Place the text at the center.
Step # 2 – Make the background
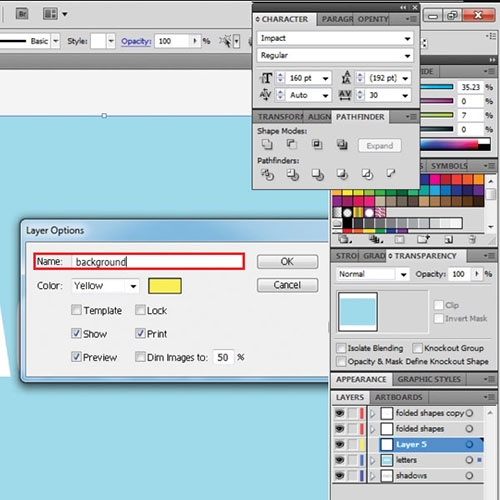
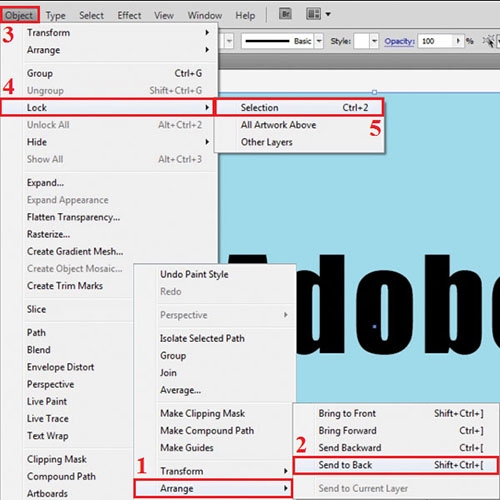
Make a rectangle the same size as your canvas, enter a bill in it, send it at the back as your background and lock it from the “Object” menu.
Step # 3 – Adjust the text
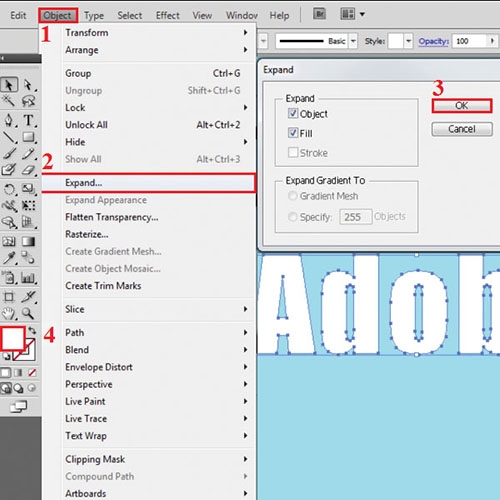
While selecting the text, “Expand” it from the “Object” menu and add a white fill into it.
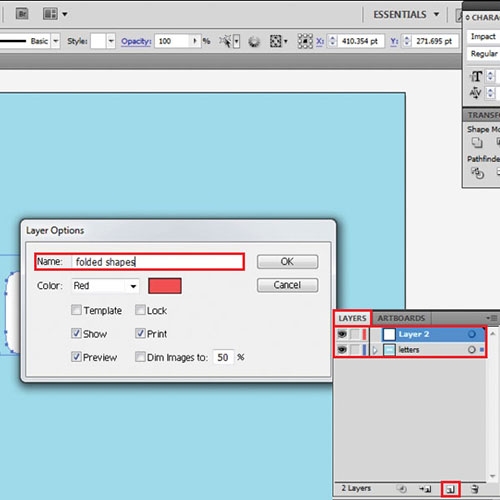
Step # 4 – Rename the layers
In the layers panel, rename the one you are working on to “Letters”. Add a new layer from the bottom and name it as “Folded shapes” by double clicking on it.
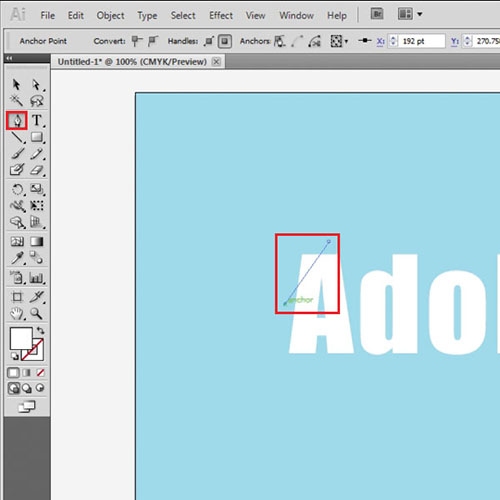
Step # 5 – Sketch out the divisions
Draw lines on the text by means of the pen tool where you wish to give a folding effect. Select all of it and press the “Divide” option from the “Pathfinder” panel.
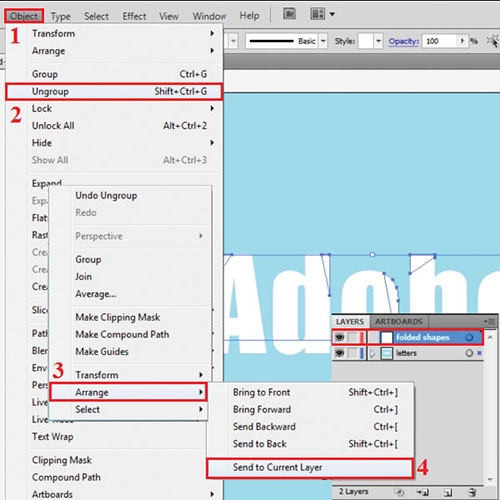
Step # 6 – Shift into a different layer
Now, ungroup the text from the “Object” menu, click on the “Folded shapes” layer.
Select the portions you will fold and send them to this new layer by right-clicking, going to “Arrange” and sending it to the layer you are currently on.
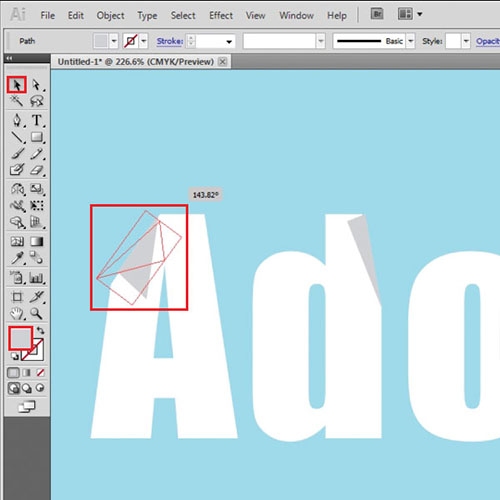
Step # 7 – Adjust the divided portions
Reflect the separated portions by means of the “Reflect” tool or rotate them from the “Selection” tool.
Change the colors of these folded portions to a light gray so that they are easily visible.
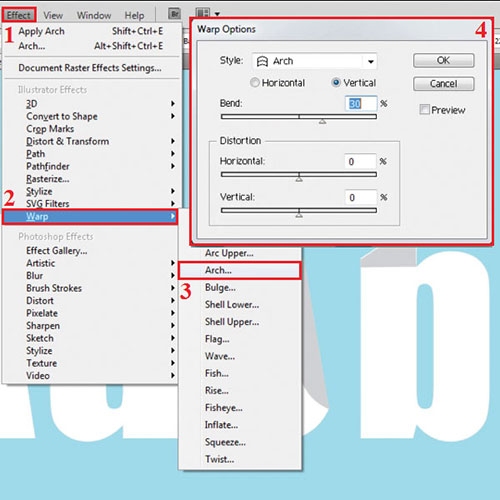
Step # 8 – Apply the Warp effect
Go to the “Effect” menu, select “Warp” in the drop down menu and apply the “Arch” effect to each portion. Specify the vertical or horizontal option and the angle according to each shape.
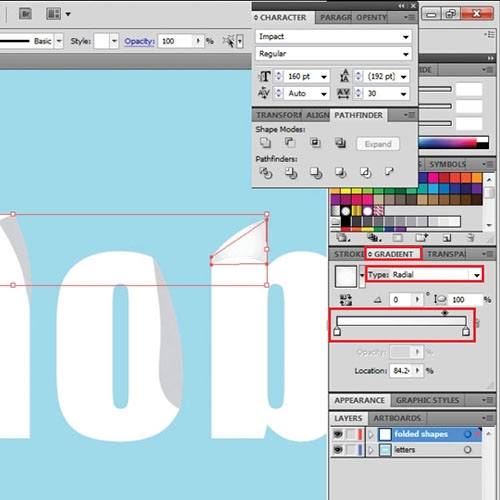
Step # 9 – Add radial gradients
Next add a radial gradient to folded shapes of the letters “A” and “B”. This gives it a more 3-dimensional effect.
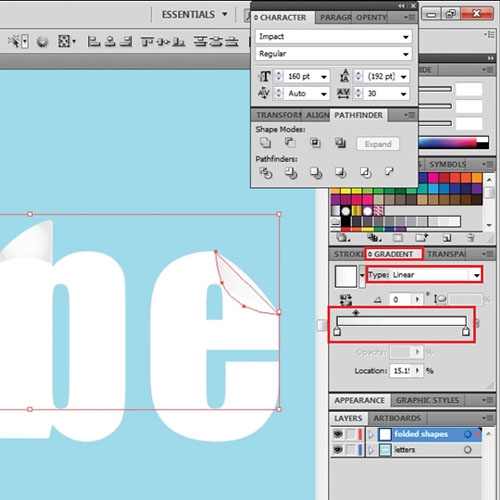
Step # 10 – Add linear gradients
Add a linear one the other three letters. Adjust the linear gradients so that they are darker at the turning.
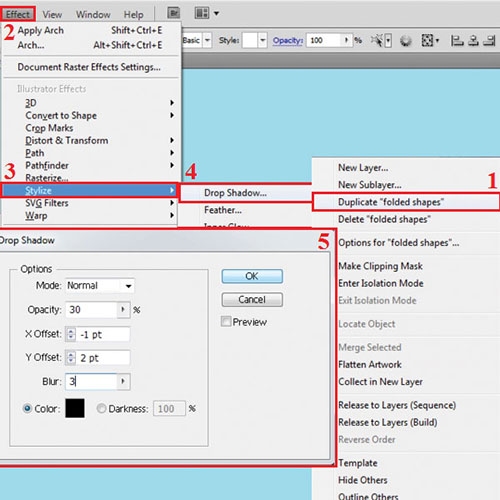
Step # 11 – Apply the “Drop Shadow” effect
Duplicate the “Folded Shapes” layer and add the “Drop Shadow” effect with the settings as shown.
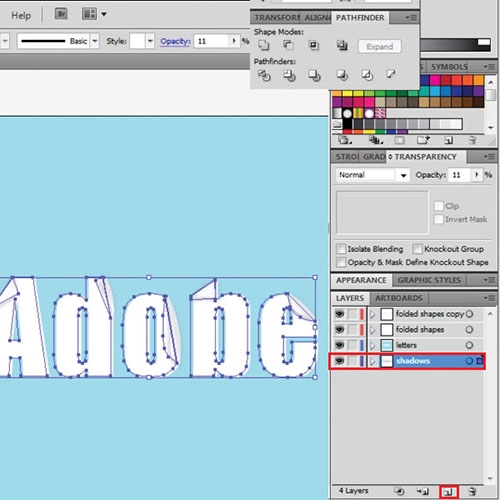
Step # 12 – Add a “Shadows” layer
Add a new layer, name it “Shadows” and copy the text on it. Fill this with black and reduce its opacity to “11”.
To send this behind the text, first bring the Shadows layer beneath all. It now goes behind the background as well.
Step # 13 – Add a “Background” layer
Unlock the background, shift it onto a new layer and place it behind all other layers to complete the texture in Illustrator.