This text effects tutorial details how to create basic retro typography in Adobe Illustrator. Multiple fills can be created and many effects can be applied to Illustrator typography to give various outputs. The created text can then be used to further design something retro in Illustrator.
Step # 1 – Enter text
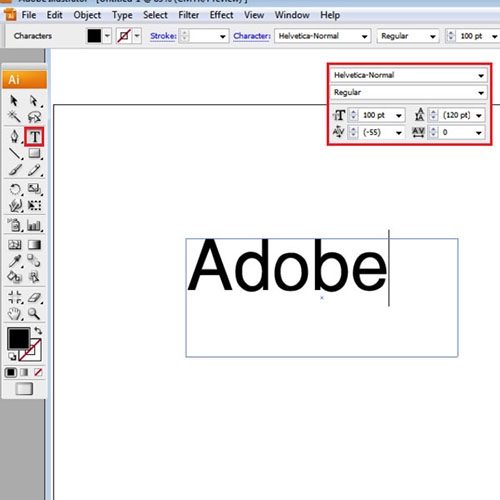
Add text on the page with “Helvetica-Normal” as the font type and the size as “100pt” to begin working on creating retro typography.
Step # 2 – Remove color
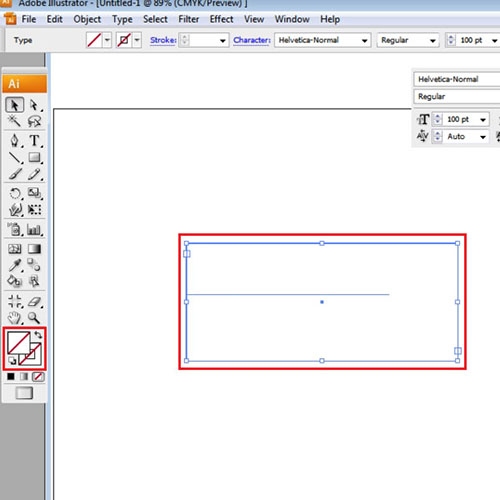
Remove the color of the text, by selecting it with the selection tool, and clicking on the “none” option below the color box on the tool panel.
Step # 3 – Add a new fill
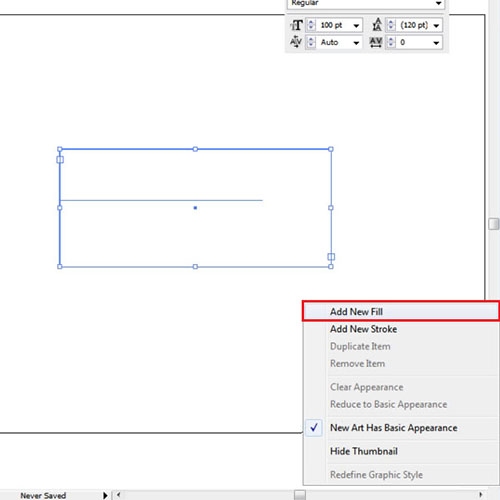
Go to the “Appearance” panel on your right. Click on the arrow on the panel to open the drop down menu, from there select the “Add New Fill” option.
Step # 4 – Alter the fill
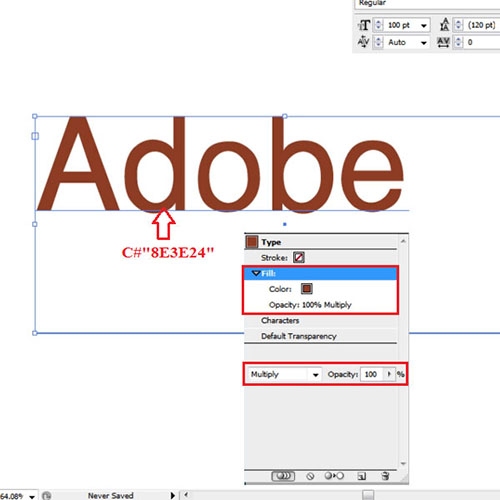
Now, let’s go all retro in Illustrator. Change the color of the text to a brownish shade, with the value C#”8E3E24″. Go to the “Transparency” panel and change its opacity to “Multiply”.
Step # 5 – Insert another fill
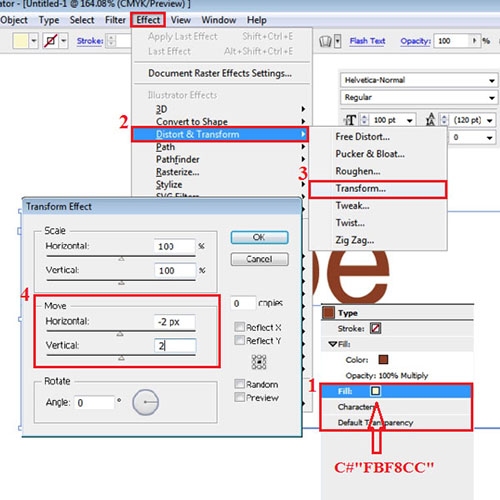
Add another fill and make its color light yellow with the value C#”FBF8CC”. Whenever you add a new fill, you will see that it appears above the rest in the Appearance panel, shift it around according to your requirement. While selecting it, go to Effect> distort and transform> transform. This opens the Settings panel, from there enter “-2px” to the Horizontal move and “2px” to the Vertical move. Press “OK” to apply this effect.
Step # 6 – Convert a new fill into shape
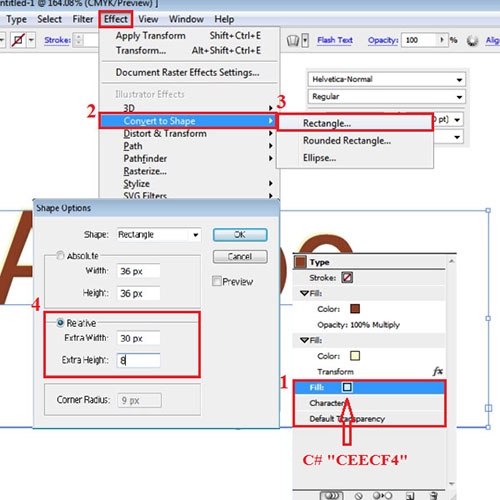
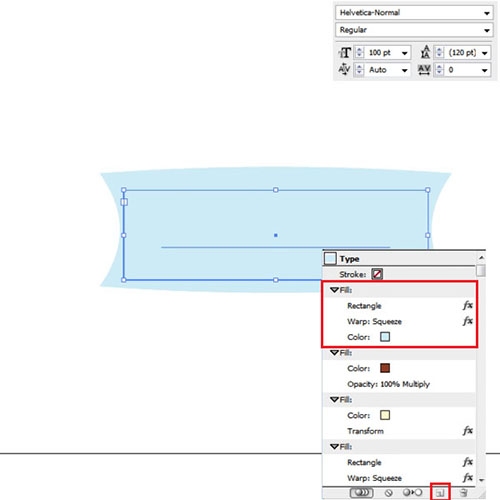
The next fill you add, change its color to blue with the value C# “CEECF4”. Bring this fill all the way to the bottom and apply two effects to it. First go to Effect> Convert to Shape> Rectangle. In the settings menu define the relative width as “30px” and height as “8px”.
Step # 7 – Add the “Squeeze” effect
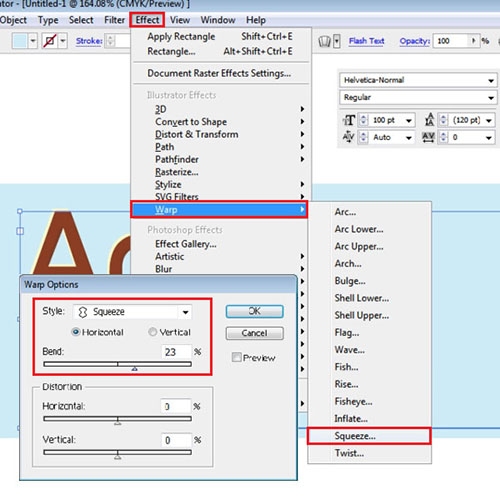
Next go back to the “Effect” menu and in the drop down menu select to “Warp” and “Squeeze” option. In the Squeeze settings, just click on Horizontal and change the bend to “23”.
Step # 8 – Duplicate the fill
Duplicate the fill by pressing the “Duplicate Selected Item” on the bottom of the appearance panel. Bring this duplicated fill all the way to the top. As you take it to the top it hides every other fill underneath it.
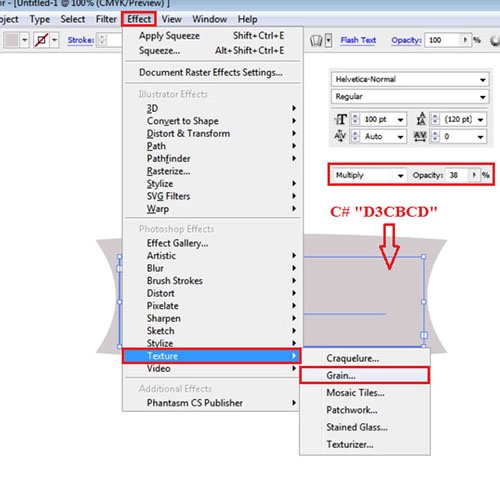
Step # 9 – Add the “Grain” effect
First change the color of this fill to gray then with the value C# “D3CBCD” then add the “Grain” effect to this fill. Do this by going to the Effect menu > Texture > Grain.
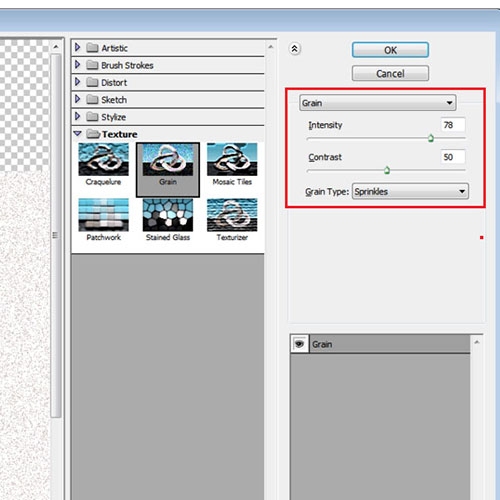
Step # 10 – Adjust the “Grain” settings
In the settings that now appear, change the “Intensity” to “78”, “Contrast” to “50” and the grain type to “Sprinkles”. Change the opacity to “Multiply” and reduce it to “38%”.
Step # 11 – Create a last fill
To create the last fill, copy the one you were working on. Let this fill stay at the top. Delete the “Grain” effect and you can change the color of the fill if you wish.

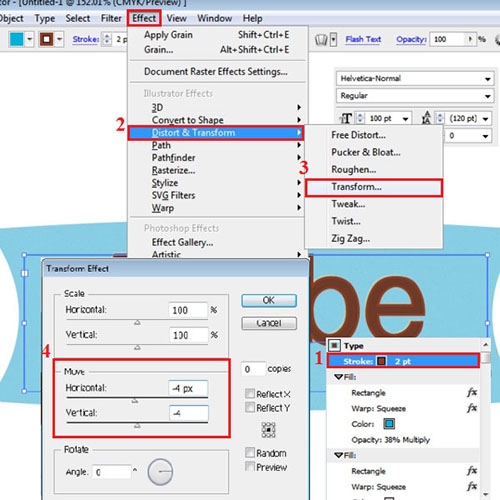
Step # 12 – Create a new stroke
Lastly, create a stroke for the retro text in Illustrator. At the top in the Appearance panel, Stroke shows that no color is filled for Stroke. Add the same brownish color to it as you did in the first fill and increase its weight to 2 from the Stroke panel. Apply the Transform effect by going to the Effect menu > Distort and Transform> Transform. From its settings panel, make the Horizontal and Vertical move as “-4px”.