Adobe Illustrator is a useful software when it comes to making different images and drawings with various effects. For creating good effects on Illustrator that are pleasing to the eye an important knowledge is your way around gradients and fills.
Create different illustrations and experiment on them with different gradient fills. One such illustration is creating a vector sphere. To understand how to create different shapes in Illustrator follow the steps given below.
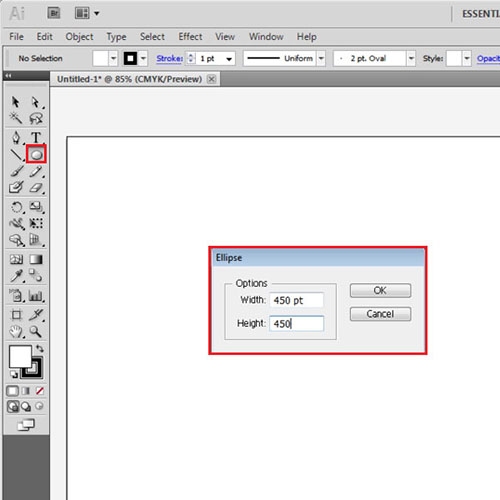
Step # 1 – Make a circle
To create a vector sphere in Adobe Illustrator, start by creating an outer circle.
For this choose the ellipse tool, click anywhere on the screen and in the options that emerge enter the values as 450 x 450.
Step # 2 – Create ellipses
To divide it into eight slices create eight ellipses. Keep the dimensions of the first one as “270 x 56”. Copy and paste it, placing one at the top portion inside the sphere and the copy at the bottom. Repeat the procedure by creating three more spheres with the dimensions “370 x 77”, “420 x 87” and “444 x 92” respectively.

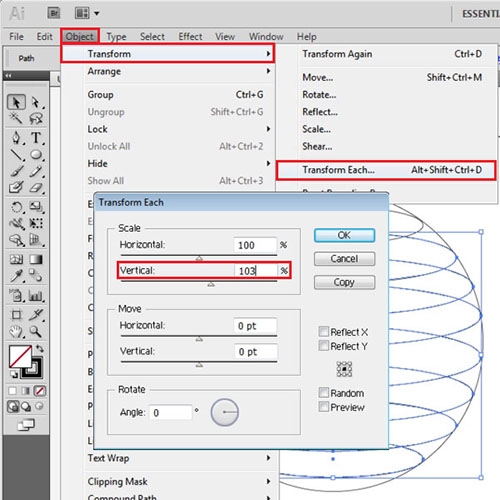
Step # 3 – Apply the “Transform each” option
Now, apart from the first ellipse select all the rest, go to “Object > Transform > Transform Each”. Change the vertical setting to “103 %”.
De-select the second one and repeat the process for the rest of the ellipses. Keep repeating this process until you reach the last shape in Illustrator.
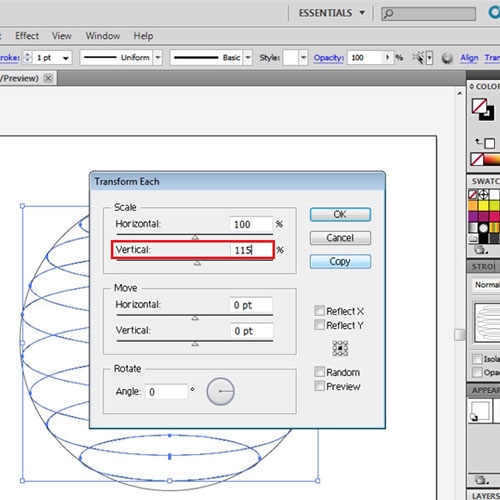
Step # 4 – Copy the ellipses
Then, select all of the spheres, go back to the “Transform Each” option, change the vertical setting to “115 %” and press the “Copy” button.
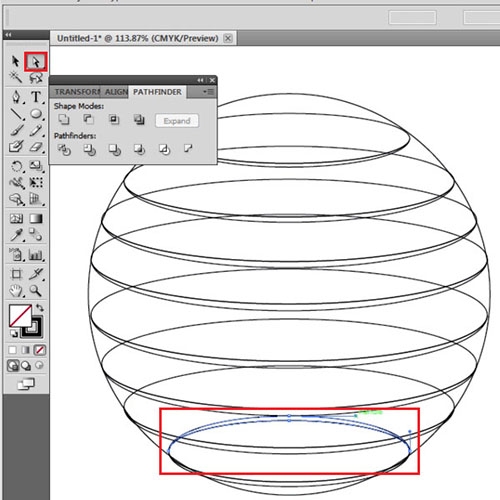
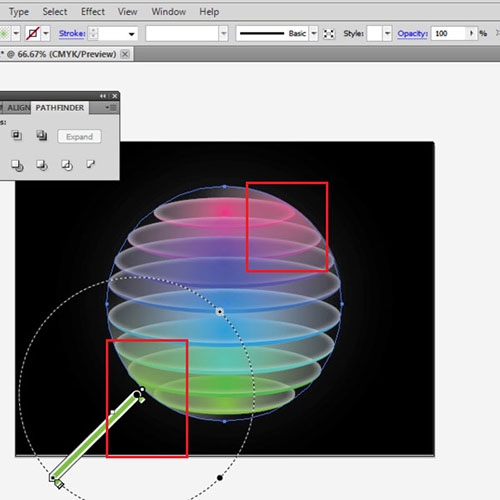
Step # 5 – Divide the ellipse pairs
Next, select the top pair of ellipses, open the Pathfinder panel and press the “Divide” option. Follow the same action for the rest of the pairs.

Step # 6 – Create disks
Use the “Direct Selection Tool” to click on the top portions of each pair and then pressing the “Delete” button. The ellipses should now look like disks.
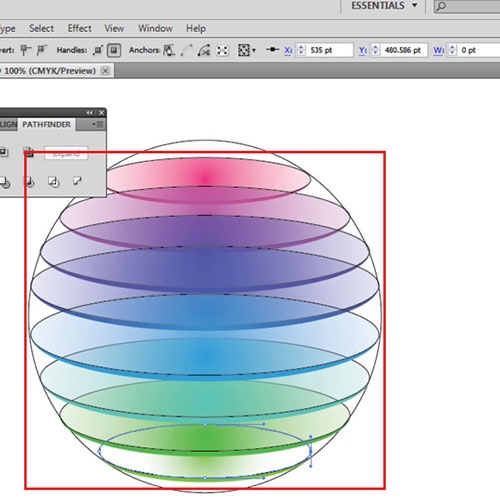
Step # 7 – Add fills to the disks
Fill in the thicknesses of the disks with the colors of your choice. Add translucent radial gradients to the main portion of the disks. Keep the gradient of the same color as the thickness of that specific disk.
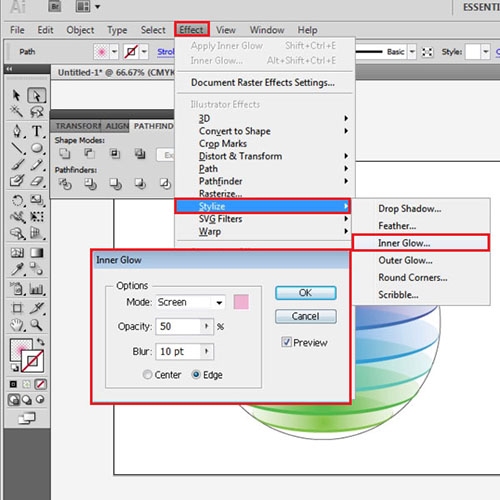
Step # 8 – Add the “Inner Glow” effect
Add the Inner Glow effect to these by going to the “Effect” menu, selecting “Stylize” in the drop down menu and pressing the “Inner Glow” option. Adjust the settings as shown and keep adding the effect on each disk one by one. Make sure that the “Inner Glow” color effect of each disk should be according to the one inside the disk.
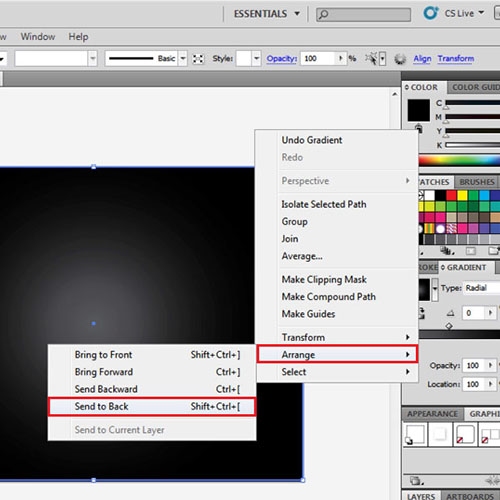
Step # 9 – Make the Background
For the Background, make a rectangle the size of your canvas and add a radial grey to black gradient in it. Send this at the back by right clicking, going to “Arrange” and pressing the “Send to Back” option.
Step # 10 – Copy the circle
Remove color from the sphere, and add a white radial gradient to it. Then to a copy of the sphere add a radial gradient to it corresponding to the color of the first disk and adjust it as shown. Copy and paste this sphere and change the gradient color to that of the last disk. Modify the gradient settings as shown to give a glow effect.
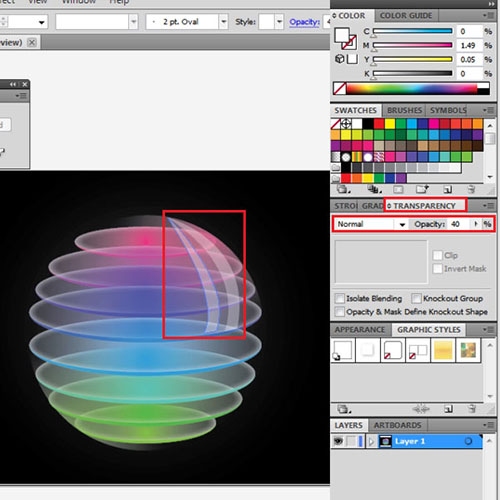
Step # 11 – Add highlights
Lastly, add highlights by drawing curved shapes from the pen tool, adding a white fill and reducing their opacity.