Adobe Illustrator gives many options for creating different logos and artworks. It provides an option to create a Vector RSS icon through a series of simple steps. Most logos are easy to make and can be perfected with practice in this software. To understand how to create such an RSS Icon in Adobe Illustrator follow the tutorial given below.
Step # 1 – Make a rounded rectangle
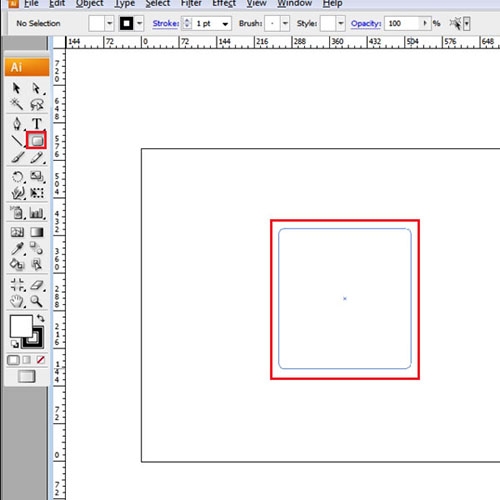
Begin creating the RSS icon by drawing a rounded rectangle. Select it from the “Selection tool” from the options panel on the left.
Step # 2 – Copy the rectangle
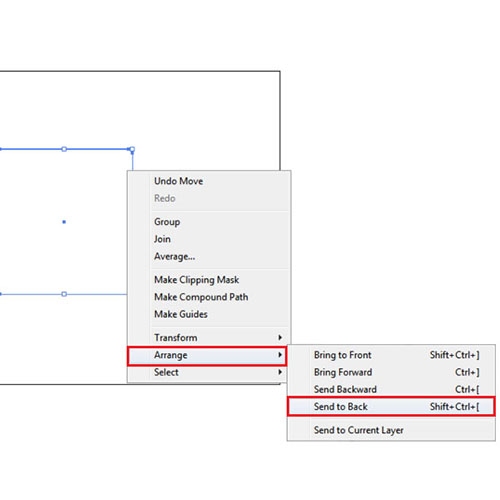
Copy and paste it by pressing “Ctrl + C” and then “Ctrl + V”. Over here strokes are added so that outlines of both rectangles are visible. Keep pressing the “Shift” key, and increase the size of the copy slightly. Move the copy to the back by right-clicking on it, going to “Arrange” and choosing the “Send to Back” option.
Step # 3 – Add gradient
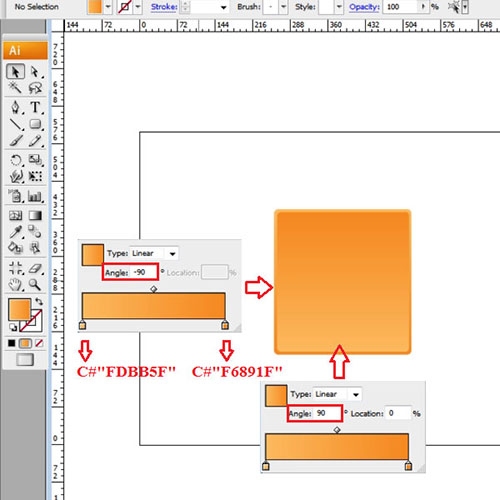
Now, add gradient to the shape in the front with the color value of the gradient slider on the right as, C#”F6891F” and the one on the left as, C#”FDBB5F”. Keep the angle at “90”. Add the same gradient to the shape in the background, but keep its angle at “-90”. Remove strokes from both of these shapes. Notice how the gradients are running in opposite directions, this is because of the different angles specified.
Step # 4 – Make a circle
Next, draw a circle separately in the workspace. Select no fill for this shape, and increase its stroke weight to “16pt” from the panel on the right. Zoom in to the circle to get a better view.
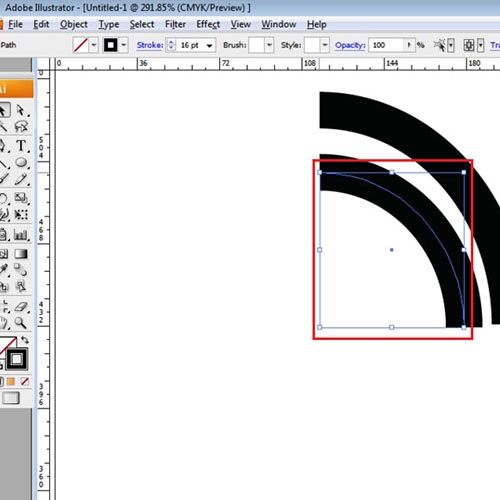
Select the “Direct Selection Tool”, a shortcut for this is by pressing “A” on your keyboard. As you can see, there are four anchor points present in the circle. Select the one on the left and the bottom one separately, press delete to remove them.

Step # 5 – Copy the shape
Copy the portion of the circle left, by selecting it from the “Selection tool” and pressing “Ctrl + C”. Paste the image by pushing “Ctrl + V” on your keyboard. A shortcut to select the “Selection Tool” directly is by pressing “V”.
Reduce the size of the copy. Do this by pressing the “Shift” key and reducing its size. For better alignment, use guides.
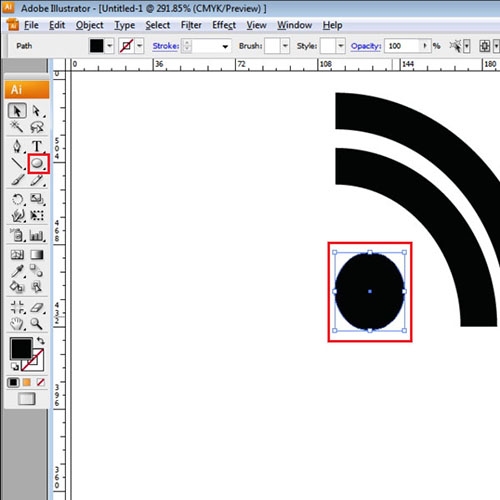
Step # 6 – Make another circle
Next, make a circle to further the design of your Vector RSS Icon. For this shape remove the stroke and add a black fill. Align the circle with the above shapes.
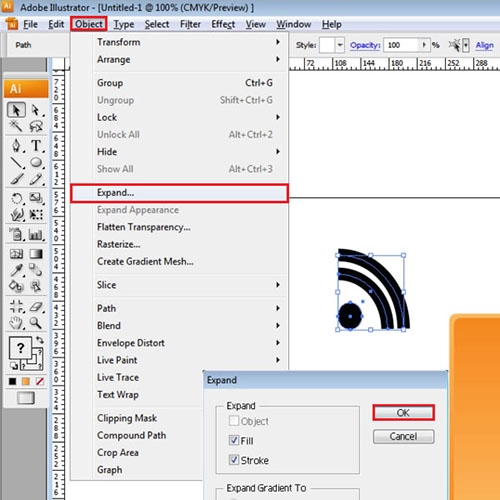
Step # 7 – Turn strokes into illustrations
Select all three illustrations and expand them by going to Object > Expand. This turns the strokes into images. Keep selecting it and group them by right-clicking and choosing the “Group” option.
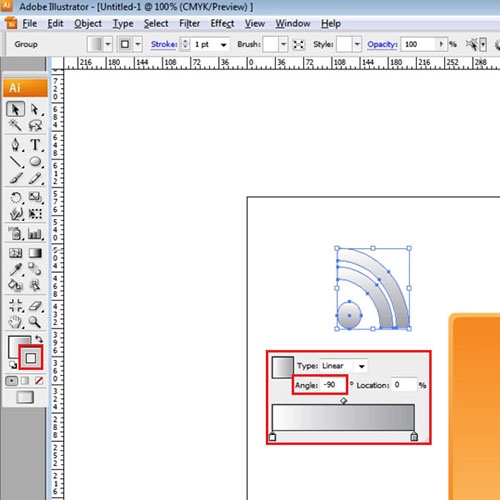
Step # 8 – Add Gradient to these shapes
Now, add a white-gray gradient to the combined image while keeping its angle at “-90”. Add a light gray stroke to it with a “2pt” weight. Drag it on top of the rectangles and increase its size as per your requirement.
Step # 9 – Intersect shapes
Copy and paste the original rectangle and change its inside-fill to white. Use the shape tool again to create an ellipse, bring it on top of the copied rectangle as shown. Select both of these two shapes and “Intersect” and “Expand” them, through the Pathfinder panel. If your pathfinder panel is not open, you can view it by going to Window > Pathfinder. Reduce the opacity of the intersected shape from the “Transparency” panel on the right.
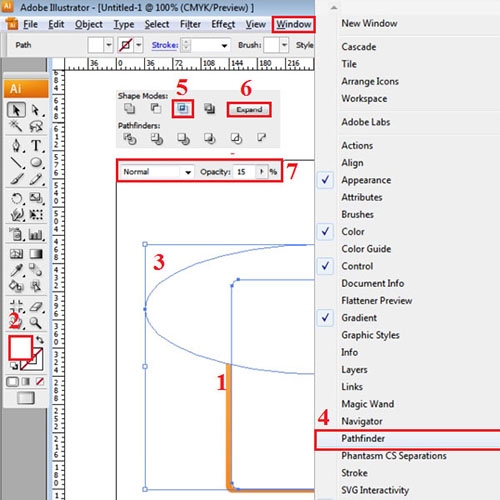
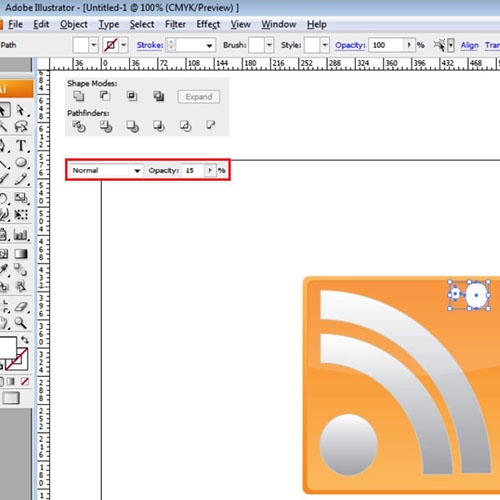
Step # 10 – Add highlights
You can add highlights to the image, by making white circles and reducing their opacity the same way as you did of the intersected shape.