Photoshop is a known application that can create various kinds of effects on images. By applying few filters and designing techniques, you can easily manipulate a simple image into a CCTV camera snap. It’s not even as difficult as it sounds indeed.
Follow this step by step guide to learn how to create a security camera effect in Photoshop.
Step # 1 – Opening an Image
In the first step, launch Adobe Photoshop and open an image on which you want to create a security camera effect. Here we are using an image of a conference room. You can choose any image of your choice however some settings may vary for different images.
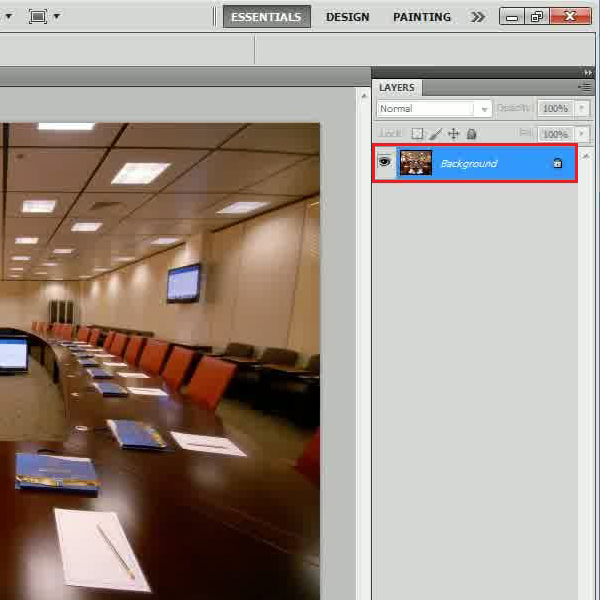
Step # 2 – Applying a Gradient Map
Now click on the “Adjustment Layer” icon and select the “Gradient Map” option from the menu. Choose a “Black to White” gradient from the menu and close this panel.
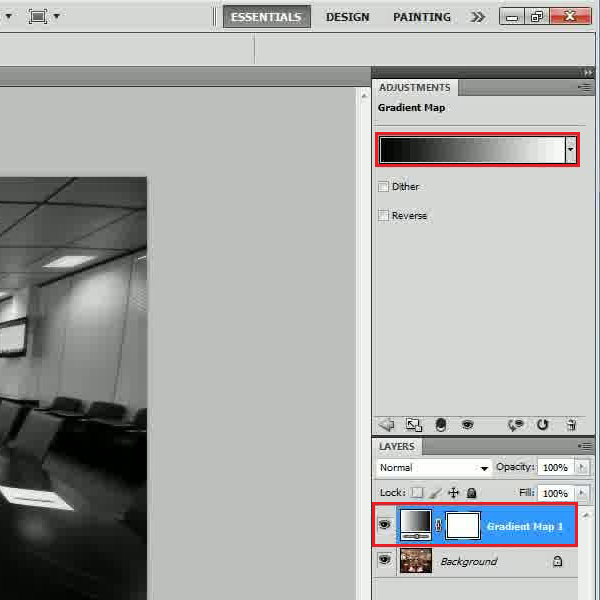
Step # 3 – Applying a Clouds Filter
In the next step, insert a new layer and change its name to “Noise”. Now fill this layer with “White” color. Here you have to apply a series of filters in this layer so let’s start with the Clouds Filter. For this purpose, go to the “Filter” menu, select “Render” and click on the “Clouds” filter.
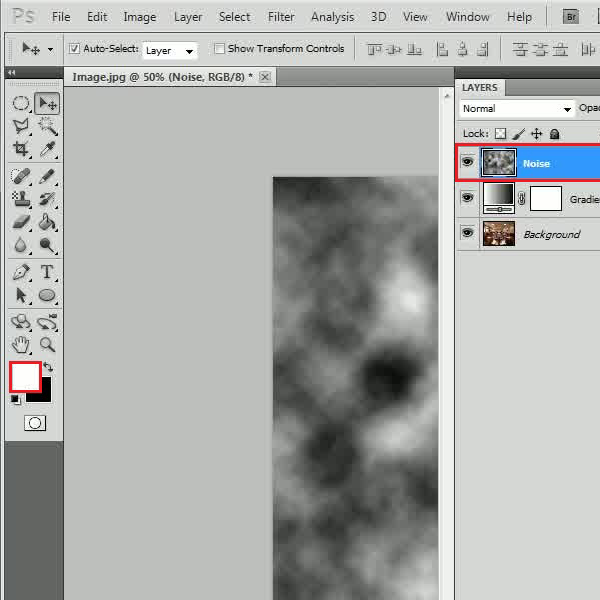
Step # 4 – Applying a Mezzotint Filter
Now again go to the “Filter” menu, select “Pixelate” and click on the “Mezzotint” filter from the list. In the filter settings panel, choose the “Fine Dots” option from the drop down list and click on the “OK” button to apply it on the image.
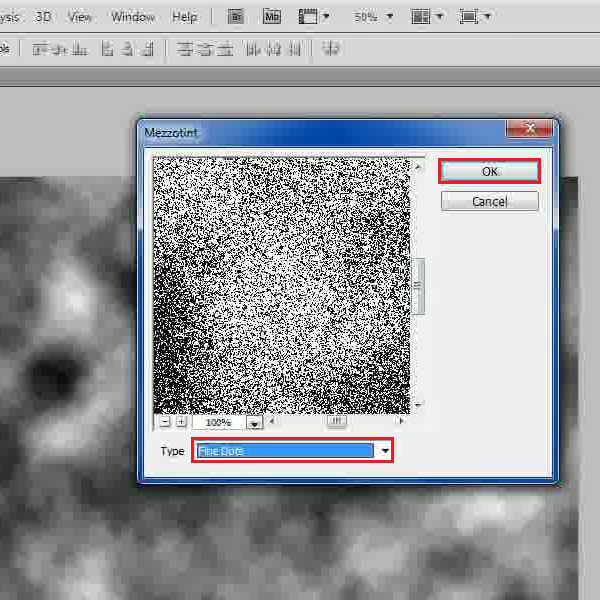
Step # 5 – Applying a Gaussian Blur
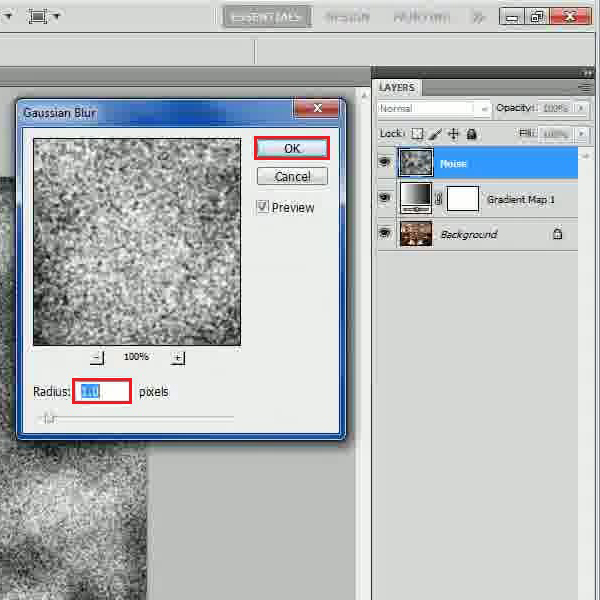
In the next step, go to the “Filter” menu, select “Blur” and click on the “Gaussian Blur” filter from the list. Set the “Radius” to “1.0 pixels” and click on the “OK” button to apply it on the image.
Step # 6 – Applying an Unsharp Mask
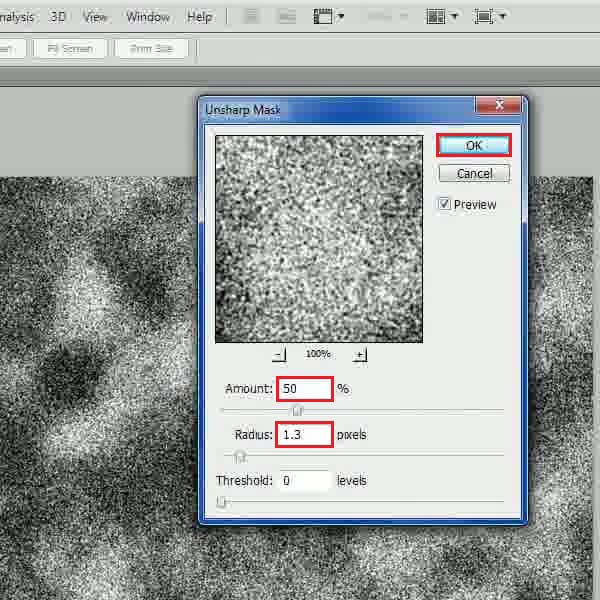
Once done, go back to the “Filter” menu, Select “Sharpen” and click on the “Unsharp Mask” filter from the list. Choose its “Amount” to “50 percent” and “Radius” to “1.3 pixels”. After changing these settings, click on the “OK” button to apply it on the image.
Step # 7 – Changing the Blending Mode and Opacity
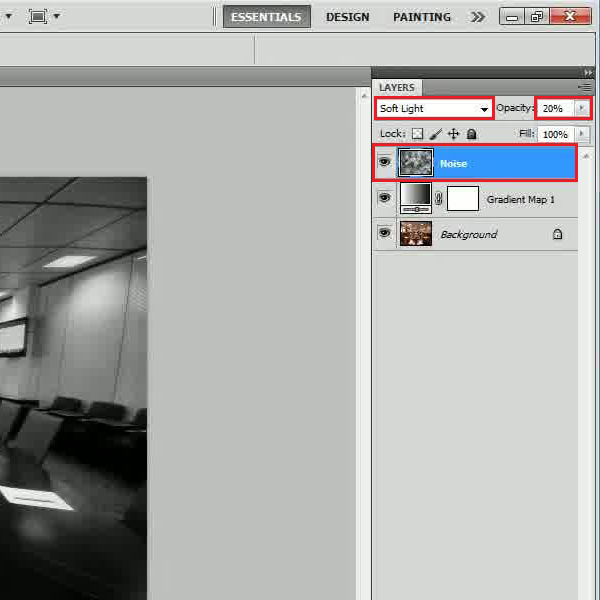
Now change the “Blending Mode” of this layer to “Soft Light” and decrease the “Opacity” to “20 percent”.
Step # 8 – Opening up a New Document
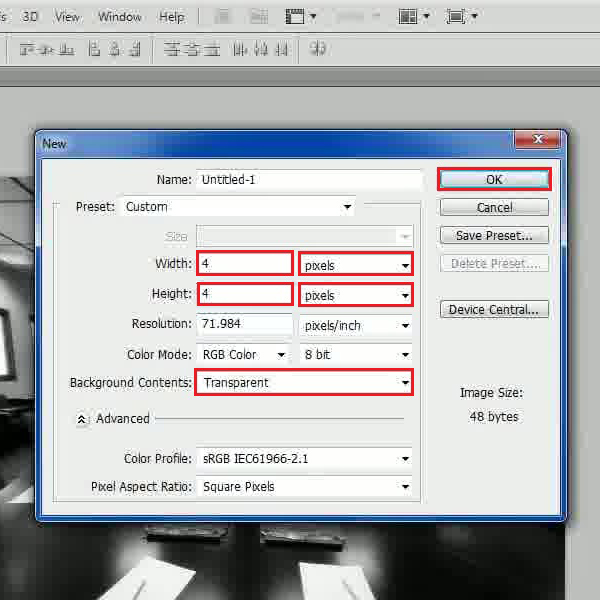
Here we have to apply special pattern of lines over the image. For creating this pattern, go to the “File” menu and open a new transparent document of “4 x 4 pixels”.
Step # 9 – Creating a Scan Lines Pattern
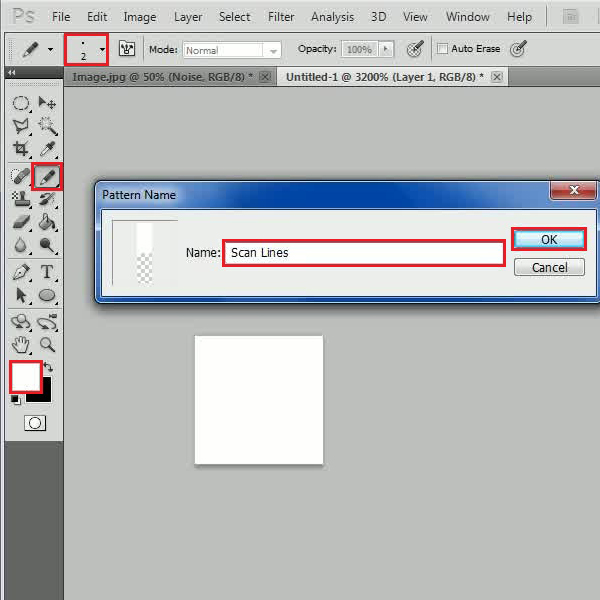
Select the “Pencil” tool from the menu, set its diameter to “2 pixels”, color to “White” and draw a line over the upper portion of the page. Now go to the “Edit” menu and click on the “Define Pattern” option. Enter its name as “Scan Lines” and click on the “OK” button to save this pattern. Now close this document and go back to the main working file.
Step # 10 – Using the Paint Stamp Tool
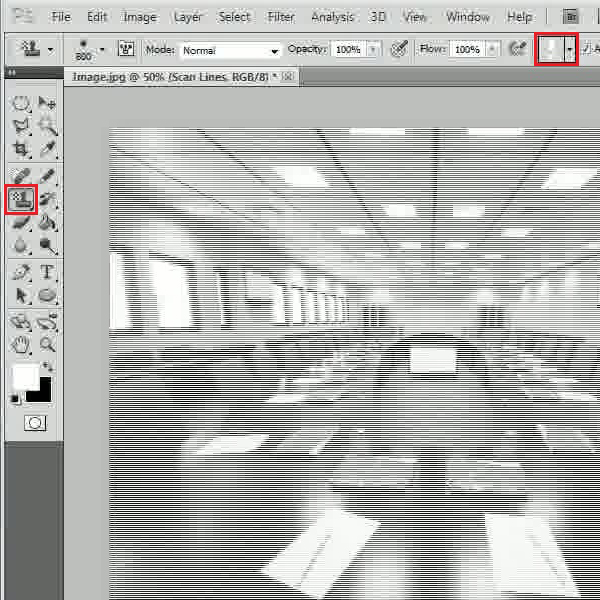
Add a new layer by entering its name as “Scan Lines” and select the “Pattern Stamp” tool from the menu. Now choose the newly created “Scan Line” pattern from the menu and apply it on the image.
Step # 11 – Changing the Blending Mode
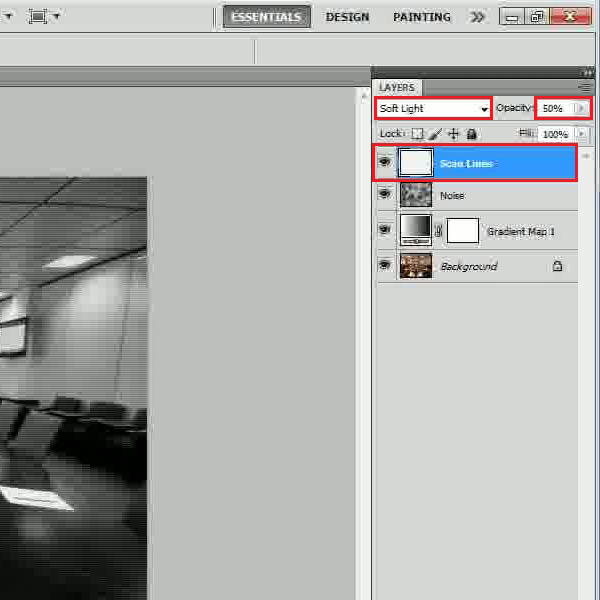
In the next step, change the “Blending Mode” of this layer to “Soft Light” and decrease the “Opacity” to “50 percent”.
Step # 12 – Inserting a Hue/Saturation Adjustment layer
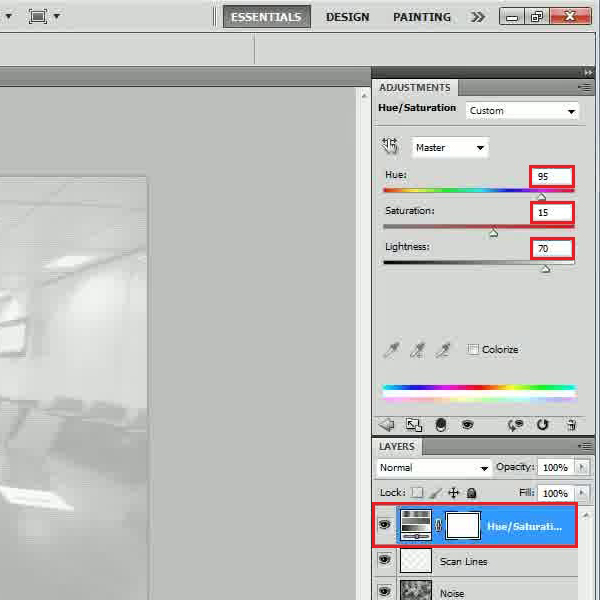
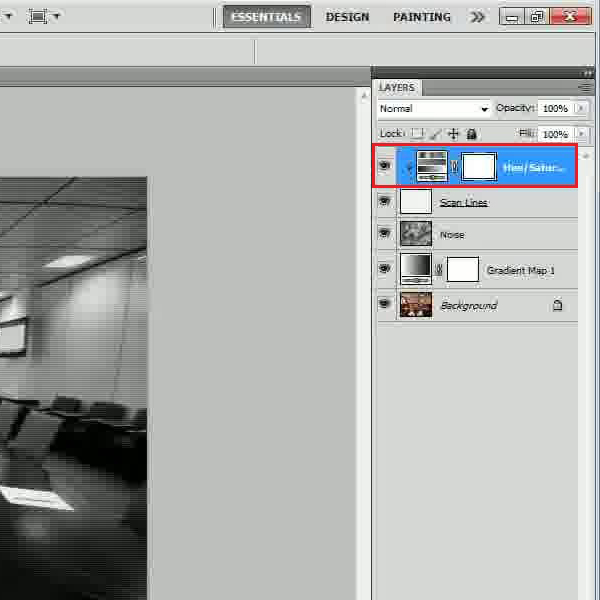
Now click on the “Adjustment Layer” icon and select the “Hue/Saturation” option from the menu. In the settings panel, set the “Hue” level to “95”, “Saturation” to “15” and “Lightness” to “70”.
Step # 13 – Using the Clipping Option
Once you have changed the “Hue/Saturation” settings, close this panel and clip this layer to the “Scan Lines” layer.
Step # 14 – Inserting some Text
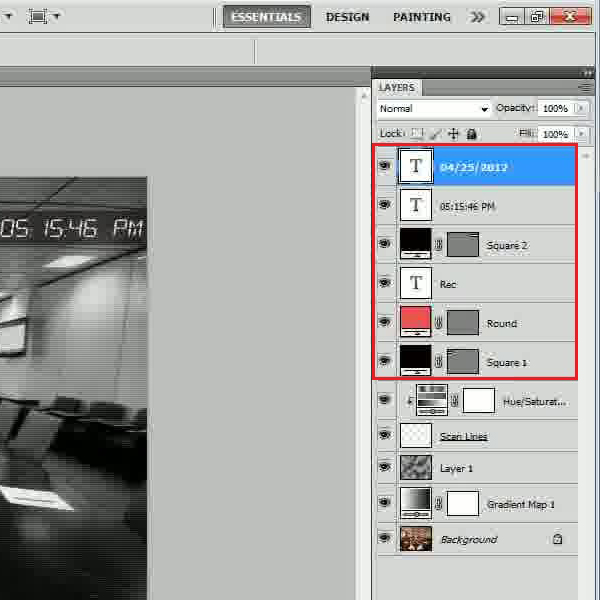
Till now the effect is almost completed. You just need to add some random items of the recording screen like the recording icon, date/time text etc. Once done, the image is ready.
 Home
Home