High key in Photoshop is an easy to create effect and it can look great for portrait photography which you want to give an interesting twist.
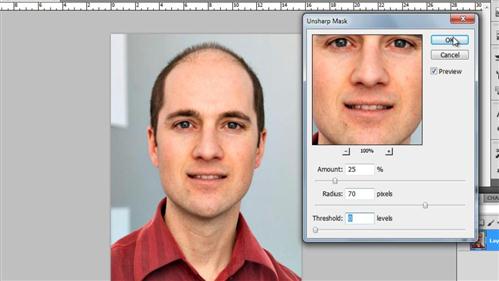
Step # 1 – Applying an Unsharp Mask
Start Photoshop and make sure that you have open the portrait photograph that you want to use. Right click on the “Background” layer in the layers panel and click “Layer From Background”. Click “OK” in the dialog box that appears. We are going to want to add an unsharp mask so click “Filter” navigate to “Sharpen” then click “Unsharp Mask”. Set the “Amount” to 25, the radius to 70 and drop the “Threshold” to 0. Click “OK”.

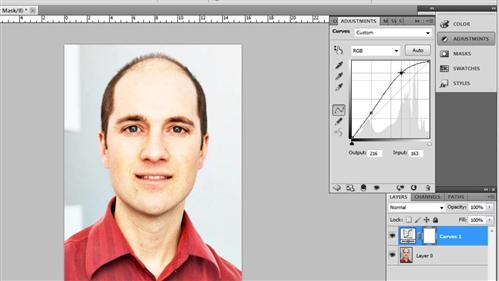
Step # 2 – Applying a Curves Adjustment
Now, click “Layer” navigate to “New Adjustment Layer” and click “Curves.” Click “OK” in the dialog box that appears. On the right the curves graph will appear and you will need to place a point on the first vertical line, just above the first horizontal quarter marker. A second point goes in the center of the third square along in the top row. In the layers panel click in the dropdown box that currently reads “Normal” and select “Luminosity”.

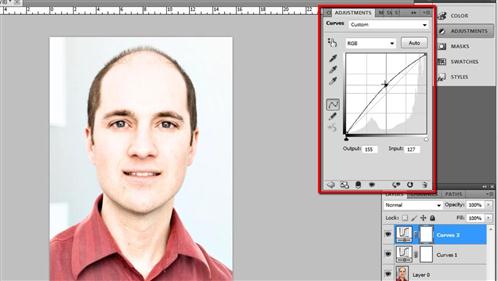
Step # 3 – Adding a Second Curves Layer
Click “Layer”, “New Adjustment Layer” then “Curves” and click “OK” to create another curves layer. Place one point right in the center of the graph and move it upwards until you achieve your desired level of brightness, here a movement to halfway up the next square works well.

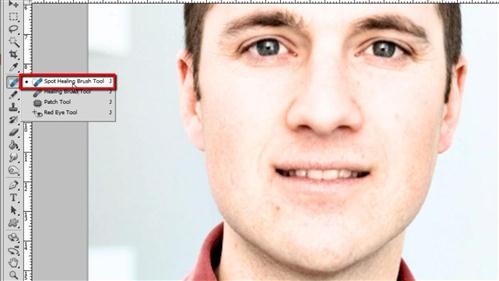
Step # 4 – Removing Blemishes
When we change the style of the image in this way blemishes on the skin tend to become more pronounced and it is important to remove these. Zoom in on the image and from the toolbar select the “Spot Healing Brush Tool”. Right click anywhere on the image and select a brush size that it small enough to just cover the imperfections – the size will depend on the resolution of your image, here 12 pixels works well. Now, select the original layer of the image and click on any blemishes with the healing brush – they should cover over nicely and that is how to do high key in Photoshop.

 Home
Home