In this final part of the tutorial, you will learn to add effects on menus, titles and shapes in a web page. We will also show few methods to create beautiful effects using blending modes and shadows techniques. This will overall teach you how to design and set up a nice and simple web blog.
Follow this step by step guide to learn how to add effects in a blog layout in Photoshop.
Step # 1 – Change the Copyright text Color
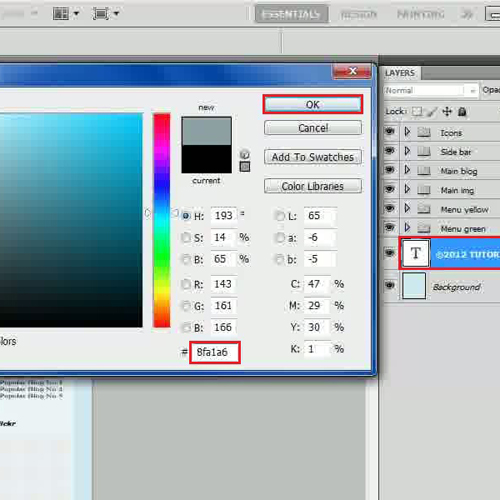
In the first step, launch Adobe Photoshop and load the blog layout which we created in the previous part. Now select the copyright text layer and change its color to “8fa1a6”.
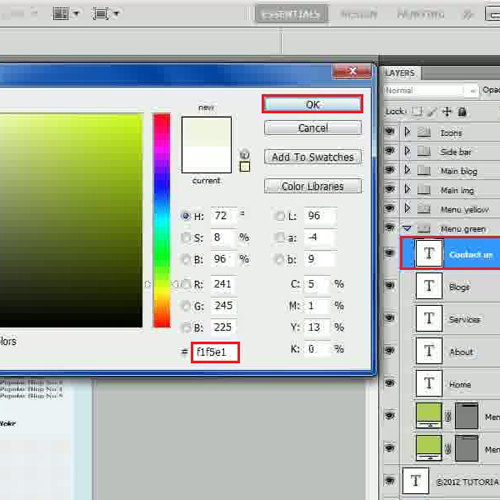
Similarly, follow the same method to on the “Menu green” group. Click on it to expand. Select the “Contact us” text layer and change its color to “f1f5e1”. Apply the color on all other text layers in this group the same way.
Step # 2 – Adjust the Gradient Overlay Settings
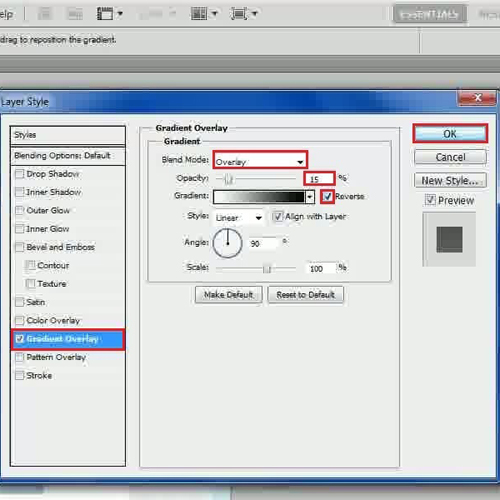
Now open the blending options of the “Menu half” layer, move over to the “Gradient Overlay” tab and change its blending mode to “Overlay”. Set the opacity to “15 percent”, select the “Reverse” option and click on the “OK” button to apply it.
Step # 3 – Adjust the “Menu full” layer settings
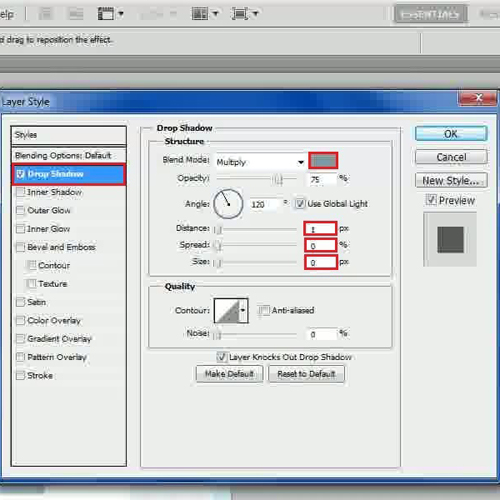
In the next step, open the blending options of the “Menu full” layer, move over to the “Drop Shadow” tab and choose its color as “adcf4f”. Now set the distance to “2 px”, spread to “0 percent” and size to “0 px”.
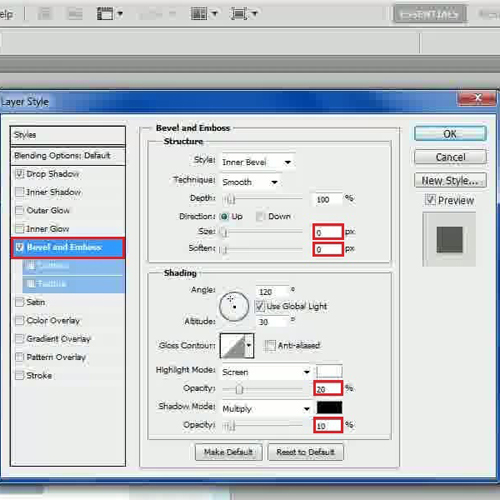
Now move over to the “Bevel and Emboss” tab and set the “Size” to “0 px” and soften to “0 px”. Once done, set the highlight mode’s opacity to “20 percent” and shadow mode’s opacity to “10 percent”.
In the same way, move over to the “Gradient Overlay” tab and adjust its settings. In this tab, set the opacity to “15 percent”, select the “Reverse” option and click on the “OK” button to apply these settings.
Step # 4 – Change the Color of the Search Box Text
Once done, move over the “Search here” text layer and change its color to “95916e” by choosing it from the color menu.
Similarly, change the color of the “Nature” text layer to “735f16”. Once done, apply this color to rest of the text labels in this group as well.

Step # 5 – Change the Stroke Settings
Now open the blending options of the “Search bar”, move over to the “Stroke” tab and set its “Size” to “1 px”. Choose its color as “c6ba92” and click on the “OK” button to apply it.
Step # 6 – Adjust the Settings of “Main menu” Shape Layer
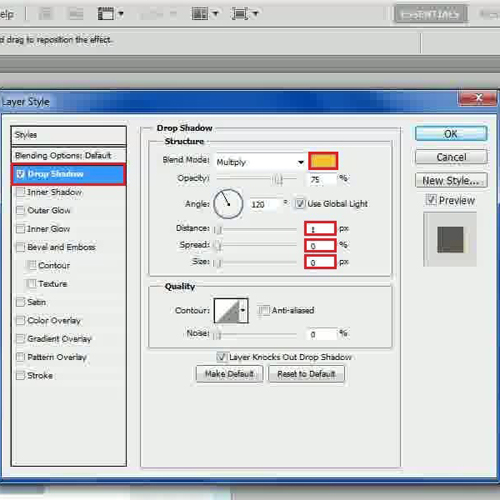
Once done, open the blending options of the “Main menu” shape layer, move over to the “Drop Shadow” tab and choose its color as “f3c125”. Set its distance to “1 px”, spread to “0 percent” and size to “0 px”.
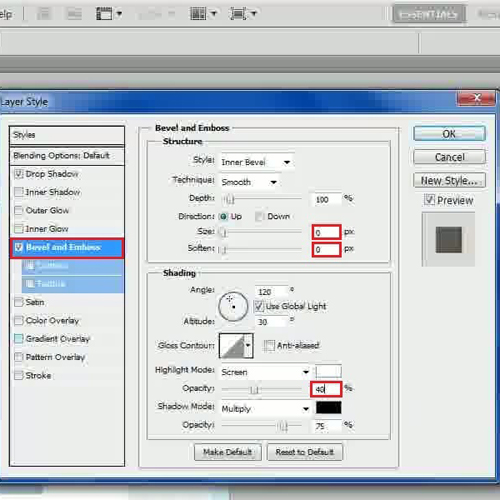
Further on, move over to the “Bevel and Emboss” tab, set the size and soften to “0 px” and highlight mode’s opacity to “40 percent”.
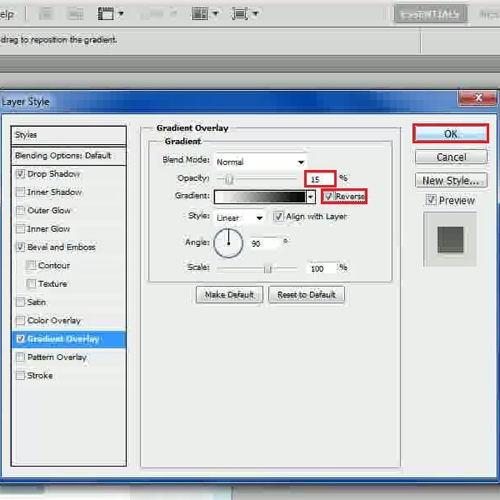
Step # 7 – Adjust the Gradient Overlay Settings
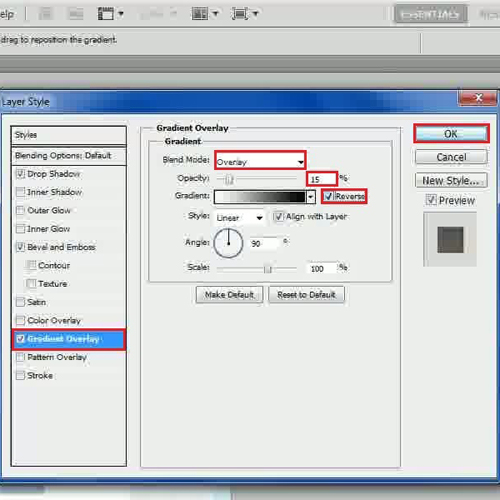
Now move over to the “Gradient Overlay” tab. In this tab, change the blending mode to “Overlay”, set its opacity to “15 percent”, select the “Reverse” option and click on the “OK” button to continue.
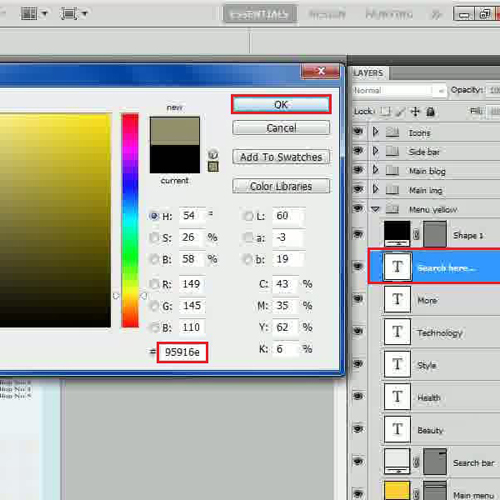
Step # 8 – Change the Color of Main Blog’s Text
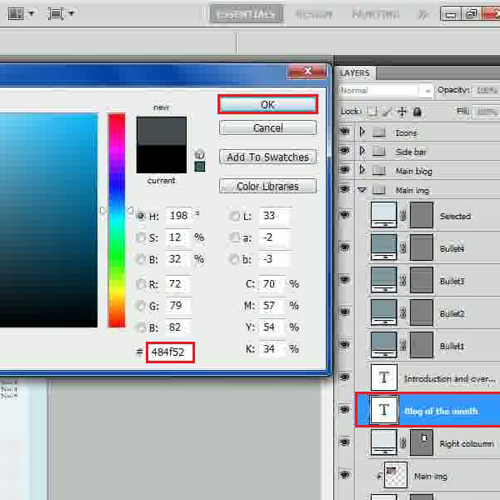
Once done, move over to the “Main img” tab, select the text layer and change its color to “484f52”. Apply it on the remaining text layers of this group.
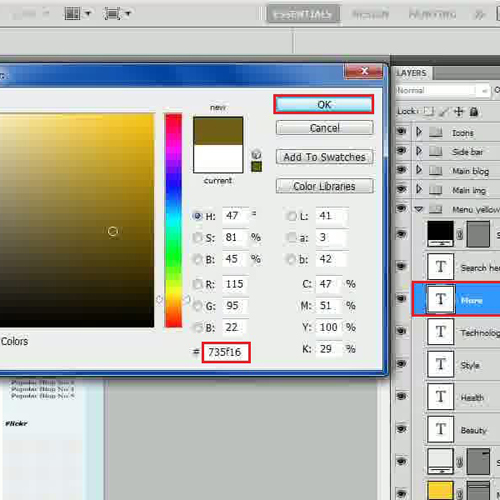
Step # 9 – Adjust the Gradient Overlay Settings
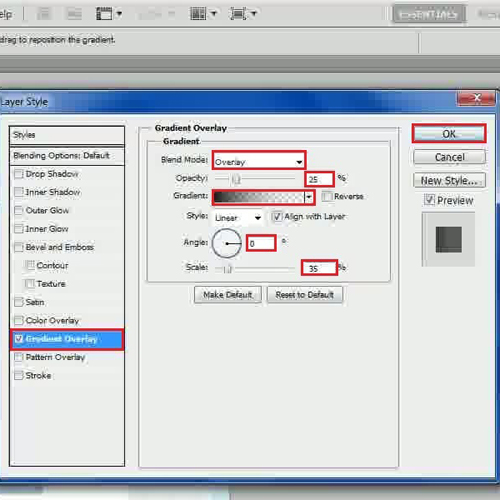
Open the blending options of the “Right column” layer, move over to the “Gradient Overlay” tab, choose its blending mode to “Overlay”, set its opacity to “25 percent” and click on the gradient color. Choose the gradient as “Black to Transparent”, close this panel, set the angle to “0 degree”, scale to “36 percent” and click on the “OK” button to apply it.
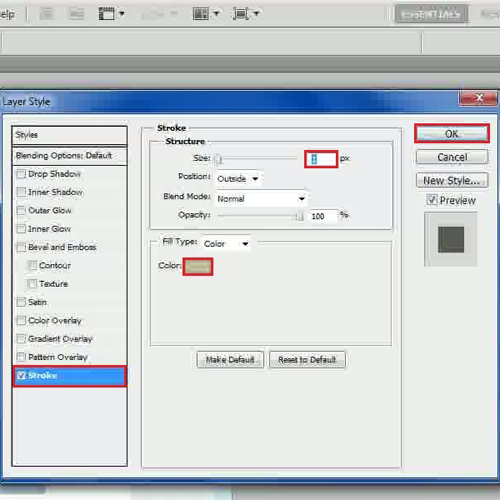
Step # 10 – Adjust the Blending Options of “Bottom part”
Now open the blending options of the “Bottom part”, move over to the “Drop Shadow” tab, choose its color as “819aa4”, set the distance to “1 px”, spread to “0 percent”, and size to “0 px”.
Next, move over to its “Gradient Overlay” tab, set the opacity to “15 percent”, select the “Reverse” option and click on the “OK” button to continue.
Once done, move over to the “Main blog” group, change the text layer color to “484f52” and apply it to all text layers in this group.
Step # 11 – Adjust the Settings of “Img” shape layer
Now open the blending options of the “Img” shape layer, move over to the “Inner Glow” tab, change its blending mode to “Normal”, increase its opacity to “100 percent”, choose the color as “e6f0f4” and set the choke to “100 percent”.
Then move over to the “Stroke” tab, set its size to “1 px”, choose the position as “Inside”, select its color as “b6c1c6” and click on the “OK” button to apply it.
Step # 12 – Adjust the Setting of the “Button” Shape Layer
Now open blending options of the “Button” shape layer, move over to the “Bevel and Emboss” tab, set its size to “1 px”, soften to “0 px”, highlight mode to “Color Dodge”, its opacity to “15 percent” and shadow mode’s opacity to “5 percent”.
Now move over to the “Gradient Overlay” tab, choose the blending mode as “Overlay” and its opacity to “10 percent”.
Next, move over to the “Stroke” tab, set the size to “1 px”, position to “Inside”, choose the color as “97b3bd” and click on the “OK” button to apply it. In a similar way, apply these settings on rest of the image holders and button shapes.
Step # 13 – Alter the “Add Space” Label
Once done, expand the “Side bar” group and now add effects to this by first changing the color of the text layer to “484f52”. Apply this on rest of the text layers as well, except the “Add Space” layer. After changing the color, decrease the opacity of both “Add Space” text layers to “25 percent” then open its blending options.
From the options that appear, move over to the “Outer Glow” tab, choose its blending mode to “Normal”, set its opacity to “100 percent”, choose its color as “e6f0f4” and set its spread to “100 percent”.
Next, go to the “Stroke” tab, set its size to “1 px”, position to “Inside”, choose its color as “b6c1c6” and click on the “OK” button to apply it. Simply copy this layer’s style and paste it on the other “Add Space” layer.
Step # 14 – Go to the blending mode of “Img” Layer
Now go to the blending mode of the “Img” shape layer, move over to the “Inner Glow” tab, choose its blending mode to “Normal” and increase its opacity to “100 percent”. Choose its color as “e6f0f4” and set the choke to “100 percent”.
Next, move over to the “Stroke” tab, set the size to “1 px”, choose its position to “Inside” and click on the “OK” button to apply it.
As the tutorial shows, the blending modes of every layer allow us to add different effects on them.
Step # 15 – Insert Thumbnail Images
Once done, copy the layer style and paste it on rest of the image place holders. Now open an image, place it right on top of the “Img1” layer, change its name to “Pic1”, create a clipping mask and adjust its size accordingly. Similarly clip all image holders with pictures in the same way and you’re done.
 Home
Home