In this tutorial, we will teach you how to add a fog effect in Photoshop.
We will be using this particular free stock image that can be downloaded from the following link:
http://sxc.hu/photo/935037
Step 1: Adding a solid color adjustment layer
Over here, we will first add a Solid Color Adjustment layer.
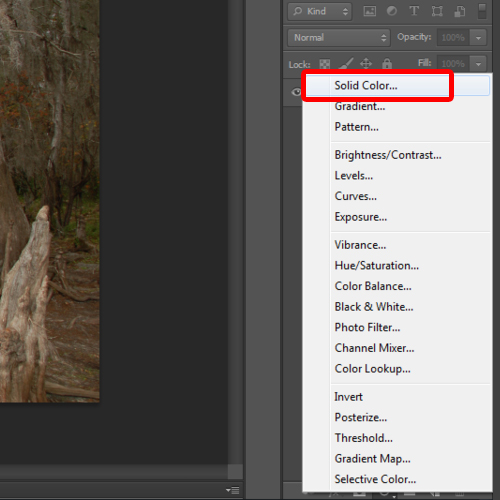
Step 2 – Configuring the solid color layer
Once the color picker window opens up, make sure you choose white color for the fill. With that done, reduce the opacity of the layer to 50%.
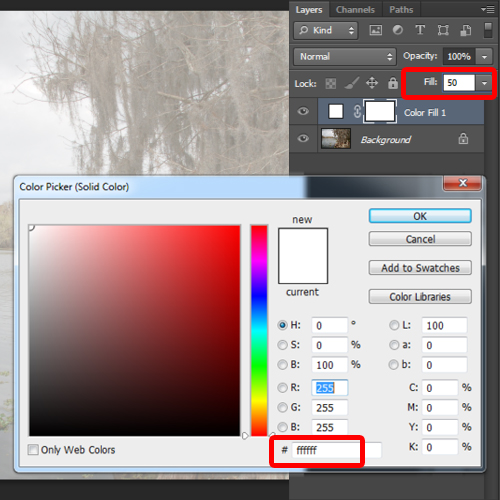
Step 3 – Adding gradient to solid color layer
Now we will select the adjustment layer and pick up the gradient tool. Make sure you have a white to black color selected for the gradient. Next, we will apply the gradient in a straight horizontal line. This way, the black color of the gradient will remove the solid color that we applied earlier.
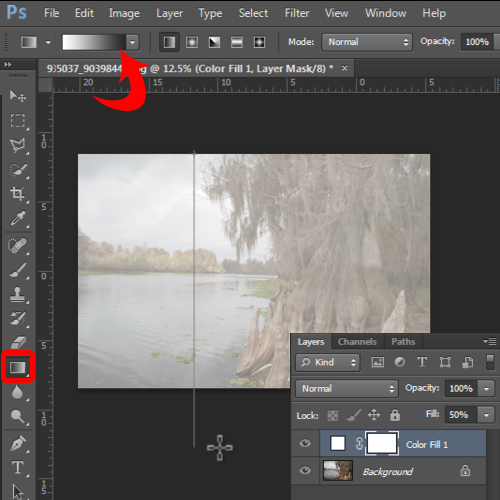
Step 4 – Using the eraser tool
Next, we will duplicate this layer and pick up the eraser tool. Over here, we have set the opacity of the eraser to 50%. With that done, we will apply the eraser over the portion of the image which is showing the tree. While making the fog effect, you have to keep in mind that the object which is close to us would be a bit more clearly visible then the scenery behind. That’s why, we are reducing the level of white color over the tree here.
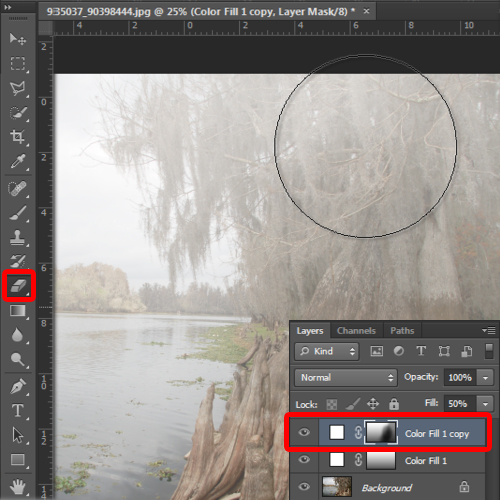
Step 5 – Adding the Levels adjustment layer
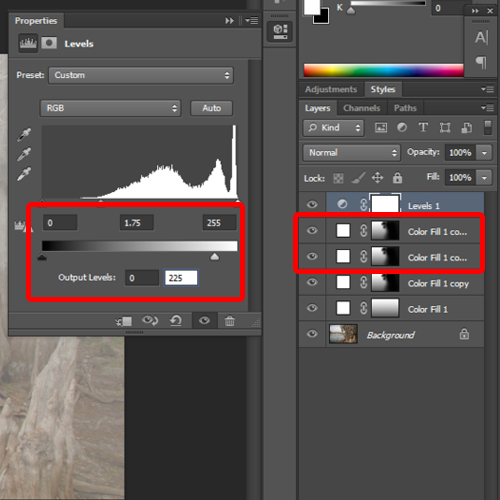
Next, we will duplicate this layer twice and add the levels adjustment layer. It must be kept in mind that the output would vary according to the image you choose. For this image however, we have kept the levels to 0, 1.75 and 255 while reducing the output levels to 0 and 225.
Step 6 – Using the clouds filter
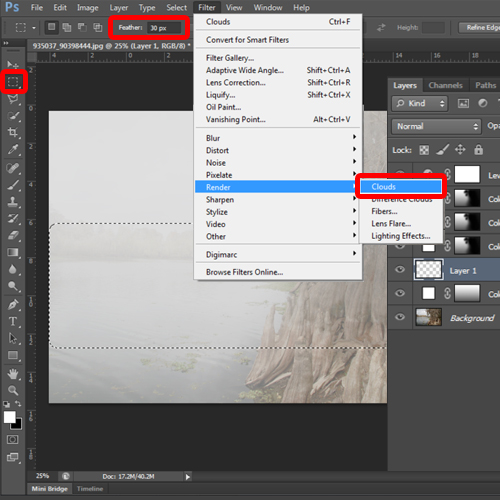
Next, we will create a new layer above the original solid color adjustment layer. With that done, we will select the rectangular marquee tool with the feather option set to 30 pixels. Next, we will make a selection, covering the entire width of the canvas. With that done, let’s move to the Filter menu, move over Render and click on the clouds option. Before applying the filter, make sure you have white selected for the foreground color and black selected for the background color.
Step 7 – Transforming the clouds layer
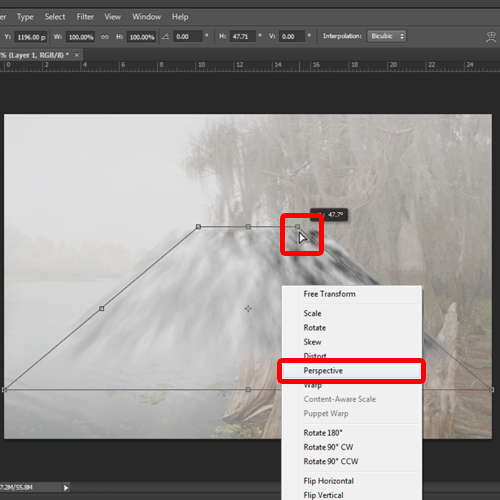
With that done, you would have something like this on your screen. Now we will press CTRL T to transform the image, right click and choose the perspective option. With that done, we will move the placeholder on top upwards to create a trapezoid shape, which would look something like this.
Step 8 – Increasing the width of the layer
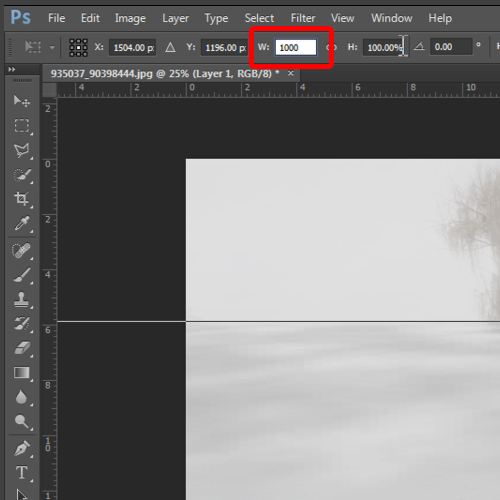
Next, we will increase the width of the layer to a 1000%, leaving the height as it is.
Step 9 – Adjusting the clouds layer on the canvas
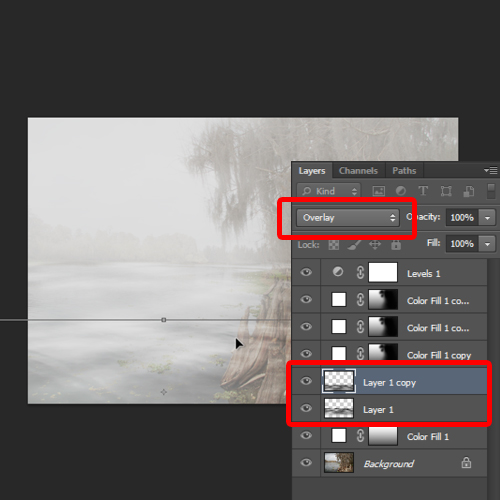
Once done, we will change the layer mode to Overlay and position the image on the water. You can duplicate the layer aswell, and position the layer accordingly to add depth to the fog effect in Photoshop.
Step 10 – Removing excess clouds from the layer
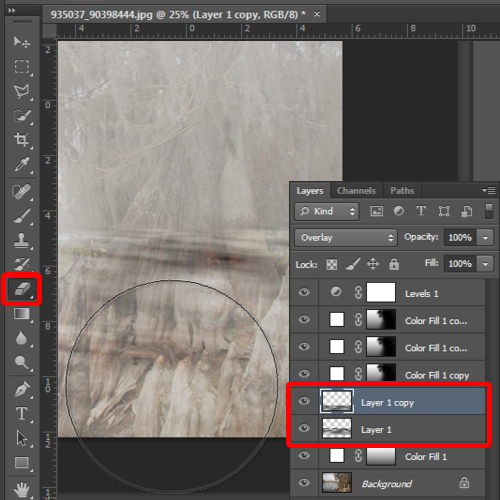
Lastly, let’s pick up the eraser tool and remove some of the fog effect from the tree here. Since the effect is on two layers, make sure you erase the clouds effect from both the layers.
Step 11 – Changing the Color Adjustment layer mode
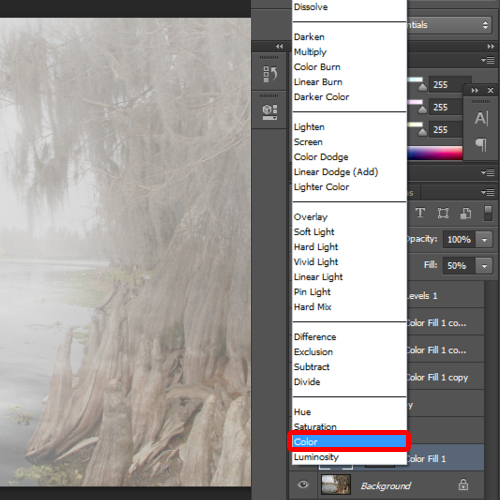
With that done, choose the original solid color layer and change the blend mode to Color.
And that’s it. The fog effect is now complete.
 Home
Home