With basic image manipulation techniques we can add 3d effects on an image. Adding shadows where necessary and using the basic layer masking tool, you can add depth and give your image a perspective. With these basic techniques you can mix and match and create a Polaroid image.
Follow this step by step tutorial and learn how to create a 3D Polaroid effect in Photoshop.
Step # 1 – Load an Image
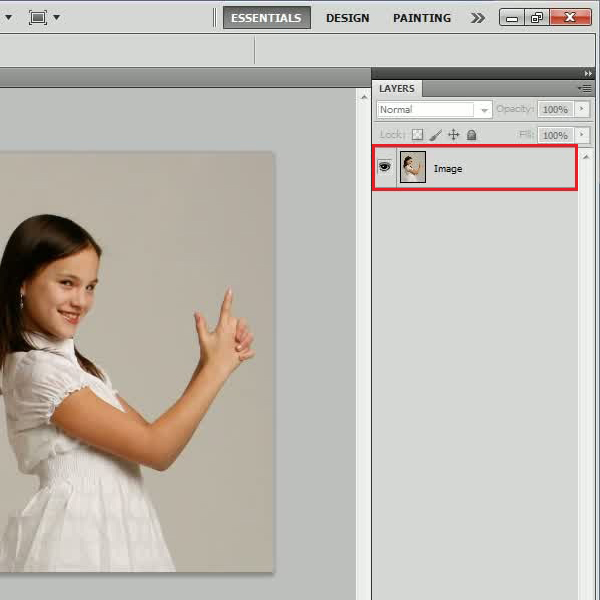
In the first step, launch Adobe Photoshop and load an image on which you want to create a 3D Polaroid effect. Choose a photo in which a part of image is extruded a bit.
Step # 2 – Create a Series of layers
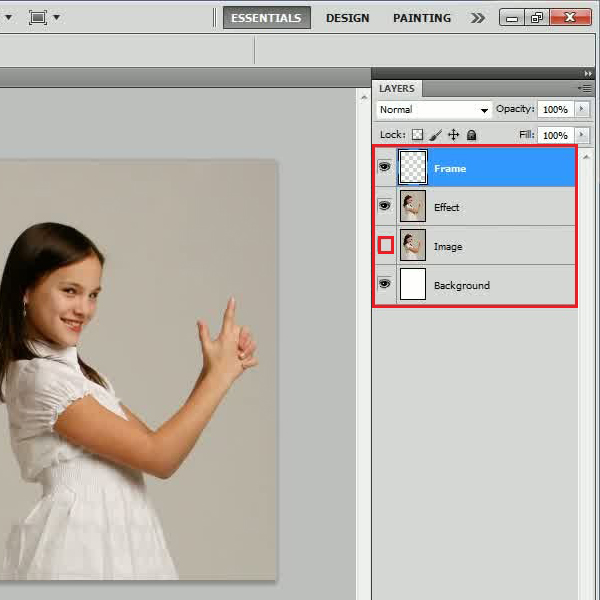
Now duplicate the original layer and change the name of this layer to “Effect”. Hide the original layer, add a new layer and change its name as “Background”. Once done, fill this layer with the “White” color and move it below all other layers. Now insert another transparent layer, change its name to “Frame” and move it on top of all other layers.
Step # 3 – Draw a Rectangular Frame
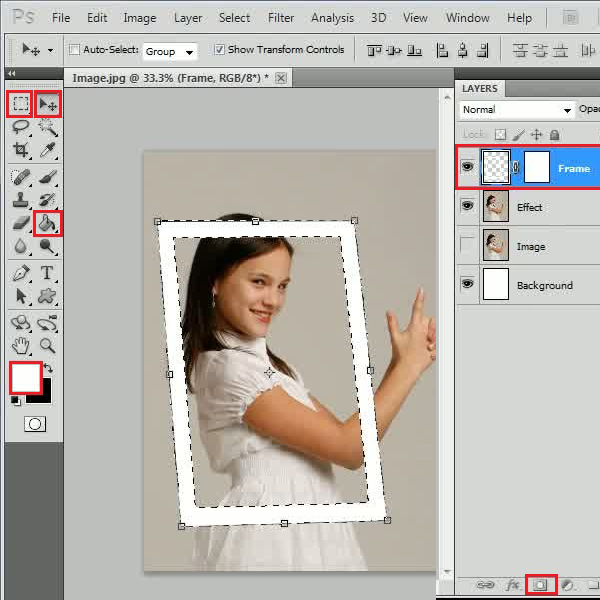
Select the “Frame” layer and click on the “Add a layer mask” icon to add a mask over this layer. Now draw a rectangular shape by using the “Rectangular Marquee” tool from the menu and fill it with the “White” color. Once done, go to the “Select” menu, move over to “Modify” and click on the “Contract” option from the list. Contract the selection by 50 pixels and click on the “OK” button to apply the changes. Now Press the “Del” button on the keyboard to remove the selection. Again select the layer and adjust it by holding down the “Ctrl” key on the keyboard and transforming it according to the image.
Step # 4 – Apply the Brush Tool
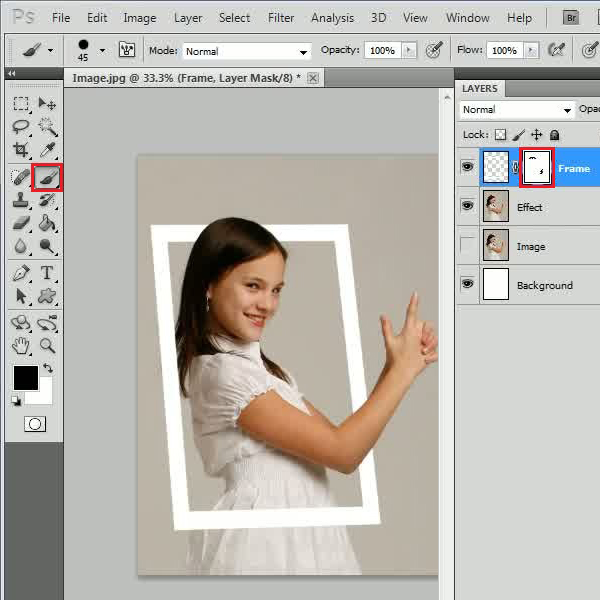
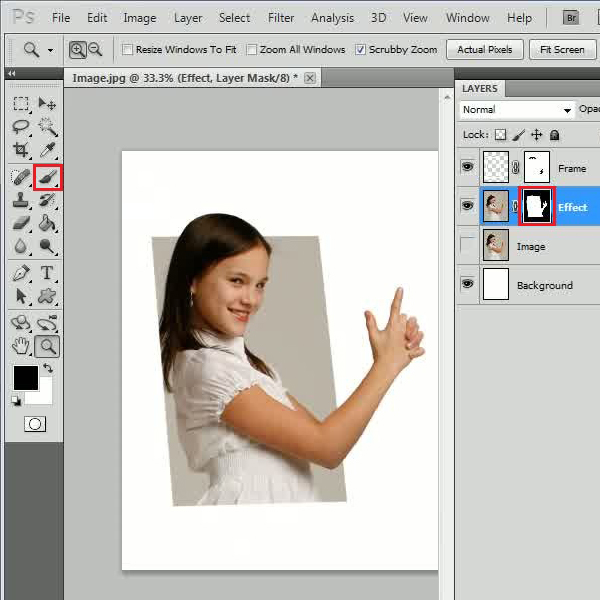
Once the frame is placed properly, click on the “Layer Mask”, select the “Brush” tool, adjust its size and paint over the part of the object which is overlapping with the frame layer. Use the “Black” color for the fill.
Step # 5 – Create a Layer Mask
Similarly add a layer mask to the “Effect” layer. Now select the “Brush” tool from the menu and paint over the rest of the image using the “Black” color. Make sure not to color over the object appearing outside the frame.
Step # 6 – Adjust the Drop Shadow Settings
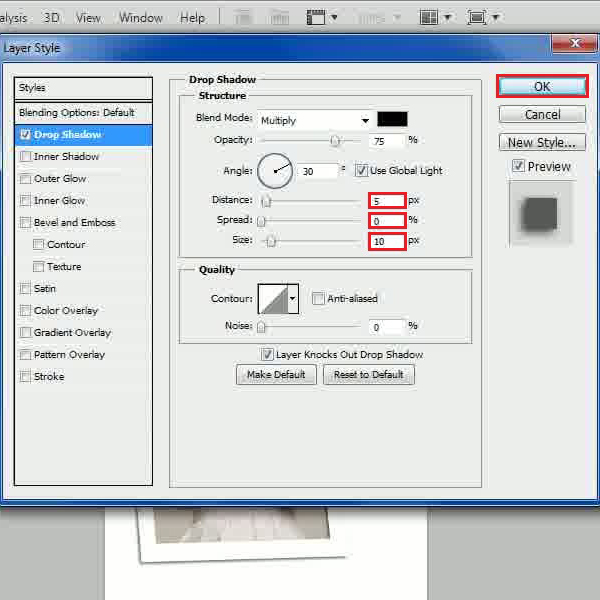
In this step, right click on the “Frame” layer and select the “Blending Options” from the menu. In the blending option’s window, move over to the “”Drop Shadow” tab. In this tab, set the “Distance” to “5 px”, “Spread” to “0 percent”, and “Size” to “10 px”. After changing these values, click on the “OK” button to apply it on the image.
Step # 7 – Create a Shadow
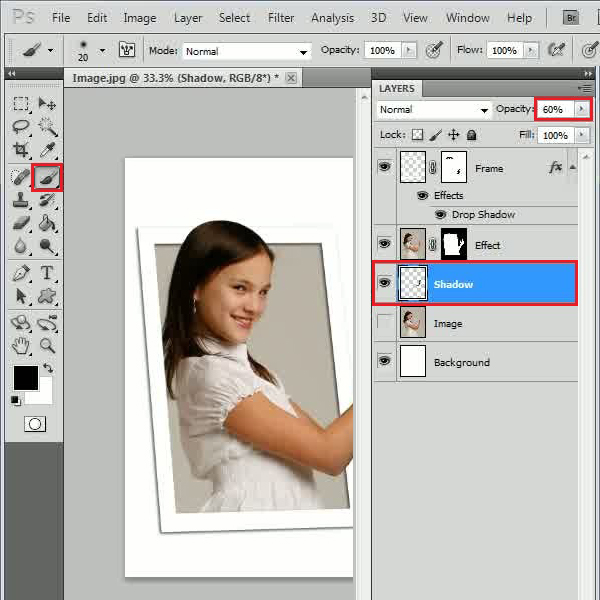
Add a new layer and change its name to “Shadow”. Now move this newly created layer below the “Effect” layer. Once done, select the “Brush” tool from the menu, choose a soft brush and start painting towards the edges. After completing this, decrease the “Opacity” of the “Shadow” layer to “60 percent”. You can also apply the “Gaussian Blur” filter over this layer.
Step # 8 – Create a Background
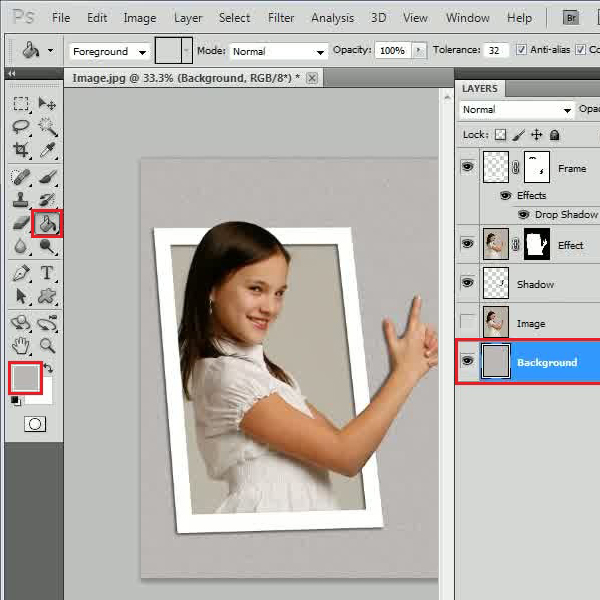
In the final step, hide all layers, select the “Background” layer and fill it with any color of your choice. Add the noise filter on this layer to add texture to your background. Now make the rest of the layers visible again and you’re done.
 Home
Home