A Bokeh effect is said to be occurred when points of light are captured which are out of focus. It occurs when an image is blurred in a way that it appears to be pleasing. A Bokeh effect is one of the most beautiful photo effects and it’s not hard to create as well. By using Adobe Photoshop, you can easily create a Bokeh Effect along with many other photography effects through its helpful tools.
In this tutorial, we will guide you to learn how to create a Bokeh Effect in Photoshop.
Step # 1 – Go to the File Menu
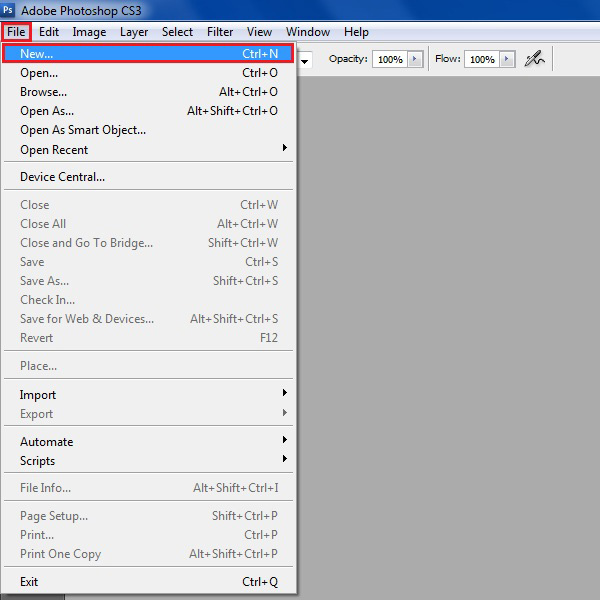
In the first step, launch Adobe Photoshop and go to the “File” menu. Click on the “New” option to create a new document.
Step # 2 – Create a New Document
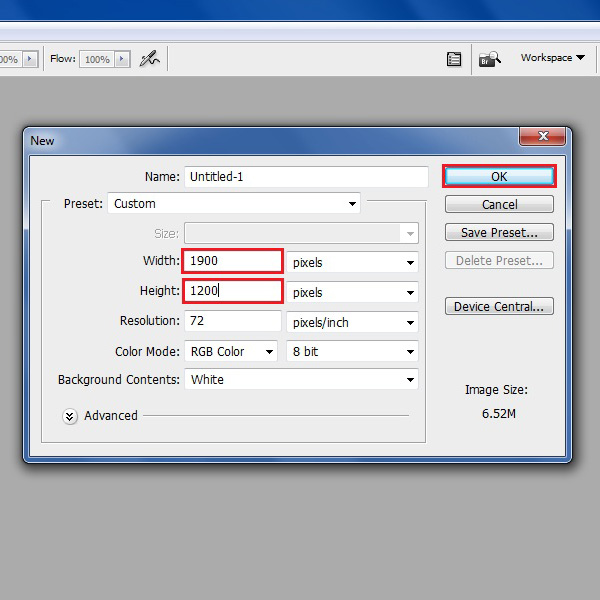
Choose the document’s width as “1900 pixels” and height as “1200 pixels”. Now click on the “OK” button to proceed.
Step # 3 – Create a Bokeh Brush
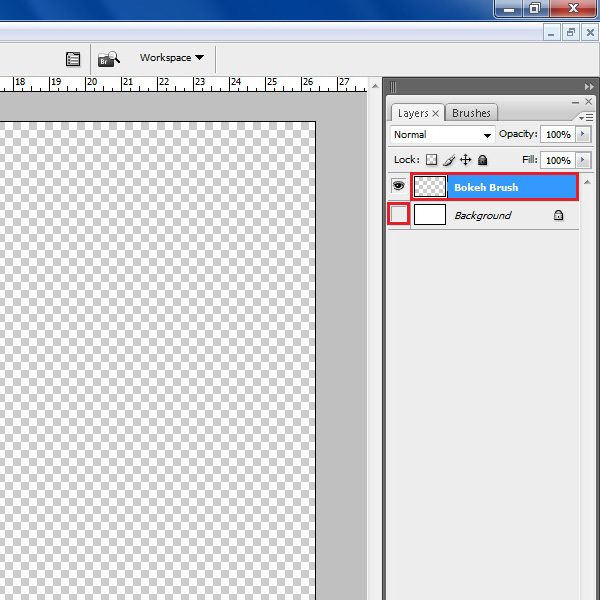
Once the new document is opened, add a new layer and rename it to “Bokeh Brush”. Now click on the visibility option of the background layer and disable it.
Step # 4 – Draw a Circle
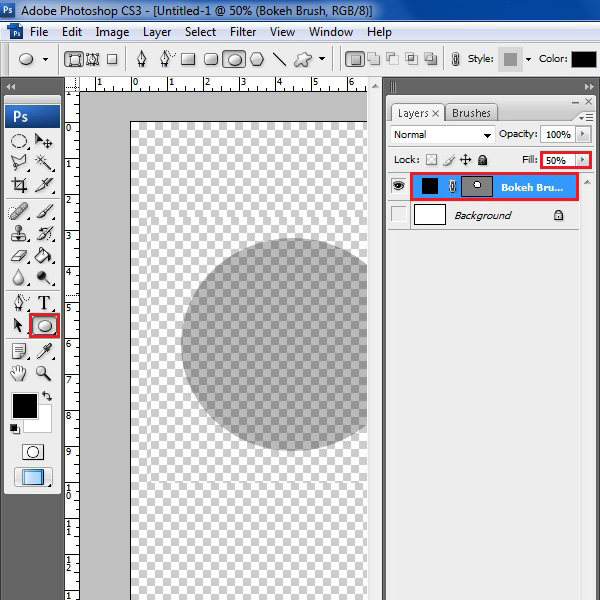
Click on the “Ellipse” tool from the menu which is available on the left corner of the screen. Now draw a circle in this new layer. Change the Fill opacity of this layer to “50%”.
Step # 6 – Adjust the Stroke Settings
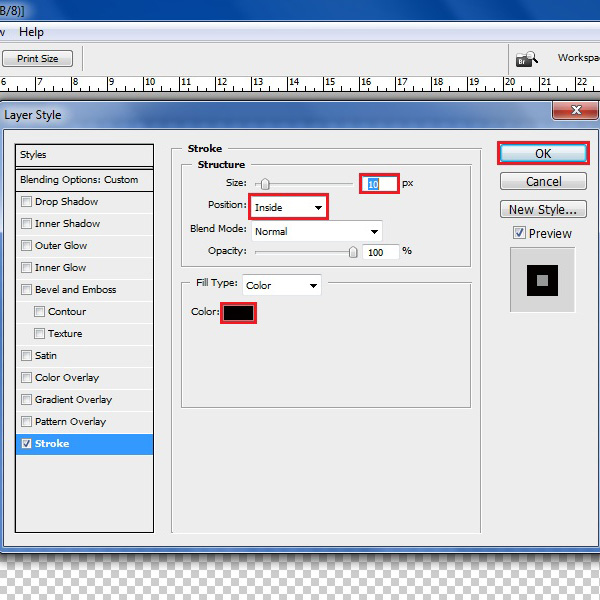
In the blending options window, go to the “Stroke” tab and increase its size to “10px”. Now change its position to “Inside” and choose a “Black color” from the menu. Click on the “OK” button to apply these settings.
Step # 7 – Define the Brush Preset
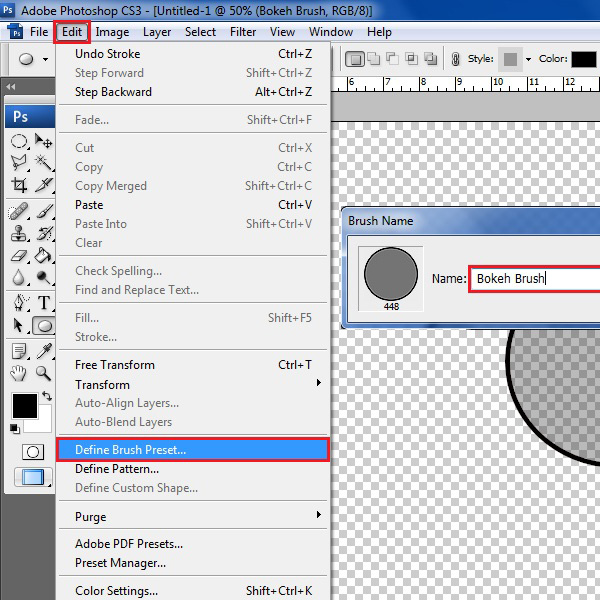
Now go to the “Edit” menu and click on the “Define brush preset” option to create a new brush design. Enter its name as “Bokeh brush” and click on the “OK” button to create it.
Step # 8 – Apply a Grey Color
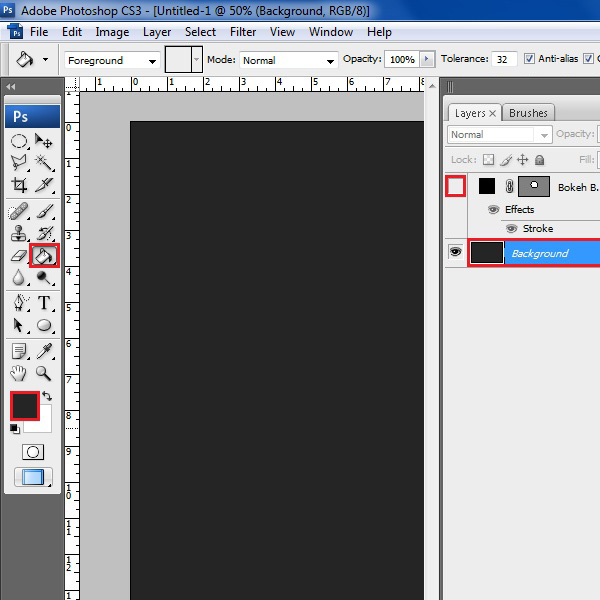
As we have created our Bokeh brush so disable the Bokeh Brush layer now.
Click on the foreground color option select a “Grey” color. Now use a “Paint bucket” tool to apply it on the layer.
Step # 9 – Create a Color Layer
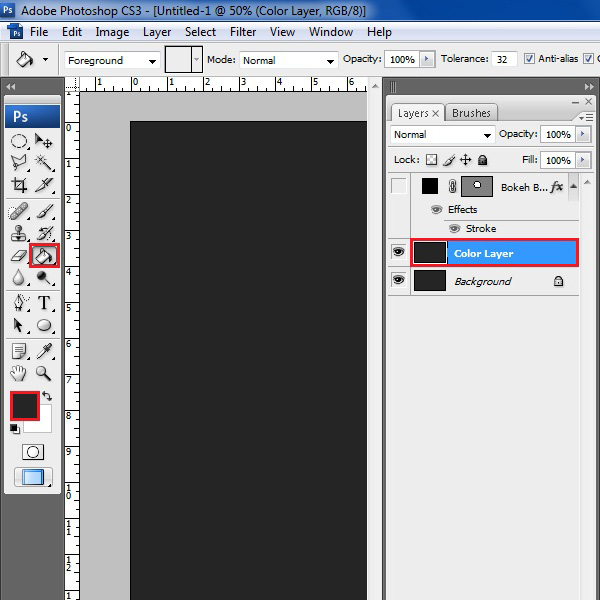
Now add a new layer, apply the same grey color on it and rename it to “Color layer”.
Step # 10 – Open the Blending Options
Right click on this newly created layer and select the “Blending” option from the menu.
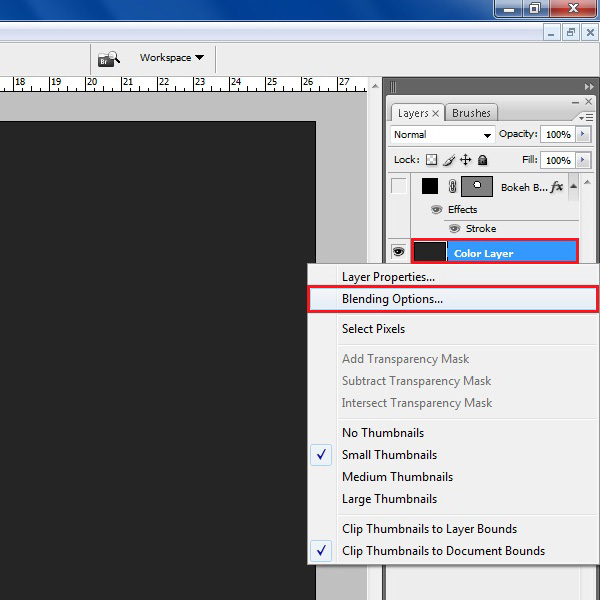
Step # 11 – Open the Gradient Colors
Go to the “Gradient Overlay” tab and click on the “Gradient” color option.
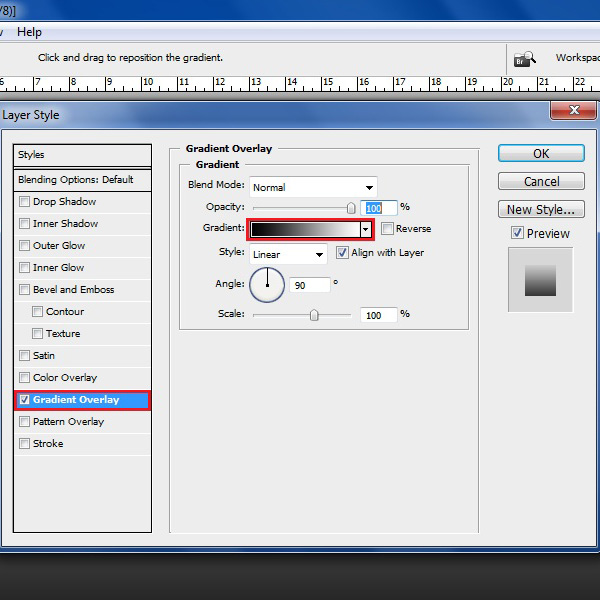
Step # 12 – Choose Bright Colors
Now in this window, divide the preset into four parts and select different colors for each part. It is recommended to use bright colors for your gradient. Click on the “OK” button to apply these settings and exit from the Gradient Color mode.
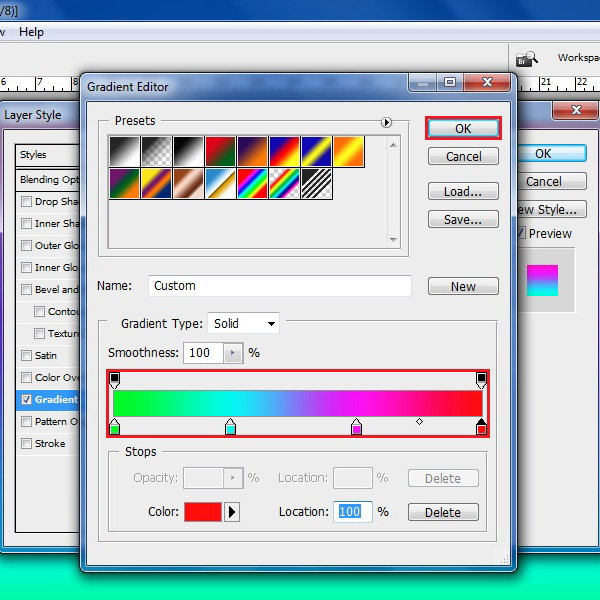
Step # 13 – Adjust the Gradient Settings
Now change the Blending mode to “Overlay”, set the angle to “45 degrees” and click on the “OK” button to apply these settings.
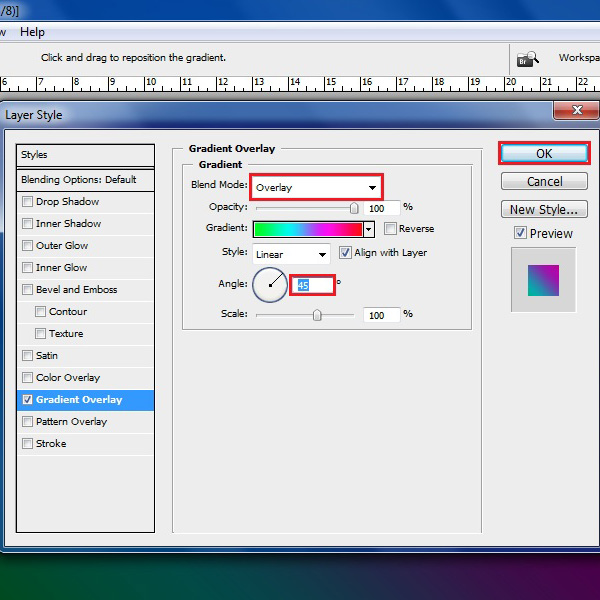
Step # 14 – Create a Group
Create a new group by clicking on the “New group” button and change its name to the “Bokeh Effect”.
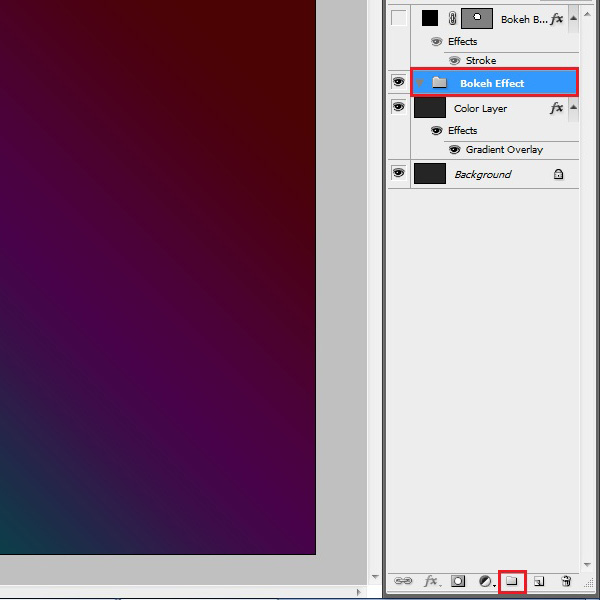
Step # 15 – Create a Lower Part Layer
Create a new layer in this group and rename it to “Lower part”. In this layer select the “Brush” tool from the menu and choose the newly created Bokeh brush.
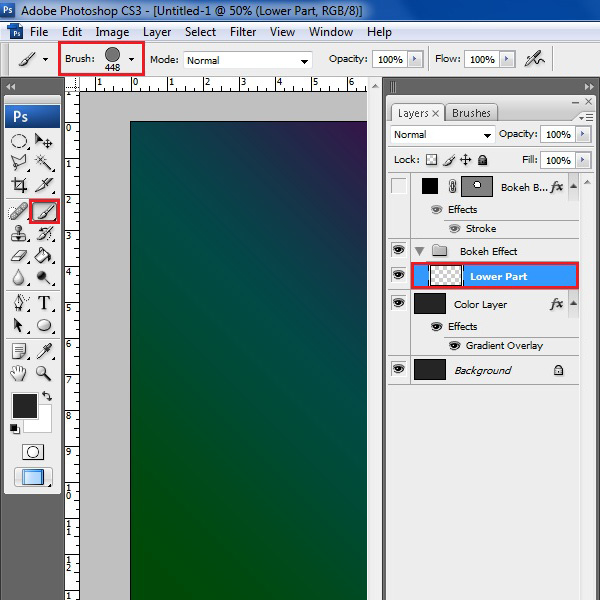
Step # 16 – Adjust the Brush Shape
First we have to change the brush diameters and its effect. For this purpose, click on the Brush properties panel and go to the “Brush tip” option from the menu. Now change its “Spacing” to “200%”.
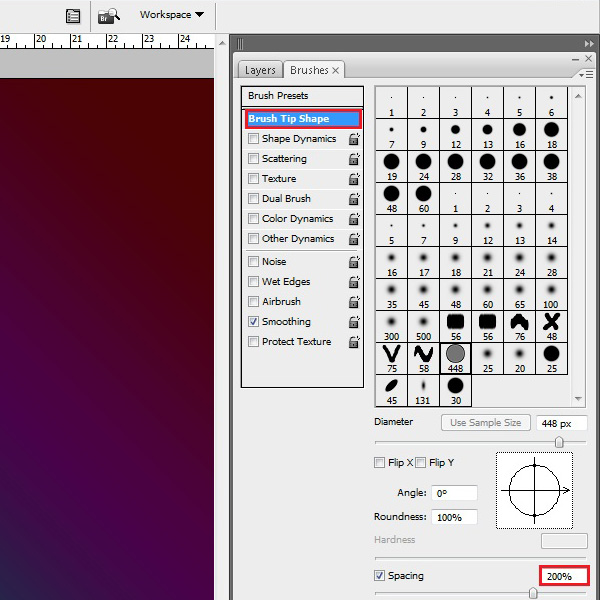
Step # 17 – Adjust the Shape Dynamics
Move over to the “Shape Dynamics” tab and change the “Size Jitter” to “100%” and “Minimum Diameter” to “50%”.
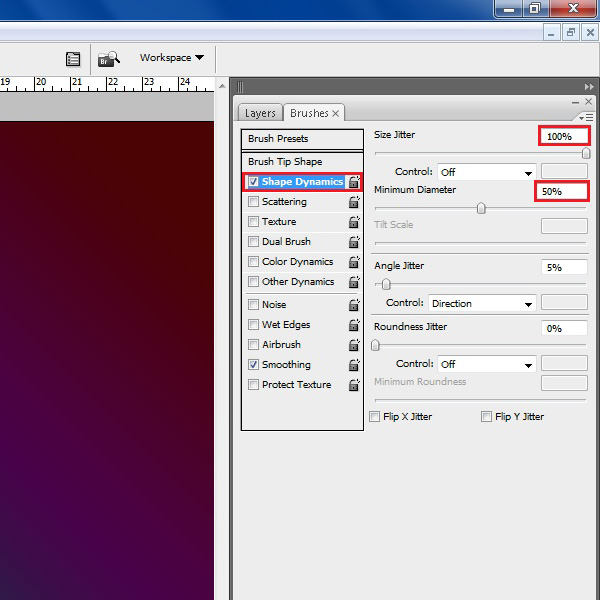
Step # 18 – Adjust the Scattering Settings
Click on the “Scattering” tab and increase the “Scatter” to “1000%”. Now choose the “Count” option to “5” and “Count Jitter” to “0%”.
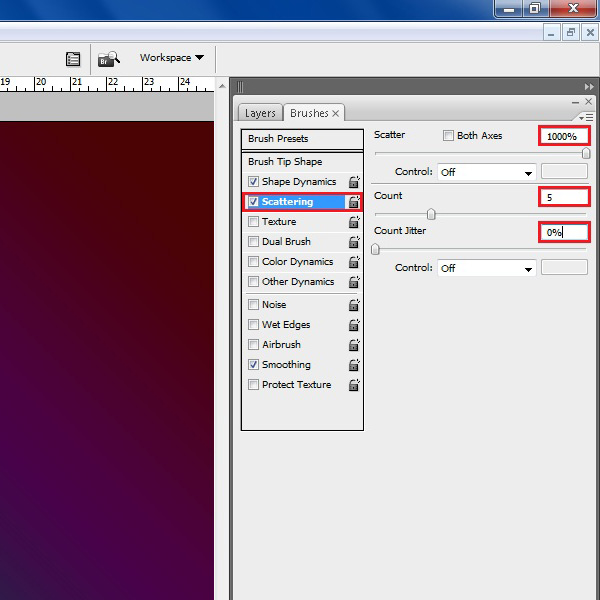
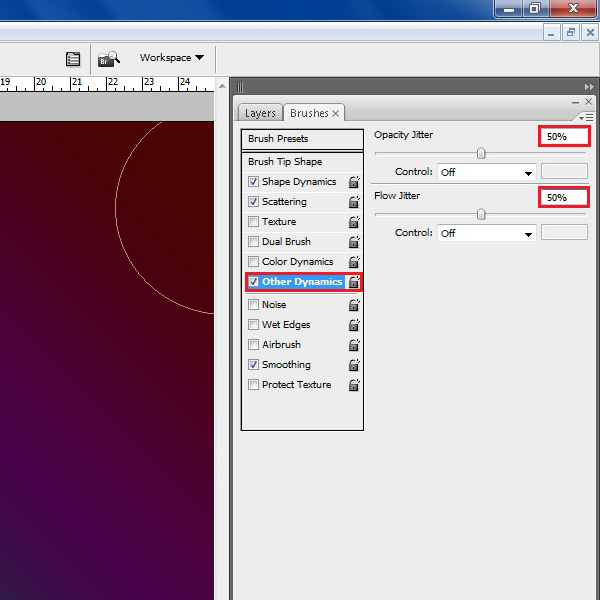
Step # 19 – Adjust the Other Dynamics Settings
Open the “Other Dynamics” tab and set both the “Opacity” and “Flow Jitters” options to “50%”.
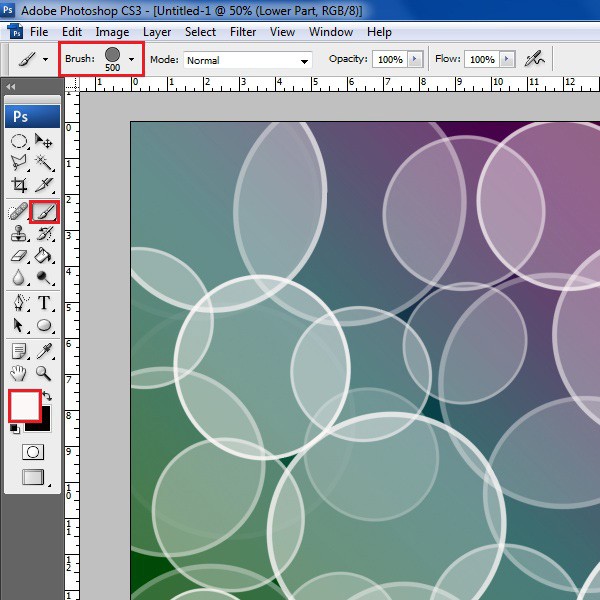
Step # 20 – Paint with Bokeh Brush
Now your Bokeh brush is ready to use. Change the “Foreground color” to “White” and increase the brush Diameter to “500px”. After changing it, draw some random circles on the layer.
It is recommended to create single circles by clicking once rather than clicking and draging the brush.
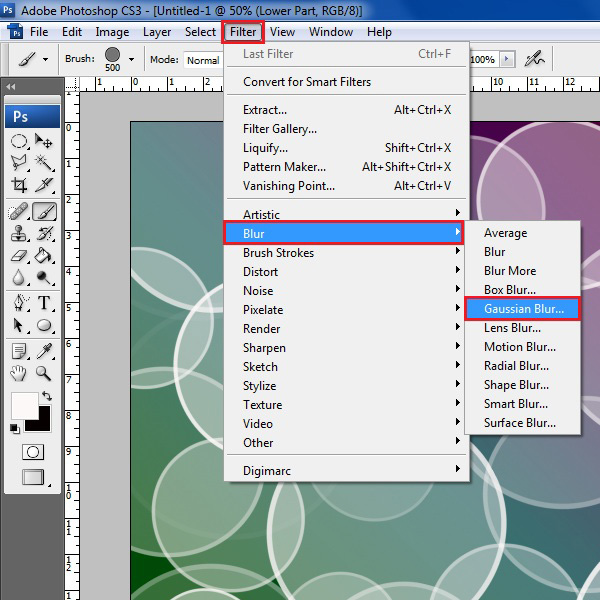
Step # 21 – Apply a Gaussian Blur
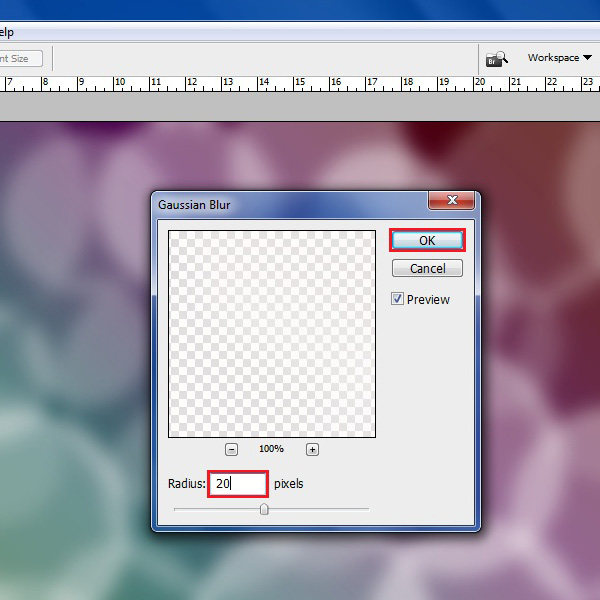
Now go to the “Filter” menu and click on the “Blur” option from the list. Select the “Gaussian blur” filter from the menu.
Step # 22 – Choose the Radius
In the Gaussian Blur filter mode, choose the “Radius” to “20 pixels” and click on the “OK” button to apply it.
Step # 23 – Create a Middle Part Layer
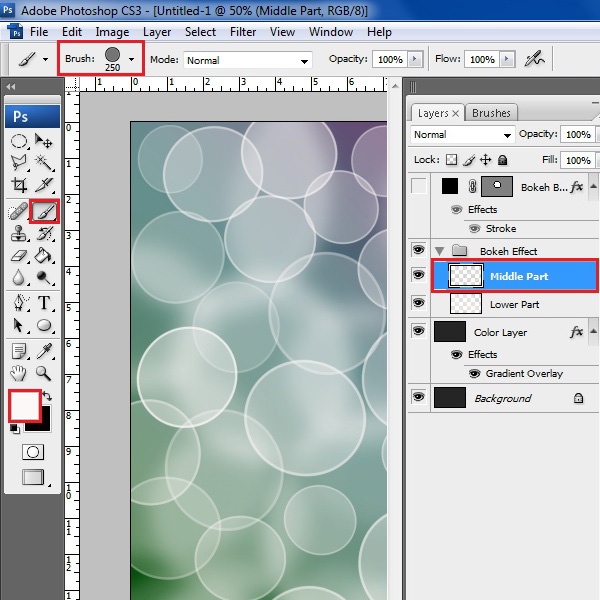
Now create a second layer and change its name to “Middle part”. Change the brush diameter to “250px” and create some more random circles like the previous step.
Step # 24 – Apply a Gaussian Blur
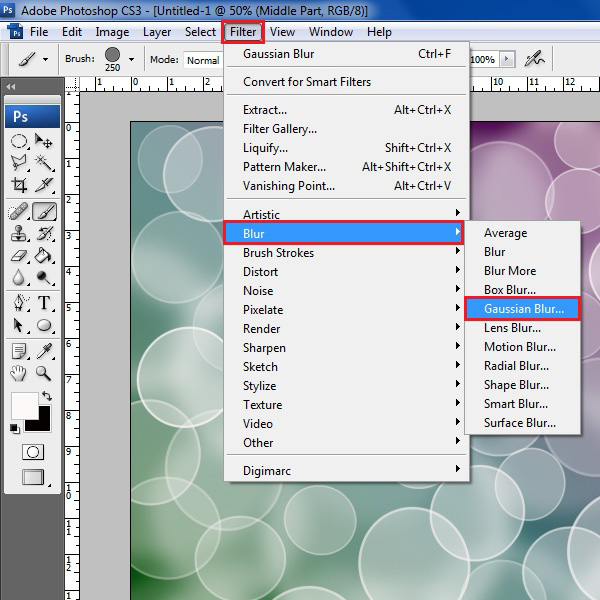
Now go to the “Filter” menu and click on the “Blur” option from the list. Select the “Gaussian blur” filter from the menu.
Step # 25 – Choose the Radius
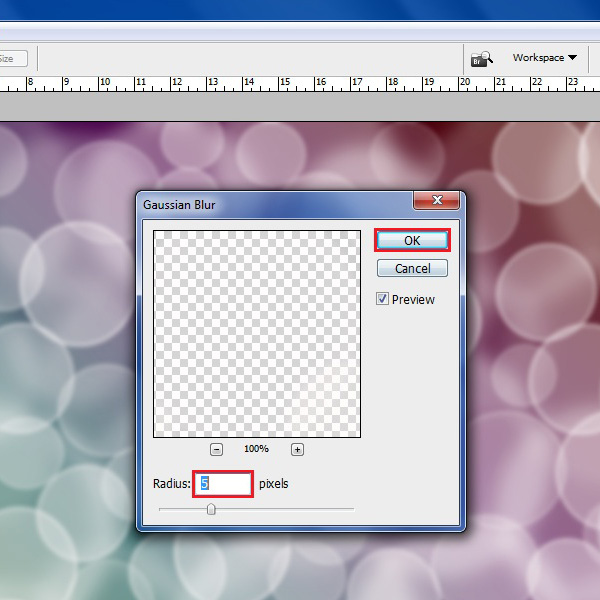
In the Gaussian Blur filter mode, choose the “Radius” to “5 pixels” and click on the “OK” button to apply it.
Step # 26 – Merge all Layers in a New Layer
Now you have to merge all the effects in a single layer. In order to merge them, press “CTRL + SHIFT + ALT + E” keys on the keyboard. This will create a new layer in which all effects are merged together.
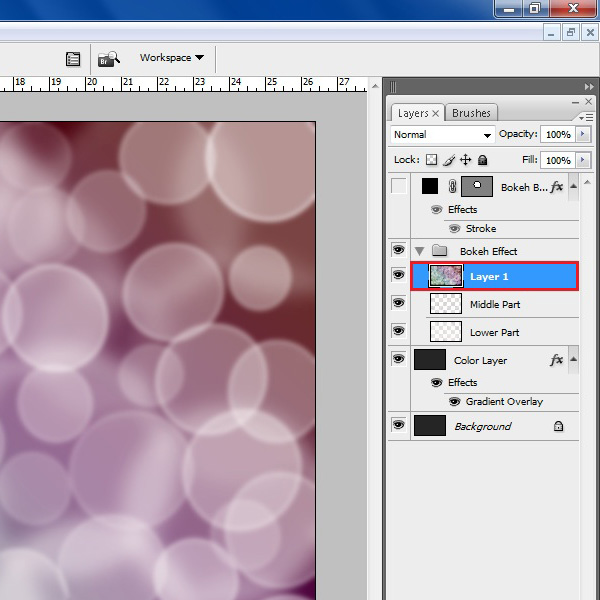
Step # 27 – Apply a Gaussian Blur
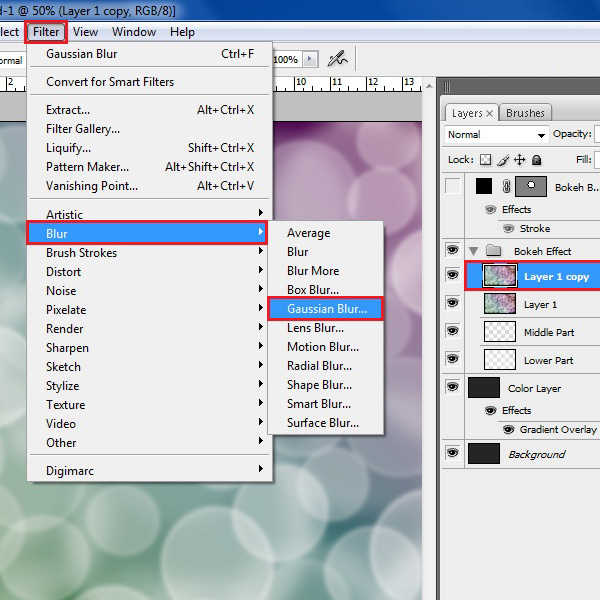
Now go to the “Filter” menu and click on the “Blur” option from the list. Select the “Gaussian blur” filter from the menu.
Step # 28 – Choose the Radius
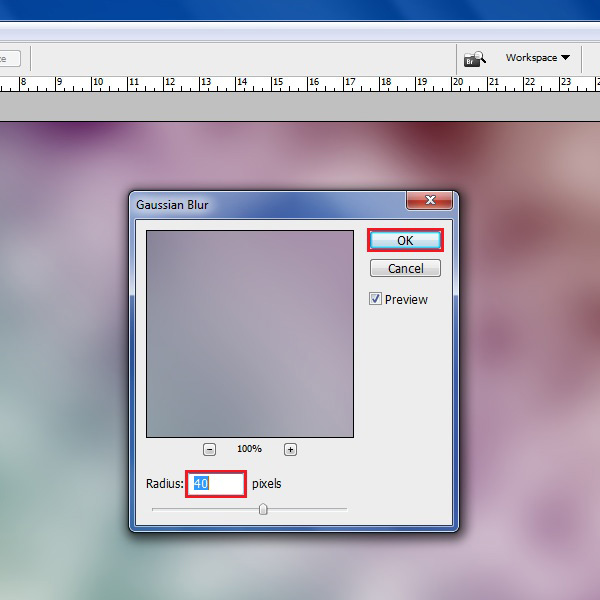
In the Gaussian Blur filter mode, choose the “Radius” to “40 pixels” and click on the “OK” button to apply it.
Step # 29 – Change the Blending Mode
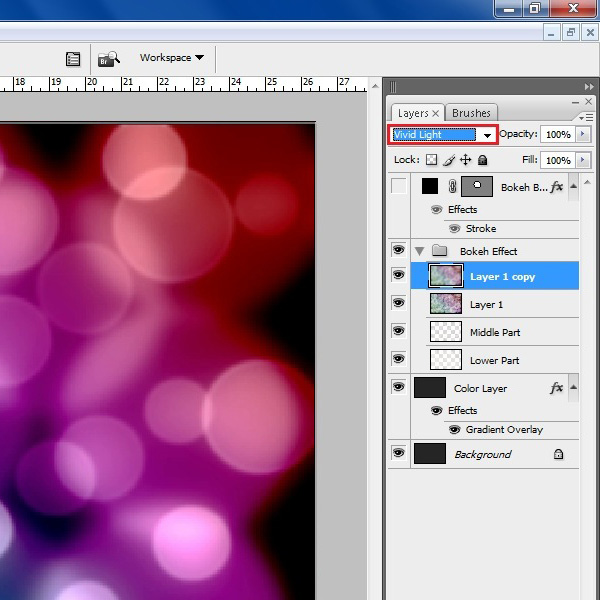
Create one more duplicate of the “Layer1” and change its blending mode to the “Vivid light”. Now your “Bokeh Effect” is created successfully.
 Home
Home