An eye-catching design of a website comprises of various elements and techniques. In web designing and site templates, all images, their colors, fonts, size, placement and every other thing counts a lot. Here in this tutorial, we will design a beautiful font style with vibrant colors and attractive appearance. This tutorial is suitable for beginners who are seeking guidance to start basic designing.
Follow this step by step guide to learn how to create a brick text effect in Photoshop.
Step # 1 – Insert Your Desired Text
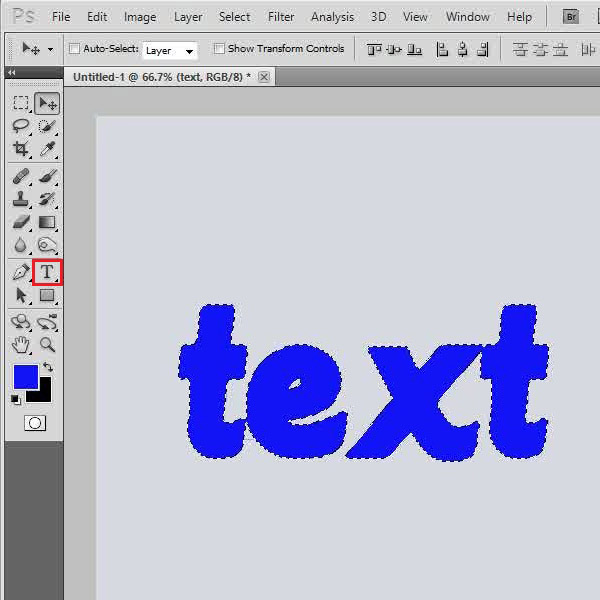
In the first step, launch Adobe Photoshop and open up a new document. You can choose any color of your choice and fill the background with it. Now select the “Text” tool from the tool bar located at the left corner of the window. Insert some text and align it to the center of the page. Once done, hold down the “Ctrl” key on the keyboard and click on the “Text” layer to select its outline.
Step # 2 – Apply the Note Paper Filter
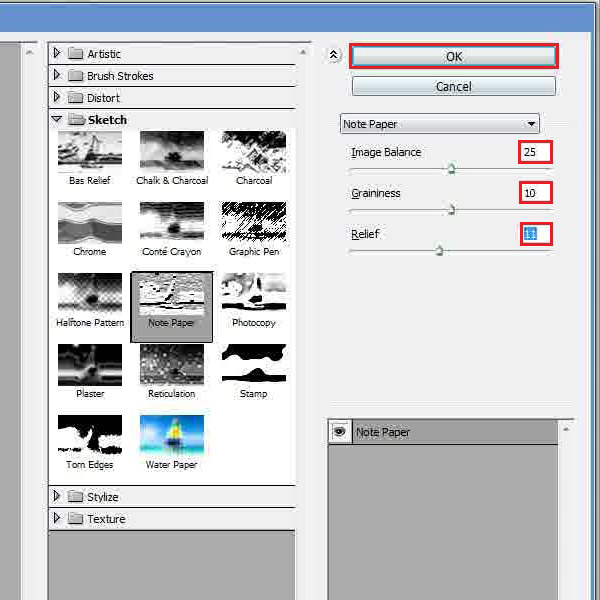
In the next step, go to the “Filter” menu, select “Sketch” and click on the “Note Paper” filter from the list. In the filter settings panel, set the “Image Balance” to “25”, “Graininess” to “10” and “Relief” to “11”. After changing these settings, click on the “OK” button to apply it on the layer.
Step # 3 – Apply the Tiles Filter
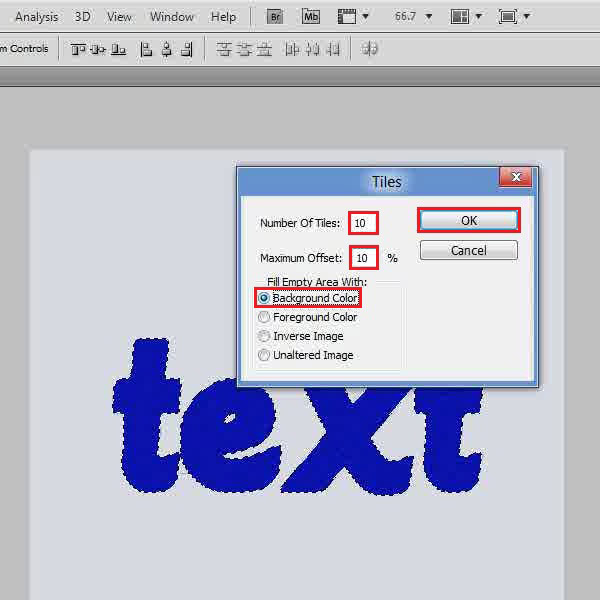
Now go back to “Filter” menu, select “Stylize” and click on the “Tiles” filter from the list. In the filter settings panel, set the “Number of tiles” and “Maximum offset” to “10 percent” and select the “Background color” option to fill empty area. After changing these settings, click on the “OK” button to apply it on the image. Once done, press the “Ctrl+F” key on the keyboard to repeat this effect.
Step # 4 – Adjust the Drop Shadow Settings
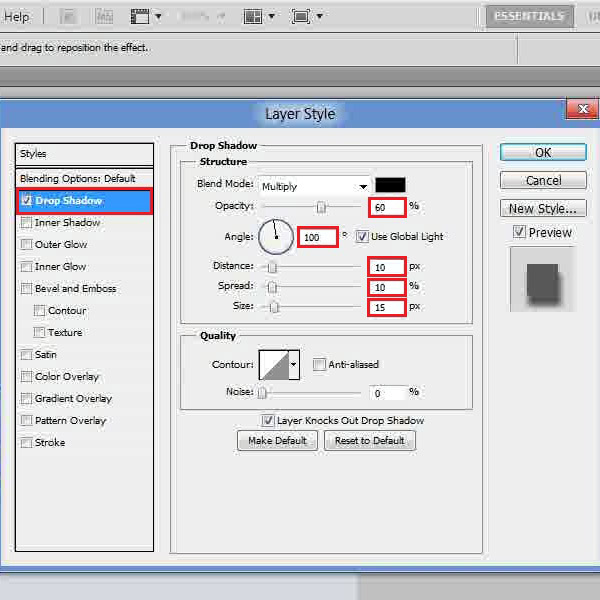
Now press the “Ctrl+D” key on the keyboard to deselect the layer and open its blending options. Once done, go to the “Drop Shadow” tab, set its opacity to “60 percent”, angle to “100 percent”, distance to “10px”, spread to “10 percent” and size to “15px”.
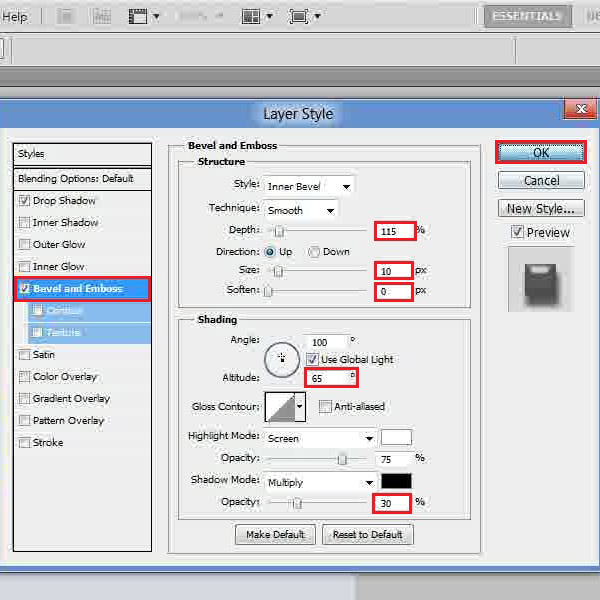
Step # 5 – Adjust the Bevel and Emboss Settings
In the last step, move over to the “Bevel and Emboss” tab, set its depth to “115 percent”, size to “10px” and soften to “0px”. Once done, set its altitude to “65 degrees” and shadow mode’s opacity to “30 percent”. After changing these settings, click on the “OK” button to apply it on the text and you’re done.
 Home
Home