Image manipulation is a powerful tool through which you can completely transform an image into that perfect piece of art. From basic tools to advanced techniques, you can let your creativity run wild and come up with something new and fresh. In this particular photoshop tutorial, we would be teaching you how to create a cartoonish effect in Photoshop. This particular tutorial is designed for beginners, using basic filters and techniques to transform the image.
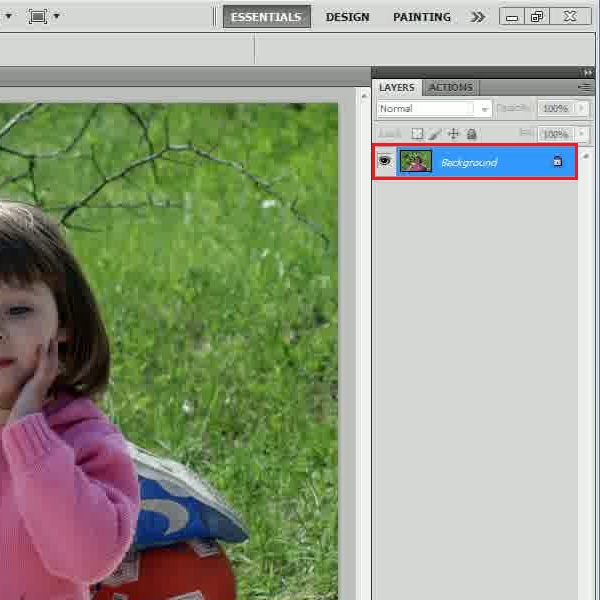
Step # 1 – Load an Image
In the first step, launch Adobe Photoshop and load an image on which you want to create a cartoonish effect.
Step # 2 – Apply the Poster Edge Filter
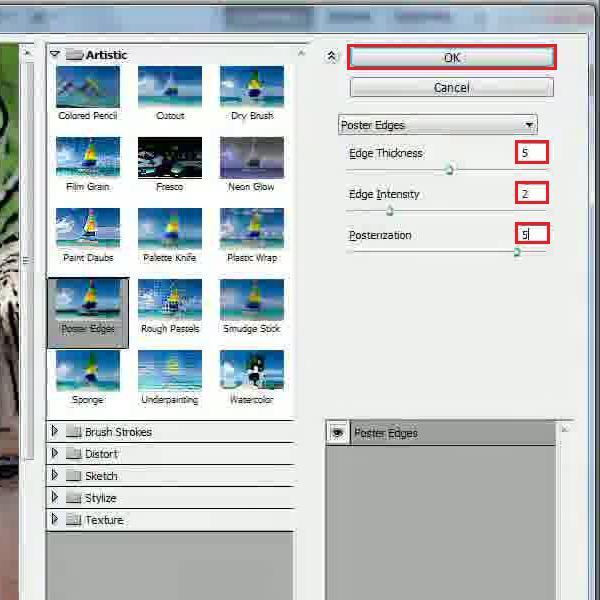
Now go to the “Filter” menu, select “Artistic” and click on the “Poster Edges” filter from the list. In the filter settings panel, set the “Edge Thickness” to “5”, “Edge Intensity” to “2”and “Posterization” to “5”. After changing these settings, click on the “OK” button to apply it on the image.
Step # 3 – Adjust the Brightness and Contrast
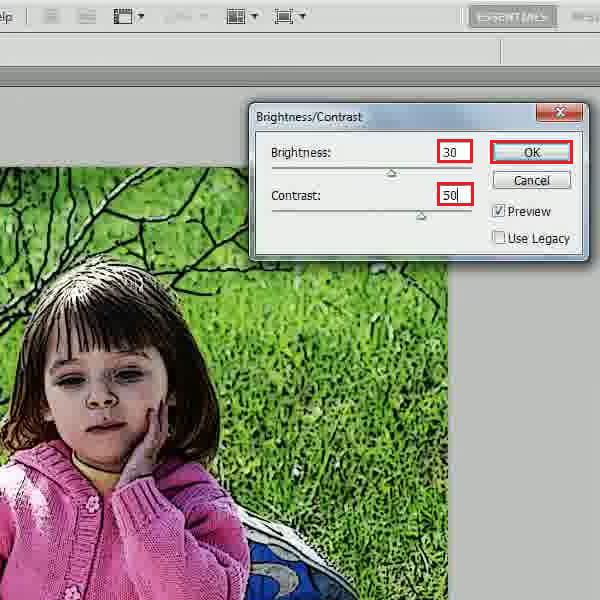
Go to the “Image” menu, select “Adjustments” and click on the “Brightness/Contrast” option from the list. In the settings panel, increase the “Brightness” level to “30” and “Contrast” level to “50”. After changing these settings, click on the “OK” button to apply it on the image.
Step # 4 – Apply the Cutout Filter
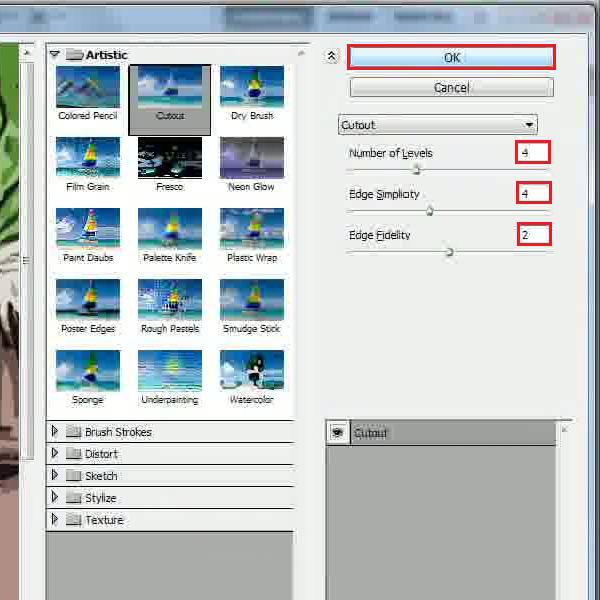
After adjusting the brightness and contrast of the image, go to the “Filter” menu, select “Artistic” and click on the “Cutout” filter from the list. In the filter settings panel, set the “Number of Levels” to “4”, “Edge Simplicity” to “4” and “Edge Fidelity” to “2”. After changing these settings, click on the “OK” button to apply it on the image.
Step # 5 – Add a Frame over the Image
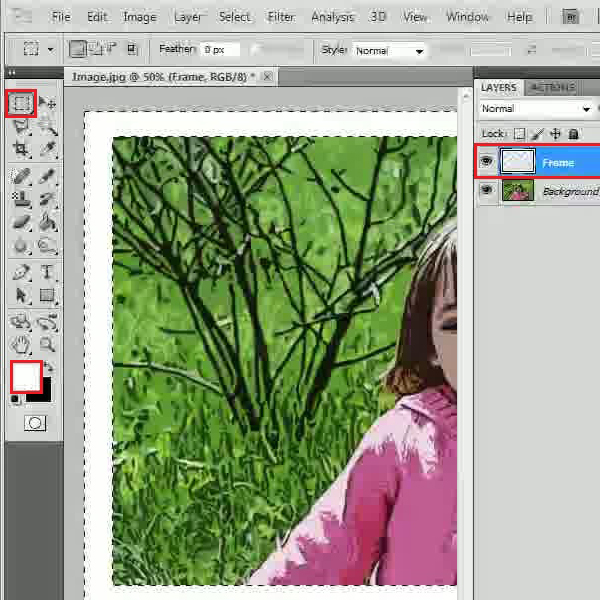
In the next step, insert a new layer and change its name to “Frame”. Now select the “Rectangular Marquee” tool from the menu and create a selection around the borders of the image. Now choose white for the foreground color and press the “Alt+Backspace” key on the keyboard to fill the selected area with “White” color.
Step # 6 – Adjust the Stroke Settings
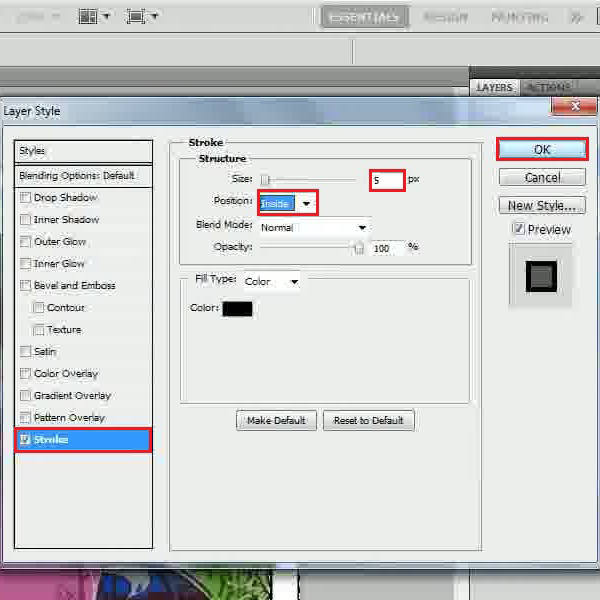
Now right click on the “Frame” layer and select the “Blending Options” from the menu. In the settings panel, move over to the “Stroke” tab. Now set the “Size” of the stroke to “5 px” and its “Position” to “Inside”. After changing these settings, click on the “OK” button to apply it on the frame.
Step # 7 – Insert a Text
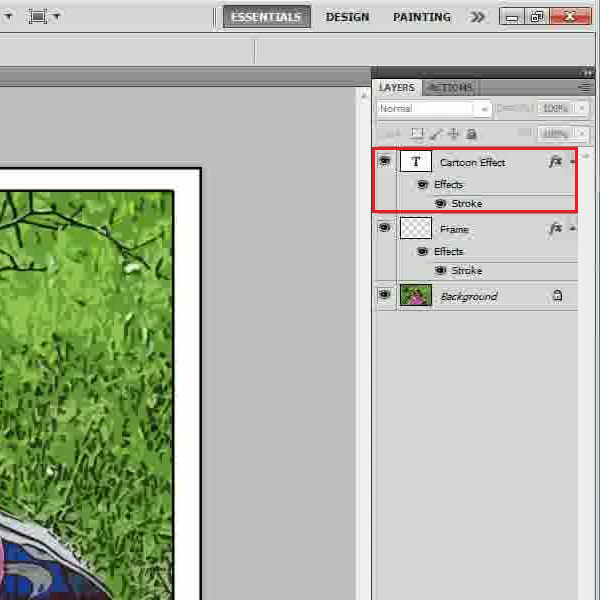
In the final step, insert the text using the “Text” tool from the menu towards the left. Use strokes to make your text prominent and you’re done.
 Home
Home