With Photoshop, you can add textures to a basic 2d image and add depth to the image. Using basic techniques and blending options, you can bring to life very basic images. For this purpose, we are using a displacement map for the basis of this effect. By playing around with the displacement filter, you can create eye catching after effects and awe inspiring designs.
Follow this step by step guide to learn how to create a fabric fold effect in Photoshop.
Step # 1 – Load Images
In the first step, launch Adobe Photoshop and load an image on which you want to create a fabric fold effect. Now change the name of this layer to “Image”. Load another image of a fabric and drag it on to the canvas. Now change the name of this layer to “Fabric”.
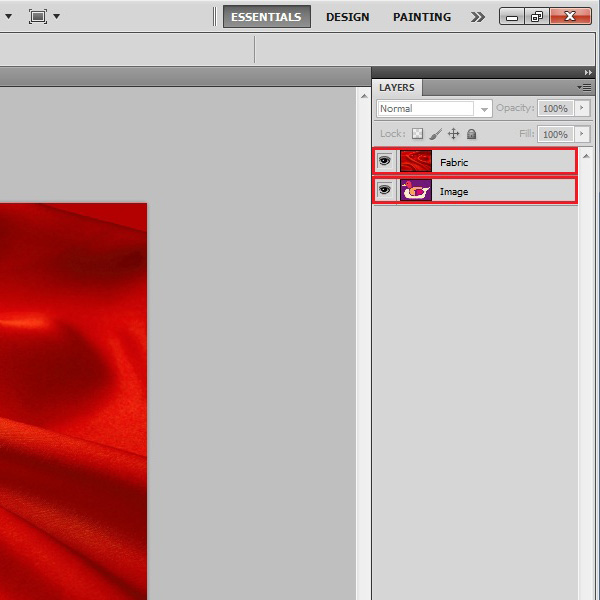
Step # 2 – Desaturate the Fabric Image
Once you have both the images on the same document, click on the “Fabric” layer to select it. Now go to the “Image” menu, select “Adjustments” and click on the “Desaturate” option from the list.
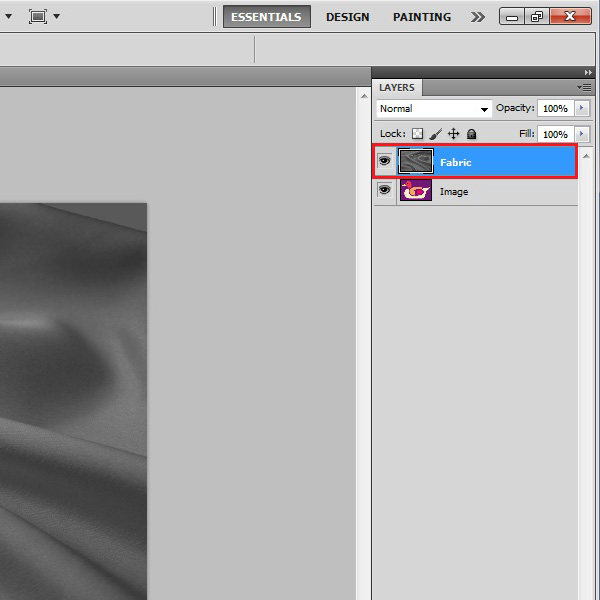
Step # 3 – Create a Displacement Filter
After desaturating the layer, save this file in a PSD format. We would be using this file as the basis for our displacement filter. For this purpose, go to the “File” menu and click on the “Save” option from the list. This will open a window which allows you to save the current document. Enter the filename and click on the “Save” button to save this file.
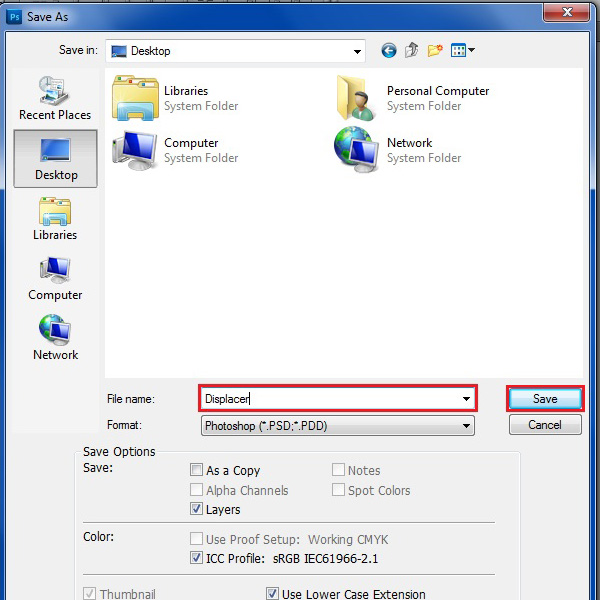
Step # 4 – Apply the Displace Filter
Once you have saved the document, hide the fabric layer. Now click on the “Image” layer to select it. Go to the “Filter” menu, select “Distort” and click on the “Displace” filter from the list. In the filter’s settings panel, set the “Horizontal Scale” option to “15”, “Vertical Scale” to “15” and select the “Stretch to Fit” and “Wrap Around” options. After changing these settings, click on the “OK” button to continue.
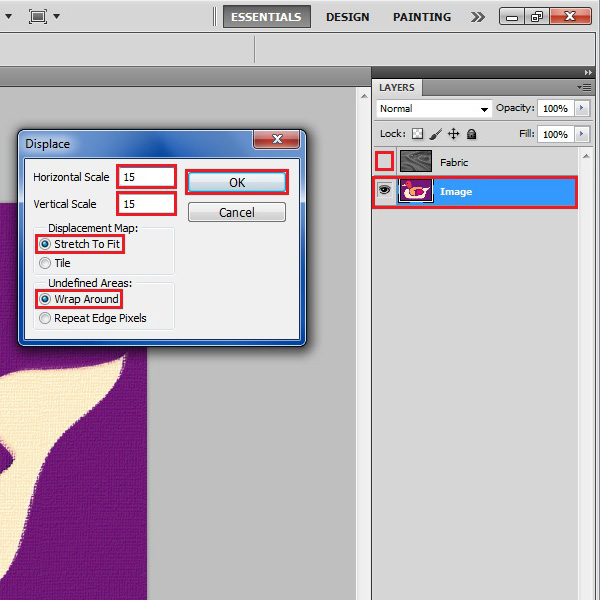
Step # 5 – Load the Displacement File
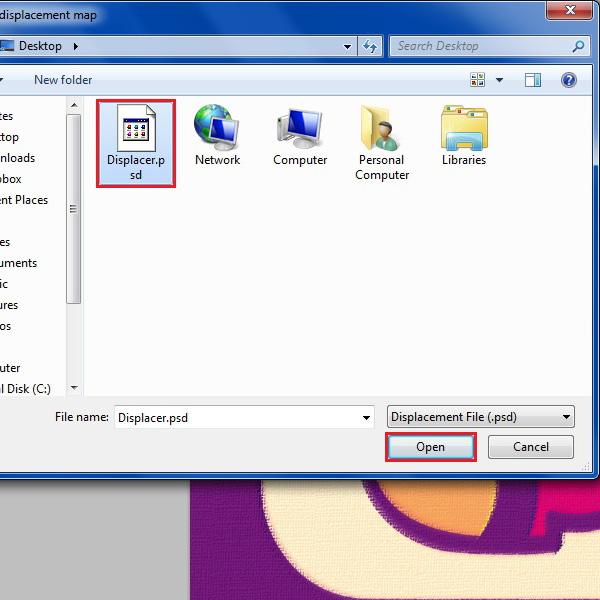
A new window will appear which will ask you to choose a “Displacement Map”. Browse and select the file saved previously. After selecting the file, click on the “Open” button to load it.
Step # 6 – Change the Blending Mode
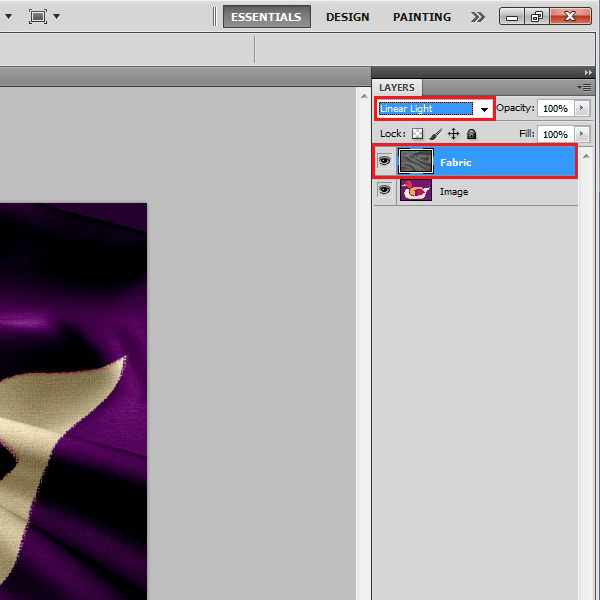
Now make the “Fabric” layer visible again. Once done, change the “Blending Mode” of this layer to “Linear Light”.
Step # 7 – Adjusting the size
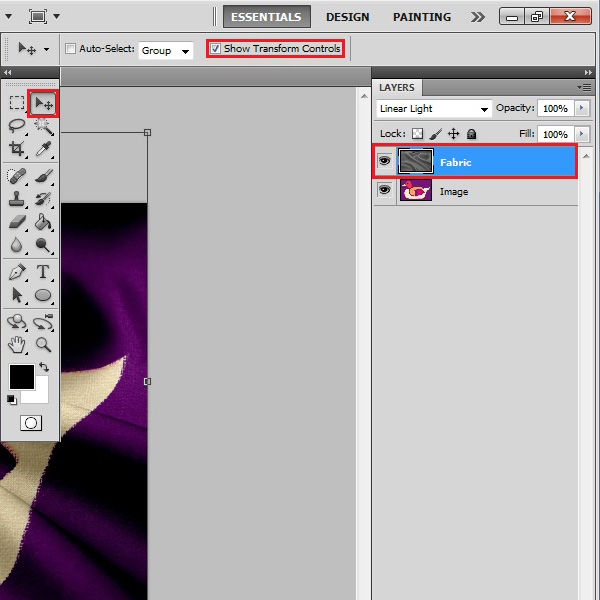
After changing the blending mode, select the “Move” tool from the menu and click on the “Show Transform Control” option. Now adjust the size and placement of the fabric folds layer according to the image.
 Home
Home