Adobe Photoshop is considered as the most useful image editing application among the people nowadays. It has many useful tools and wonderful features through which you can completely change the color effects and manipulate the image. In this tutorial we will guide you to learn how to create a ghost effect in Photoshop which is one of the best picture effects in digital photography.
Step # 1 – Go to the File Menu
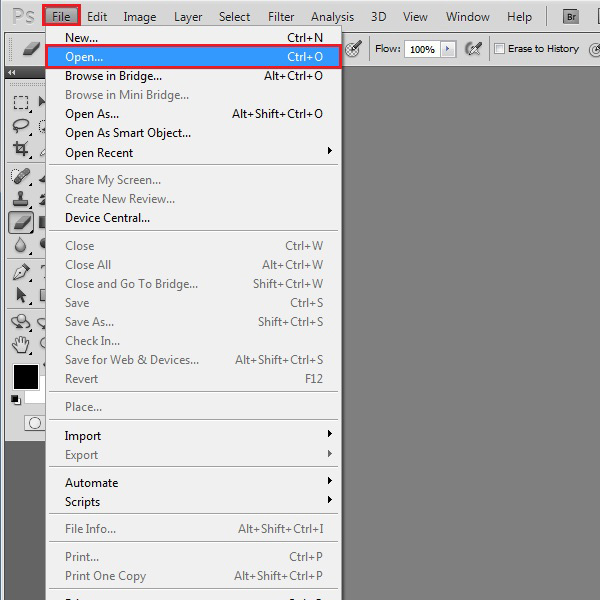
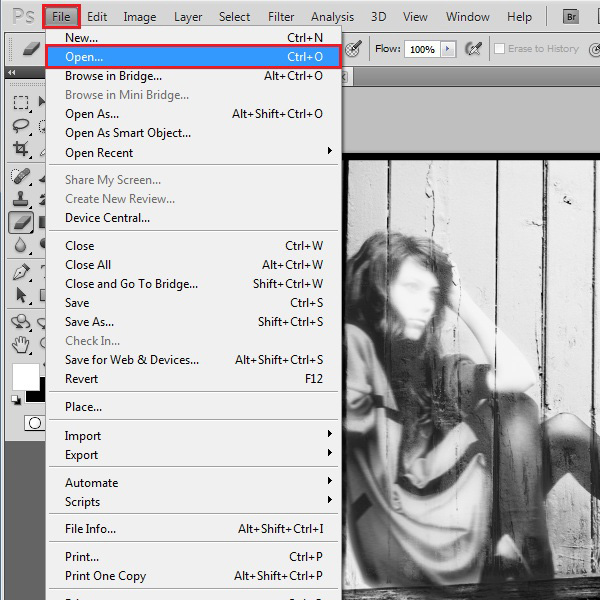
In the first step, go to the “File” menu which is located at the top left corner of the screen. Now click on the “Open” option from the menu.
Step # 2 – Select an Image
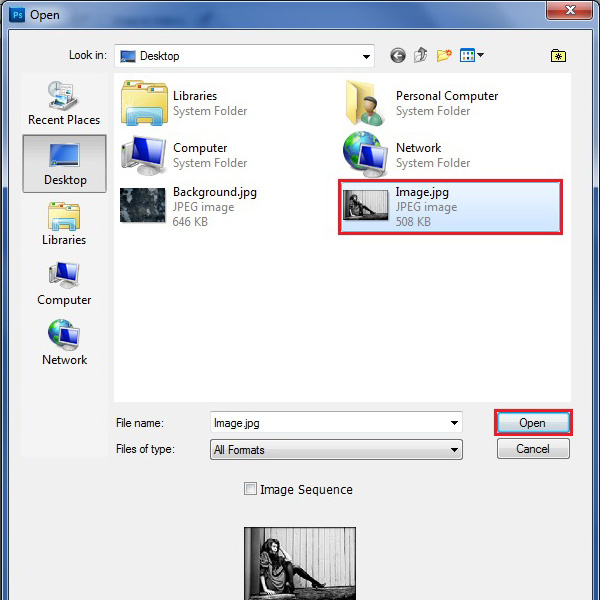
In the browsing window, select your desired image and click on the “Open” button to load it.
Step # 3 – Duplicate the Image
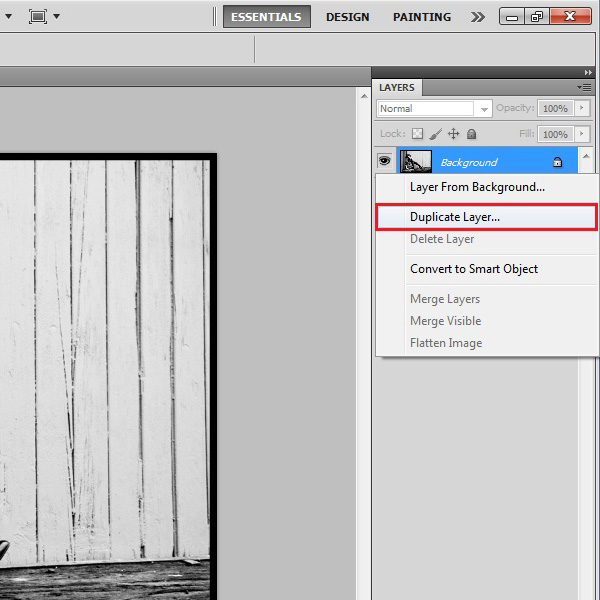
Once opened, right click on its layer name and create a copy of this layer by selecting the “Duplicate Layer” option from the menu.
Step # 4 – Change the Layer’s Name
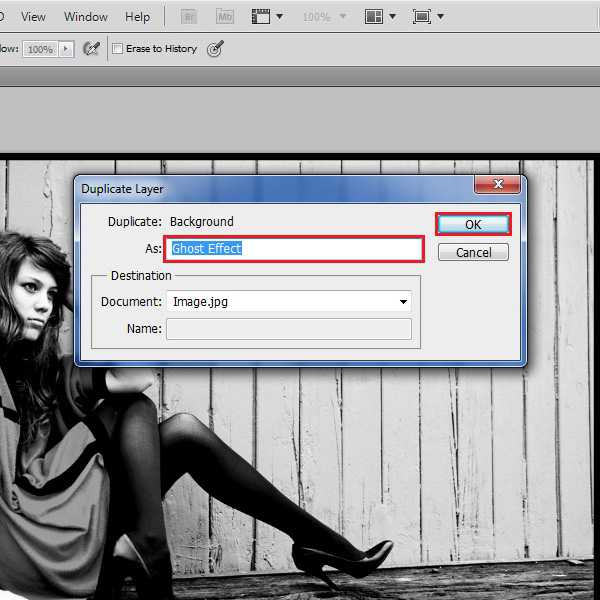
Enter the layer’s name as “Ghost Effect” and click on the “OK” button to create a new layer.
Step # 5 – Change the Visibility
Now click on the “Visibility” icon of this layer and disable this layer for now.
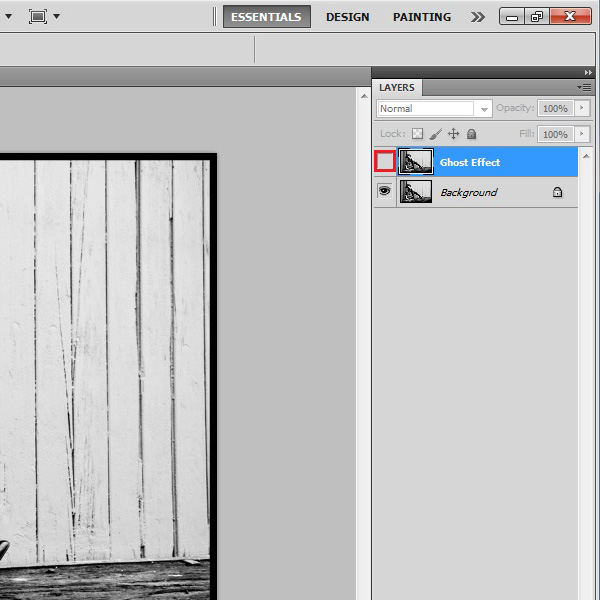
Step # 6 – Select the Girl’s Image
Now select the “Background” layer and click on the “Lasso” tool from the menu. Create a selection around the girl on the image. Here you can also use other selection tools as well according to your preference.
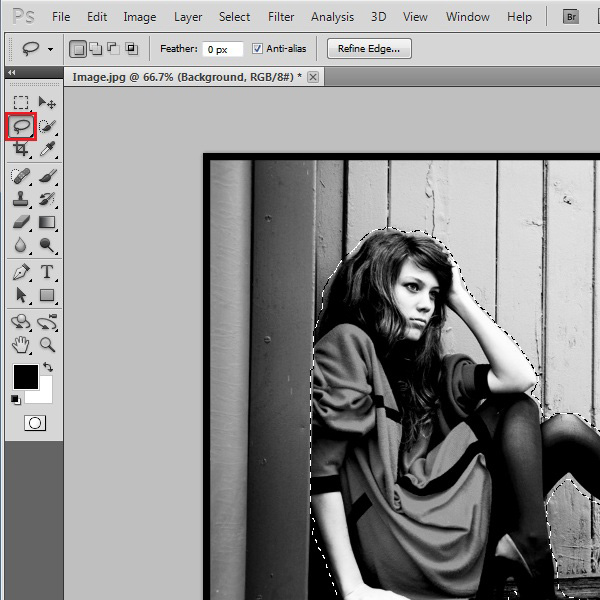
Step # 7 – Open the Fill Panel
After selecting the image, go to the “Edit” menu and click on the “Fill” option.
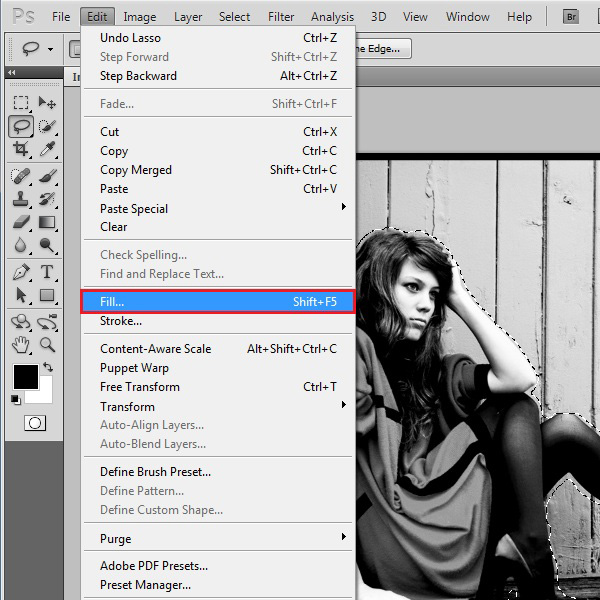
Step # 8 – Choose the Fill Type
In the “Fill” panel, choose the “Content Aware” option from the menu and click on the “OK” button to apply it on the selected part of the image.
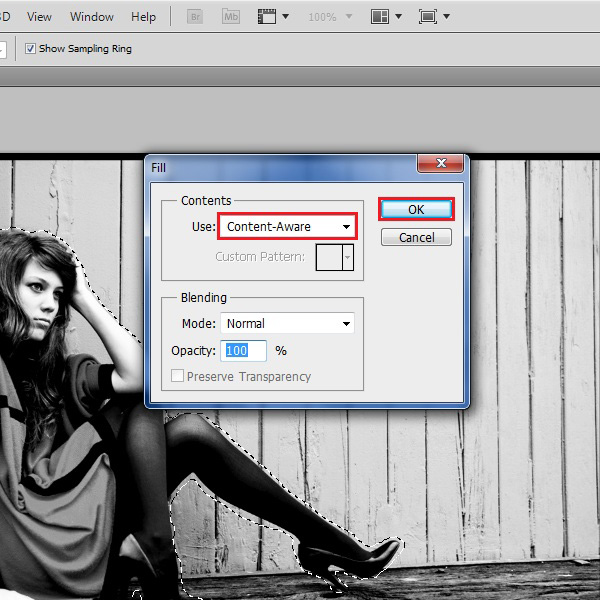
Step # 9 – Deselect the Image
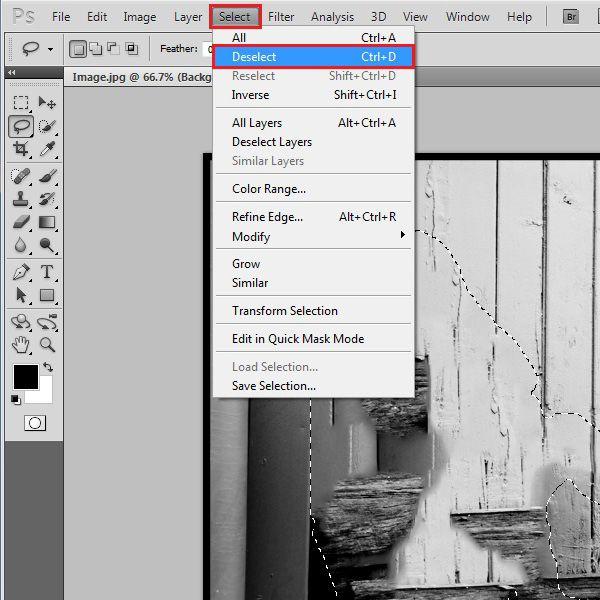
Now click on the “Deselect” option from the “Select” menu to clear the selection area.
Step # 10 – Apply the Clone Stamp Tool
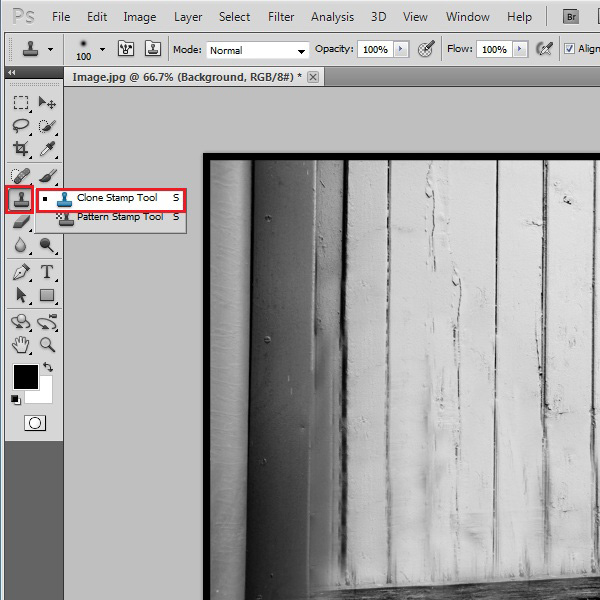
Select the “Clone Stamp” tool from the menu and use it over the image to fix the area.
Step # 11 – Open Brightness / Contrast Panel
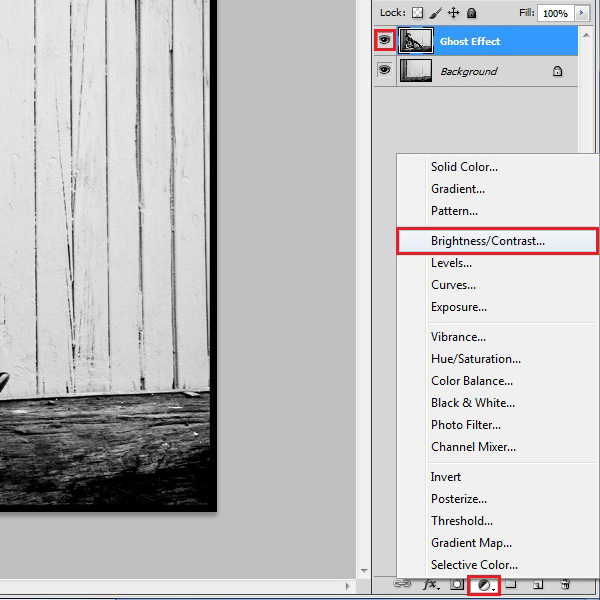
Once you fixed it, click on the visibility option of the “Ghost Effect” layer to enable it. Now click on the “Adjustment layer” button and select the “Brightness/Contrast” option from the menu.
Step # 12 – Change the Contrast Level
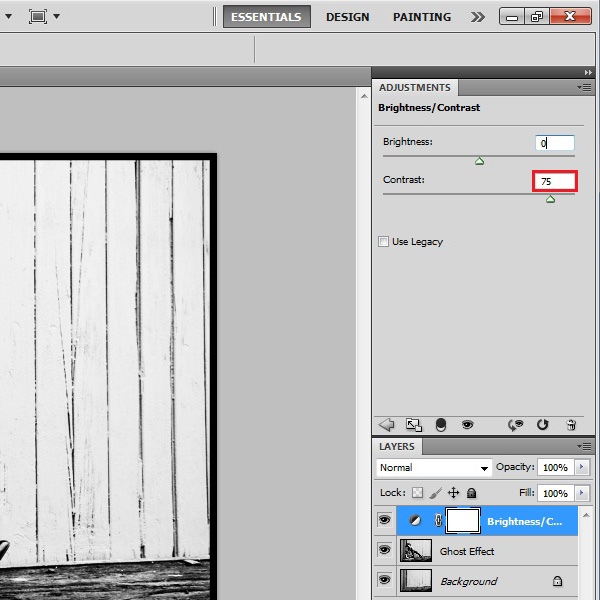
Increase the “Contrast” option to make it appear brighter. Here we increase the contrast level to “75”.
Step # 13 – Convert to Smart Object
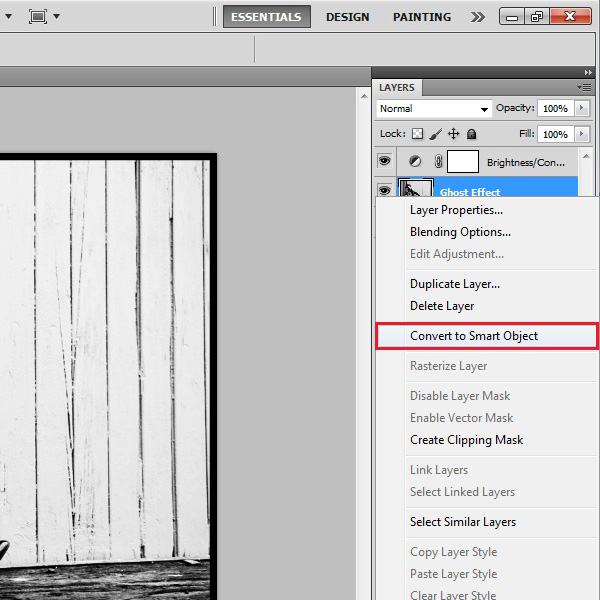
Once done, right click on the “Ghost Effect” layer and select the “Convert to Smart Option” from the menu. This will convert it into a Smart Object.
Step # 14 – Apply a Distort Filter
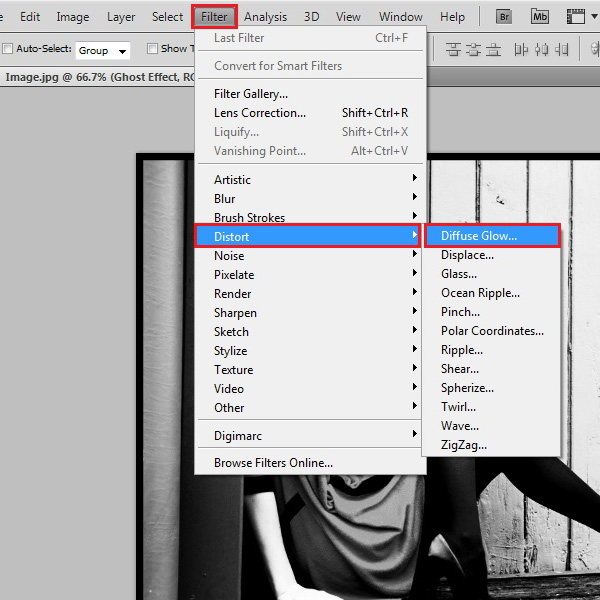
Now we can apply few filters on our image. Go to the “Filter” menu and select the “Distort” option from the list. Click on the “Diffuse Glow” filter from the list to apply it on the image.
Step # 15 – Decrease the Graininess
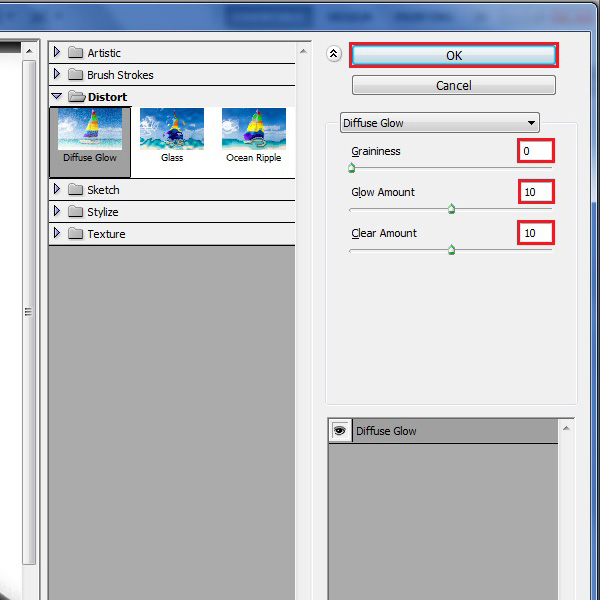
A new window will open in front of your screen. In this window, choose the “Graininess” level to “0”, “Glow amount” and “Clear amount” options to “10” and click on the “OK” button to apply the filter.
Step # 16 – Apply a Motion Blur
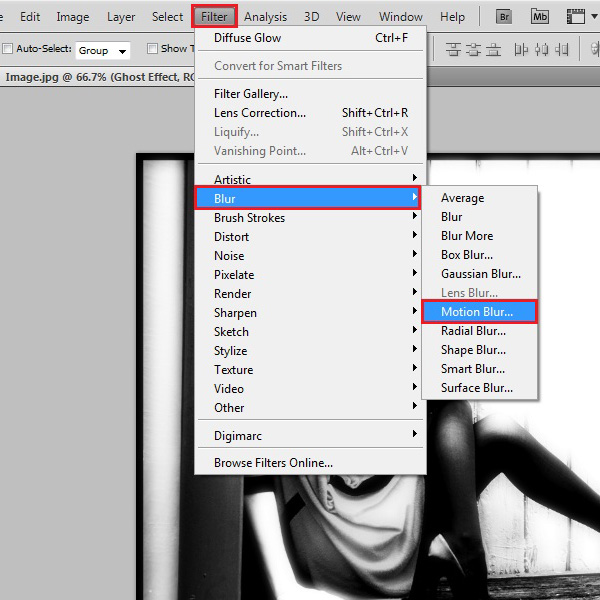
Now again go to the “Filter” menu and select the “Blur” option from the list. Now click on the “Motion Blur” filter from the menu to apply it on the image.
Step # 17 – Choose Blur Settings
In the Motion Blur settings panel, choose the “Angel” to “0 degree” and “Distance” to “5 pixels”. Now click on the “OK” button to apply the filter on the image.
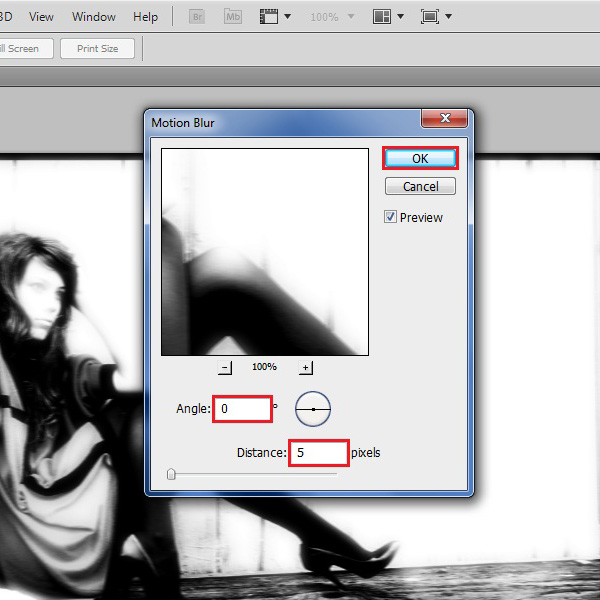
Step # 18 – Select the Eraser Tool
Click on the “Smart Filter” mask layer and select the “Eraser” tool from the menu. Now carefully remove the excess Glow area around the girl’s image.
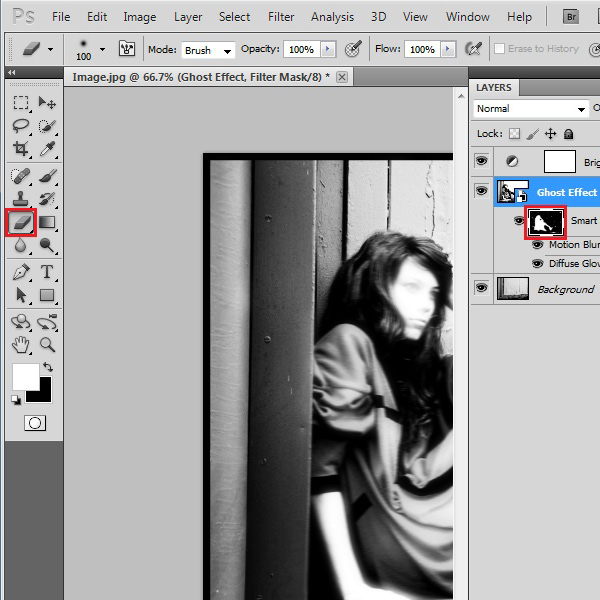
Step # 19 – Open the Blending Options
Once the background image is cleared, right click on the “Ghost Effect” layer and select the “Blending” option from the menu.
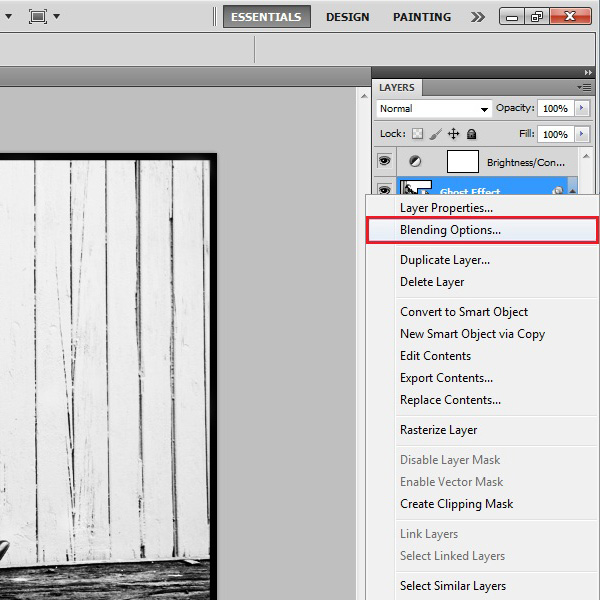
Step # 20 – Change the Blending Options
In the Blending options panel, decrease the “Opacity” level to “75%” and select the both halves of black and white points of the “Underlying Layer” to “200” by pressing the “ALT” key from the keyboard. Now click on the “OK” button to apply these settings.
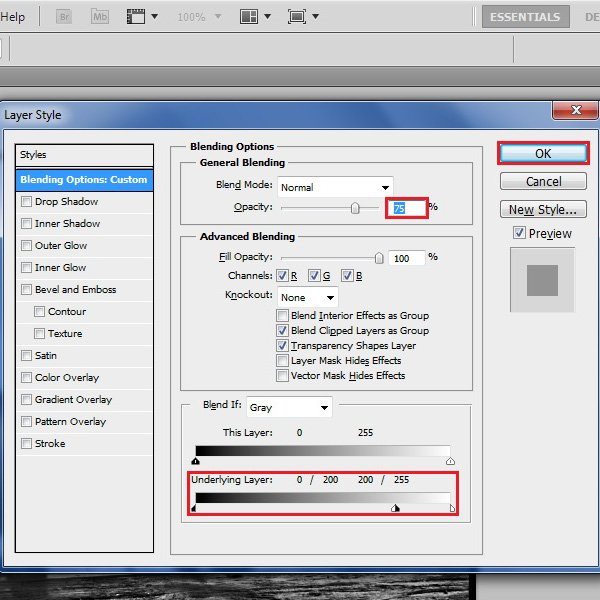
Step # 21 – Go to the File Menu
Now go to the “File” menu and click on the “Open” option from the list.
Step # 22 – Open a Grunge Background
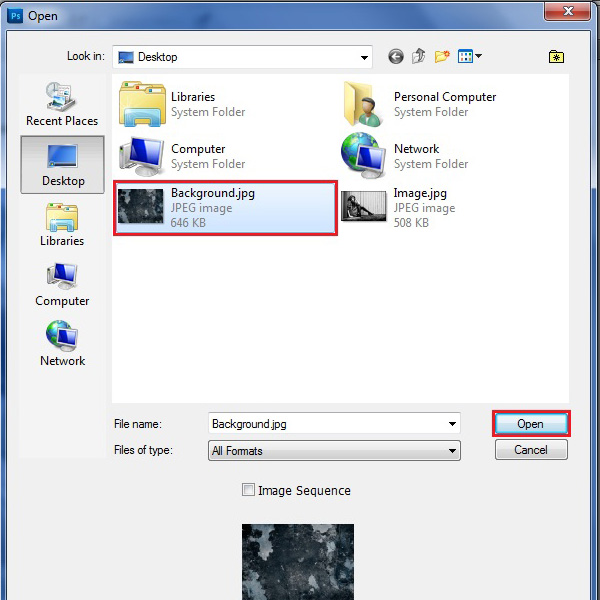
Choose a “Grunge background” from the Browsing menu and click on the “Open” button to load it.
Step # 23 – Modify the Grunge Background
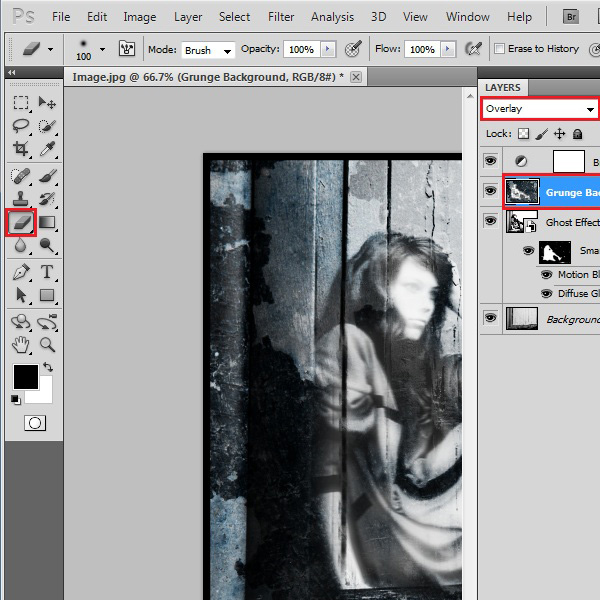
Now drag this background image over the Ghost Image and change the name of this layer to “Grunge Background”. Change the “Blending mode” to “Overlay” and adjust its placing according to the Image. Now select the “Eraser” tool from the menu and clear the Girl’s image by removing the background marks over it.
 Home
Home