Adobe Photoshop; is one software many people enjoy working with because of the number of tools and options it gives them to play around with. It is the ideal software that must be used when working on picture editing, trying to create various icons or transform images into brilliant results. Even though working with Photoshop may appear to be complex and difficult at first, once you gain a crisp understanding of its functions and options, you will be left with nothing but a great experience and the amazing opportunity of making your images stand out amongst others of its kind.
In this tutorial, you will learn how to create a gold text effect from scratch in Photoshop.
Step 1 – Typing out text
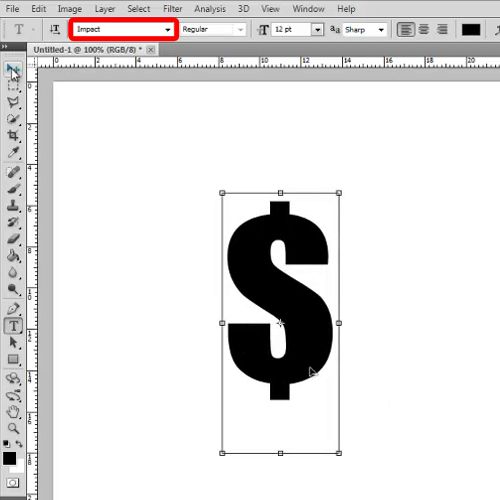
In order to create a gold text effect in Photoshop, you will firstly need to select the “text” tool and type in your text you would like to use for this image. In this tutorial, we would be using the option titled “Impact for” the font and use the dollar sign as the basis for this text effect. You will need to Increase the size of the text and align it to the centre of the canvas in order to proceed.
Step 2 – Using layer options
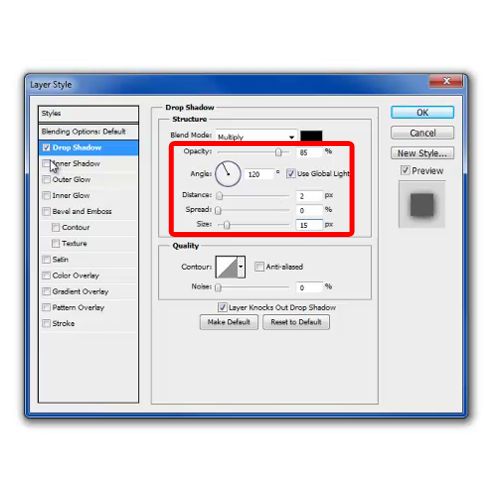
Next, you will have to open up the layer style options. First of all, move over to the drop shadow tab. Here, you must change the Opacity to 85%, Distance to 2 pixels and Size to 15 pixels. Now click on the “Ok” button in order to move onto the next step.
Step 3 – Using the Inner shadow tab
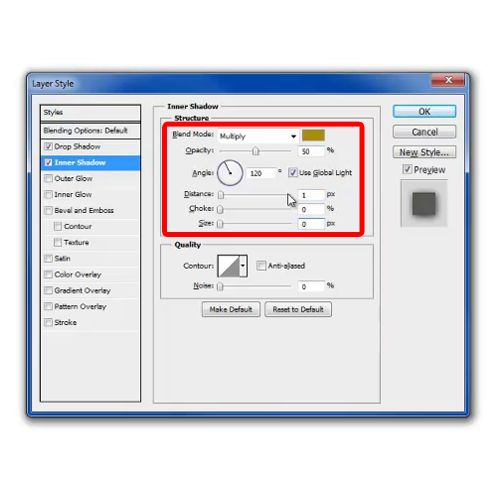
Once this has been done, open up the Inner Shadow tab. Here, you need choose “a98e0f” for the color fill; change the opacity to 50%, distance to 1 and size to 0 pixels. Once again, click on the “Ok” button.
Step 4 – Changing the blend mode
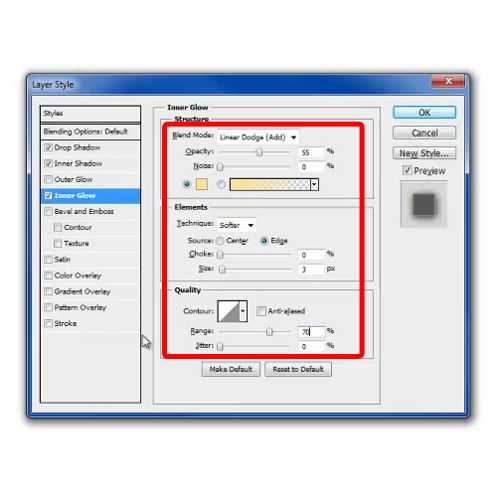
With that done, move over to the Inner Glow tab. Change the blend mode to “Linear Dodge (Add), opacity to 55%, choose “fae48f” for the color fill, change the size to 3 pixels and increase the Range to 70%.
Step 5 – Using the gradient overlay tab
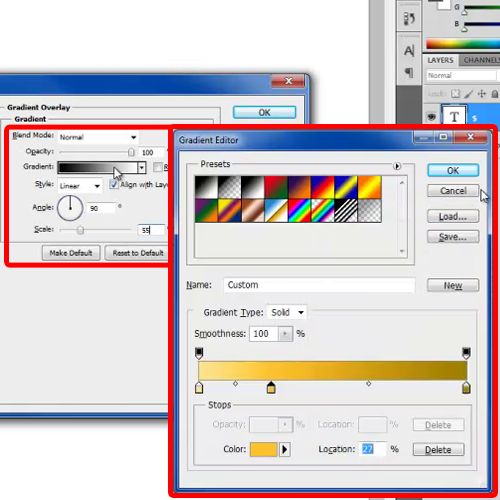
Once this is done, move over to the Gradient Overlay tab. Change the scale to 55% and open up the Gradient Editor window. For the slider towards the left side, choose “fae48f” for the color fill. Double click on the slider towards the right and choose “9f7f00” for the fill.
Now add a new slider towards the left side and choose “ffc230” for the color fill. Do remember to tick on the checkbox titled Reverse before closing the window.
Step 6 – Working on the background
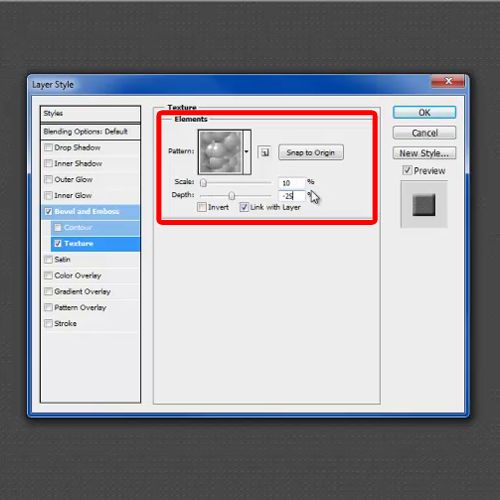
Now that we’re done with the text effect, we will need to start work on the background. Click on the background layer, choose “444444” for the color fill and apply it. Now open up the Layer Style options, move over “Texture”, choose “Bubbles” for your texture, change the Scale to 10% and Depth to -25%.
Step 7 – Adding a new layer
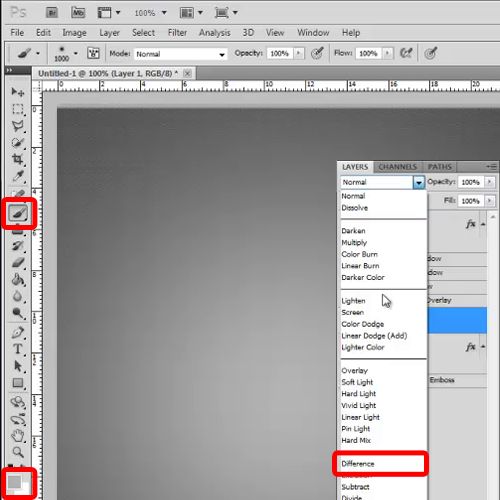
Now add a new layer, pick up the brush tool, change the hardness of the brush to 0%, choose “8b8686” for the color fill, increase the size of the brush and apply it at the center of the layer. Once this is done, change the Blend Mode of this layer to “Difference” and your procedure is absolutely complete.
You can even add these text effects on different images while picture editing in Adobe Photoshop.
 Home
Home