In this tutorial, you will learn how to create a print design for a t-shirt using Photoshop.
Before we get started, you would need to download the following brush packs which have been used for the designs in this tutorial:
Crack Brushes:
http://brusheezy.com/brushes/1442-crack-brushes-i
Phobia Brushes:
http://brushsoulz.com/phobia-brushes-by-xavier
Step 1 – Configuring the document settings
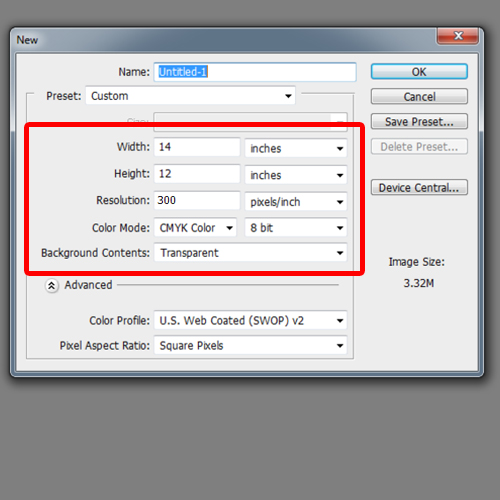
First of all, let’s open up a document and configure the settings. For the size, you would want something that’s a bit larger than an A4 paper. So for now, we will keep the size 12 inches by 14 inches Make sure the resolution you are working with is 300 dpi and the color mode is CMYK.
Step 2 – Adding the text
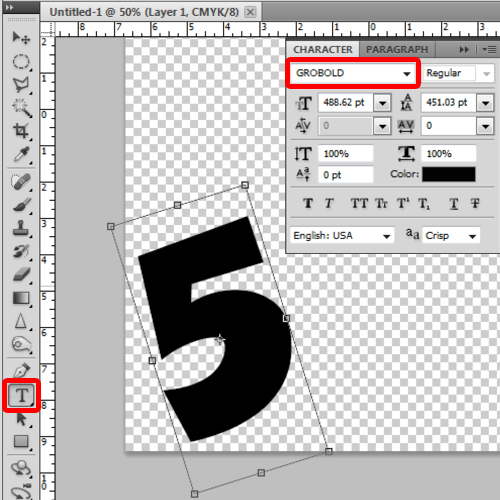
In our design, we will primarily work with a number. So let’s pick up the type tool and insert the number 5 on the canvas. For this tutorial, we have used the font named Grobold. Now let’s change the color of the font to black, press CTRL T and increase the size of the text. With that done, lets tilt the font a bit and move it towards the right side of the canvas.
Step 3 – Rasterizing the text
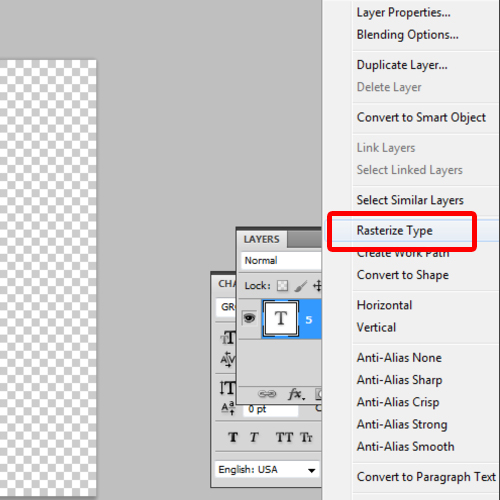
Next, we will right click on the type layer and “rasterize” it.
Step 4 – Using the magic wand tool
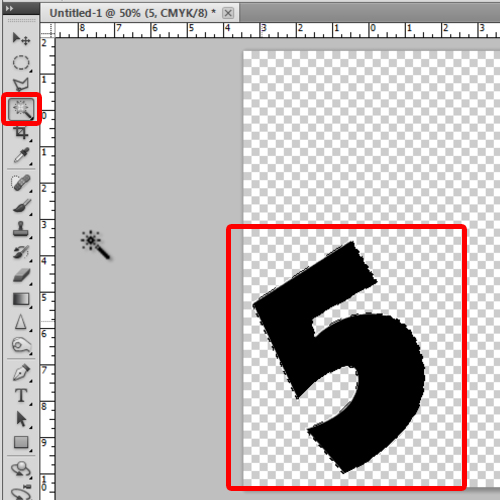
Now let’s use the magic wand tool to make selection of the number.
Step 5 – Using Brush Packs
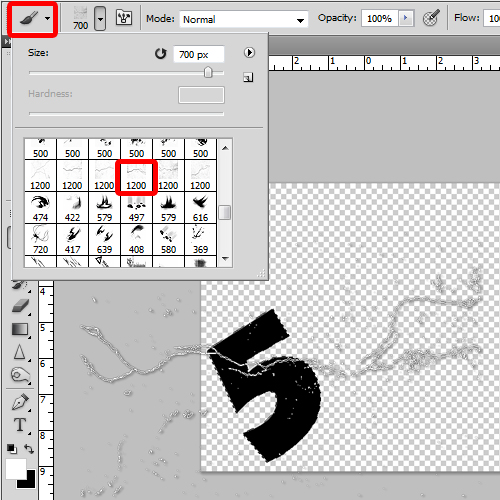
With that done, let’s pick up the brush tool and choose the crack brush from the option
We have decreased the size of the bush and applied it horizontally between the number. Notice that we have selected a white color for the brush. By making a selection, notice that the brush will only be applied within the boundaries of that selection. Once done, simply press “Ctrl+D” to deselect.
Step 6 – Adding effects for the backdrop
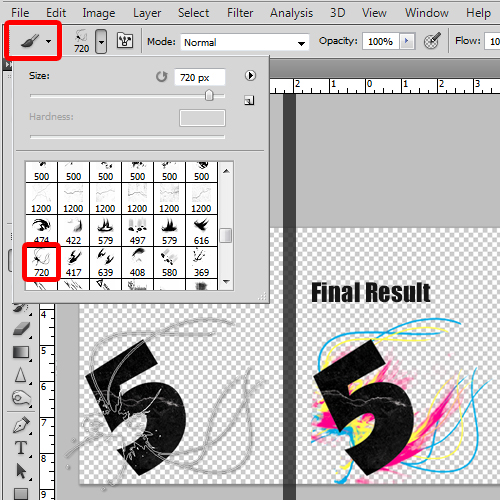
Now let’s create a new layer and rename it “color”. Drag this layer at the bottom. Here we will apply a number of brushes that will blend with the number. For this purpose, we have downloaded the brush set named “phobia paint”.
With that done, we will apply different brushes from the pack in different sizes behind the number. First we have used the blue and yellow color followed by a different brush from the set applied in “magenta” color. The idea is to give an artistic splash look.
So this is what we have so far.
Step 7 – Adding a splash effect to the text
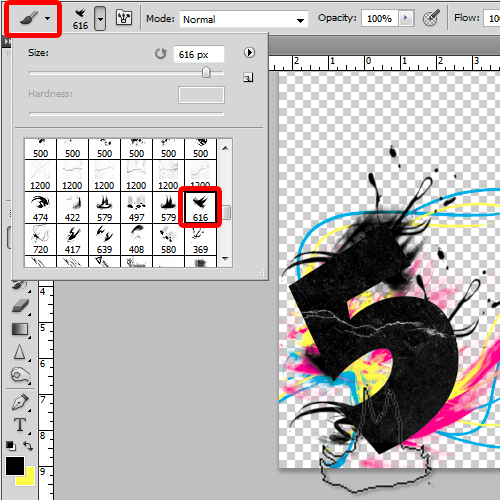
Next, we will create a new layer above the “color” layer and use the “urban scrawl” and phobia paint brush packs to add to the design around the number. Therefore, we will use the same color for brush as the number, which in this case is black. Now we will apply the different brushes around the edges of the number, like so.
You can play around with the idea and use different brushes to add to the artwork. This is what we came up with at the end.
Step 8 – Bringing the artwork on a T-shirt
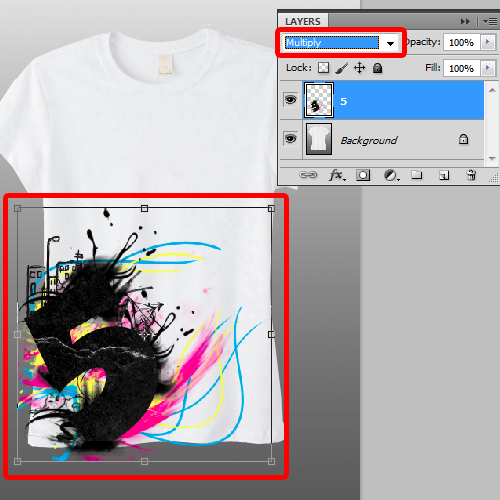
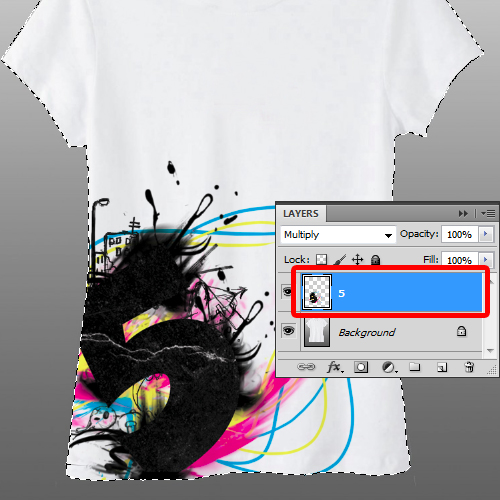
Once the design is ready, we will fit it on the t-shirt to see how it looks. Here we have a sample stockphoto of a plain t-shirt. You can easily get your hands on such stockphotos from sxc.hu. Let’s bring the artwork here and adjust the placement of the design on the shirt. With that done, let’s change the layer mode to “multiply”.
Step 9 – Making a preview screen
Lastly, we will use the magic wand to make a selection around the t-shirt. This will help us remove the extra parts of the design. This way you can preview how your design would fit into the t-shirt. You can even play around with the placement of the artwork to get a better idea of what will fit in well. For us, our design is now print ready.
 Home
Home