With Photoshop, you can easily find such effects for photos which bring out the best in the image. You can use your imagination and bring it to reality in the way you want to. You can play around with various effects and let your creativity run wild. Here we will show you a simple technique and use the comics effect to add a unique touch to your image.
Follow the step by step guide to learn how to create a retro comic book effect in Photoshop.
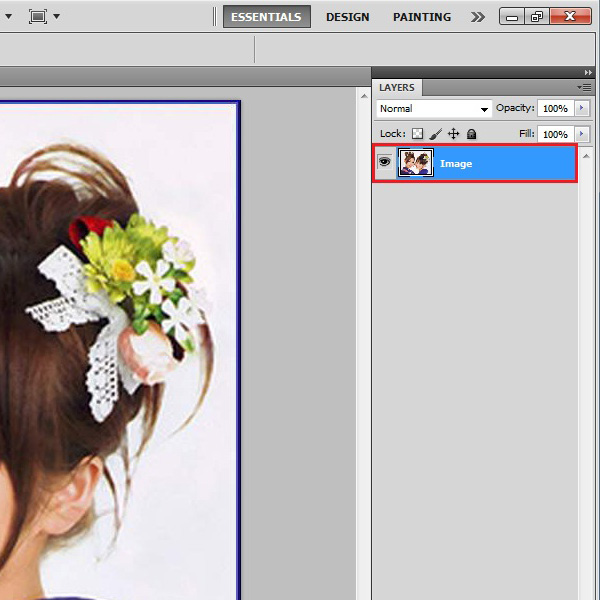
Step # 1 – Load an Image
In the first step, launch Adobe Photoshop and load an image on which you want to work on. Use an image with a simpler background like the image used for this tutorial. It must be noted that the effect and the overall output might vary according the image selected.
Step # 2 – Adjust the Levels of the Image
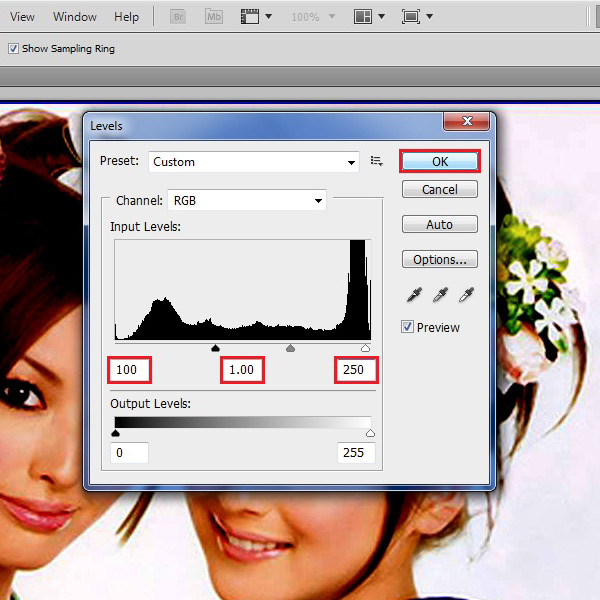
After loading the image, go to the “Image” menu, select “Adjustments” and click on the “Levels” option from the list. In the level settings panel, set the “Input” level to “100”, “1.00” and “250” respectively. After changing these values, click on the “OK” button to apply it on the image.
Step # 3 – Apply the Film Grain Filter
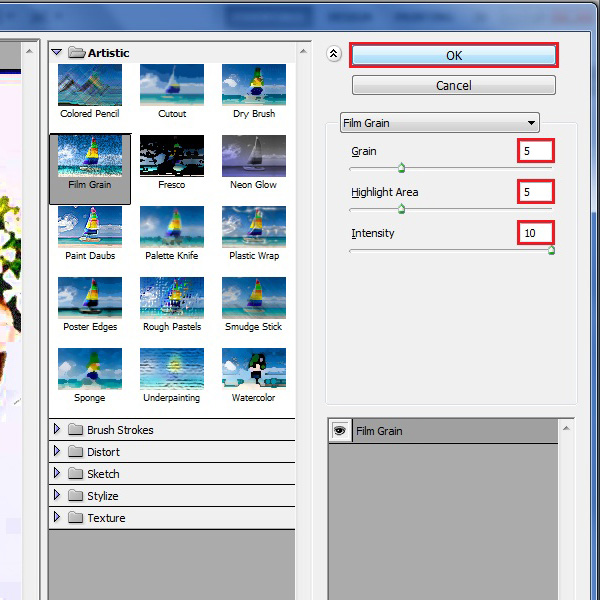
Now go to the “Filter” menu, select “Artistic” and click on the “Film Grain” filter from the list. In the filter’s settings panel, set the “Grain” level to “5 points”, the “Highlight Area” to “5 points” and the “Intensity” level to “10 points. After changing these values click on the “OK” button to apply the filter on the image.
Step # 4 – Apply the Color Halftone Filter
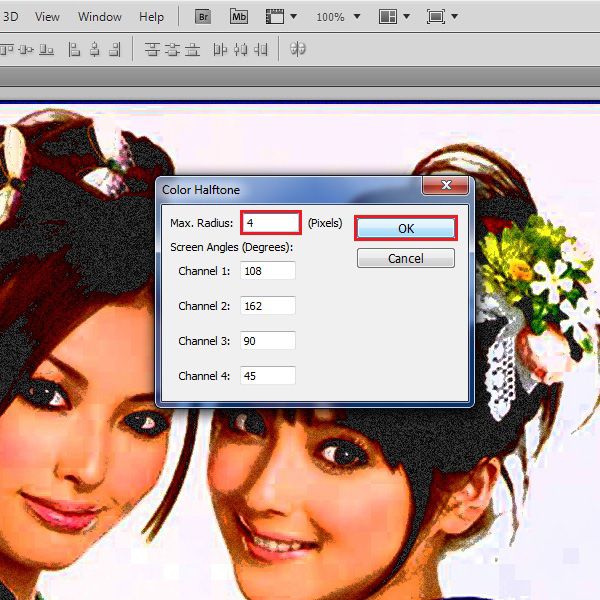
After applying the filter, duplicate the layer and change the name of the new layer to “Comic Effect”. Now go to the “Filter” menu, select “Pixelate” and click on the “Color Halftone” filter from the list. In the filter’s settings panel, set the “Max Radius to “4 pixels”. Leave rest of the options as it is and click on the “OK” button to apply this filter on the image.
Step # 5 – Apply a Stroke to the Image
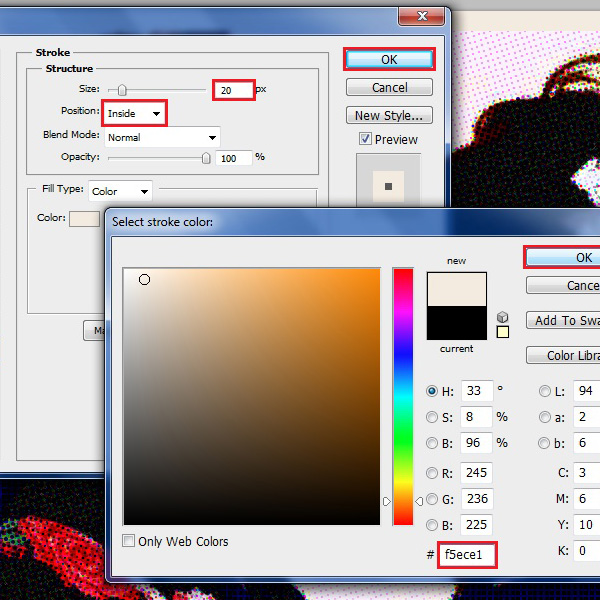
In the next step, change the “Blending Mode” of this layer to “Darken”. Now go to the “Layer” menu, move over to “Layer Style” and click on the “Stroke” option from the list. In the stroke’s settings panel, change the “Size” to “20 px” and its “Position” to “Inside”. Now choose the color by entering in “F5ece1” for the color code. Once done, click on the “OK” button to apply it on the image.
Step # 6 – Add a Box for Entering the Text
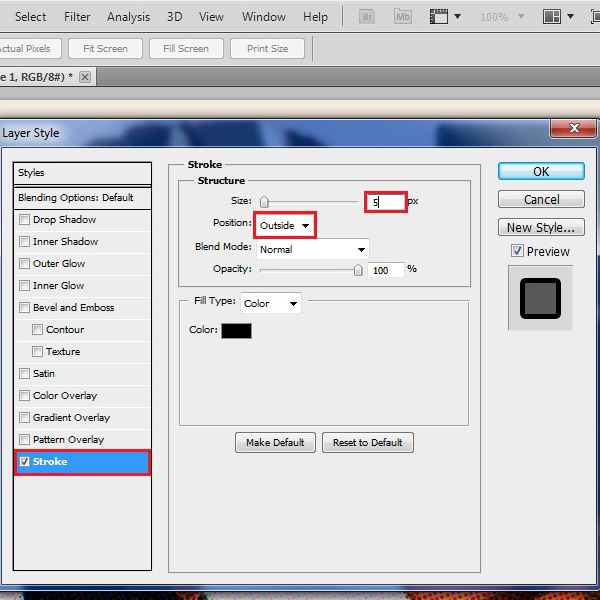
Now add a new layer and draw a rectangular shape in it. Once done, open the “Stroke” panel from the “Layer” menu. In the stroke’s settings panel, set the “Size” to “5 px” and the “Color” to “Black”.
Step # 7 – Apply a Gradient on the Text Box
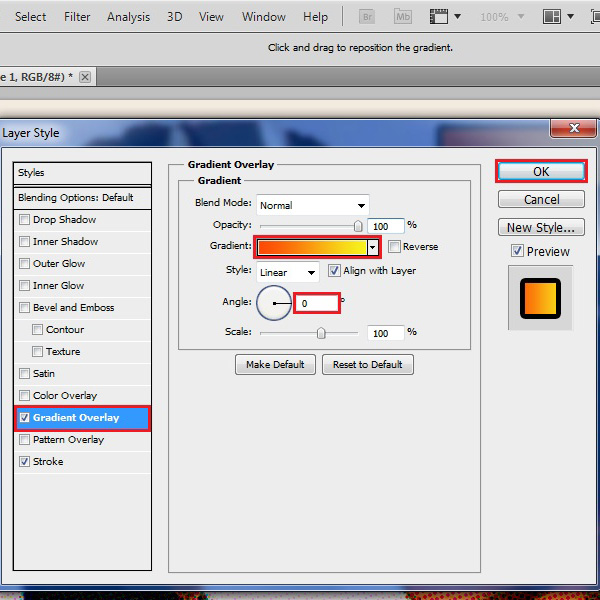
Now move over to the “Gradient Overlay” tab, choose an “Orange to Yellow” gradient color and set the “Angle” to “0 degree”. After changing these settings, click on the “OK” button to apply it on the image.
Step # 8 – Insert an Outline Frame
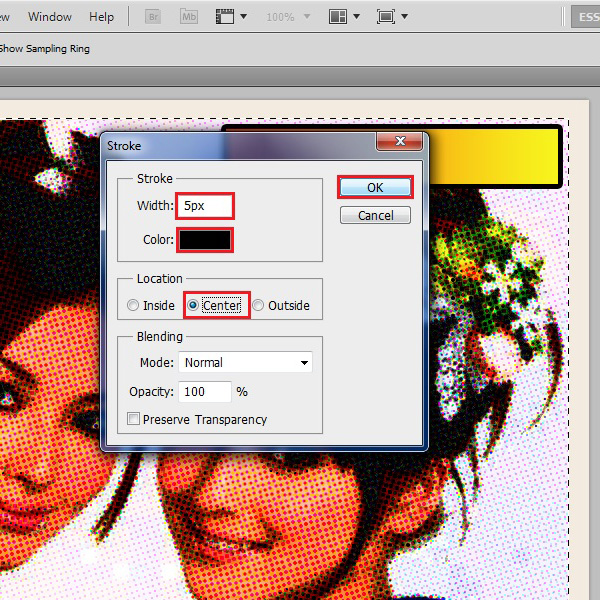
In this step, go to the “Edit” menu and click on the “Stroke” option from the list. In the settings panel, change its “Width” to “5 points”, “Color” to “Black” and its “Location” to “Center”. After changing these values, click on the “OK” button to apply it on the image.
Step # 9 – Insert your Text
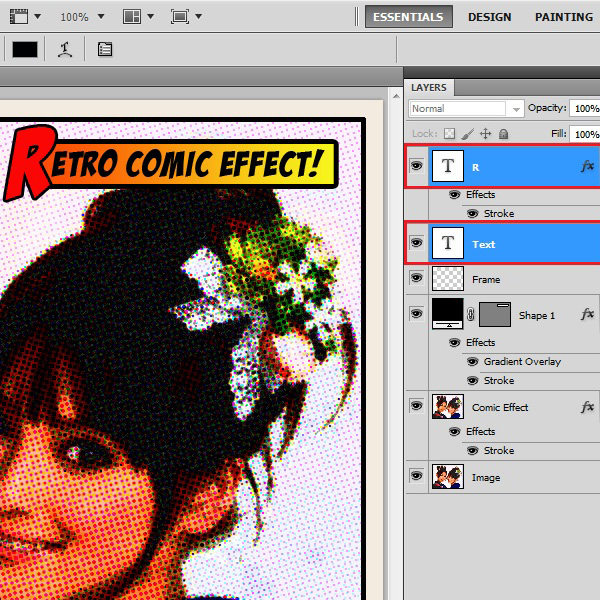
In the final step, add another layer for the text. Now select the “Text” tool from the menu and enter your desired text according to your image. And you’re done.
 Home
Home