Most of the people find it very interesting to keep a scrap book nowadays. Some people keep a digital scrap book of their interest as well. For designing a digital scrap book, we can take help from Adobe Photoshop. It helps us to easily design and create covers, textures, patterns and creative fonts to make our scrap book interesting and fun to read.
Here in this tutorial, we will guide you to design your own scrap book fonts according to your choice and interest. Just follow the step by step procedure to learn it.
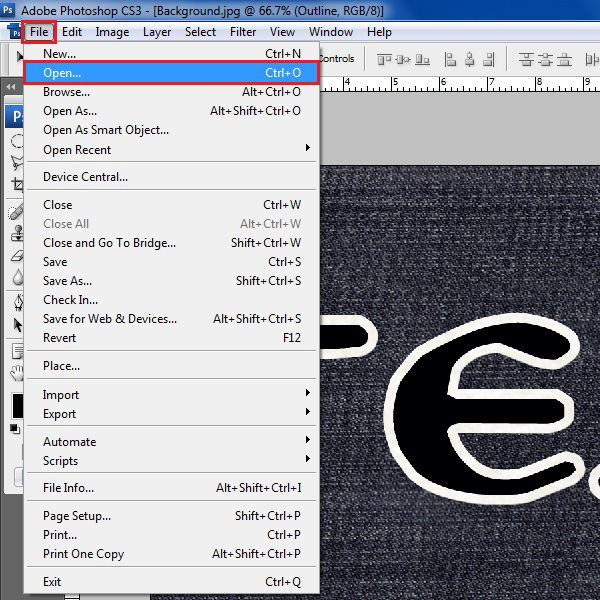
Step # 1 – Go to the File Menu
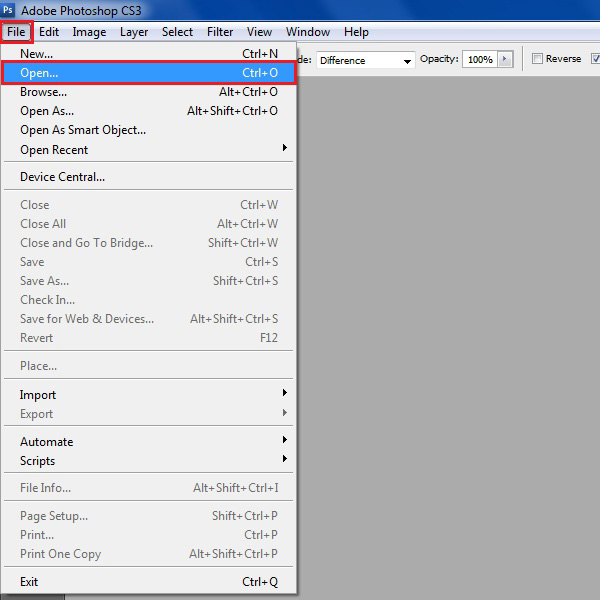
In the first step, launch Adobe Photoshop and go to the “File” menu. Click on the “Open” option from the list to open an image.
Step # 2 – Select a Background Image
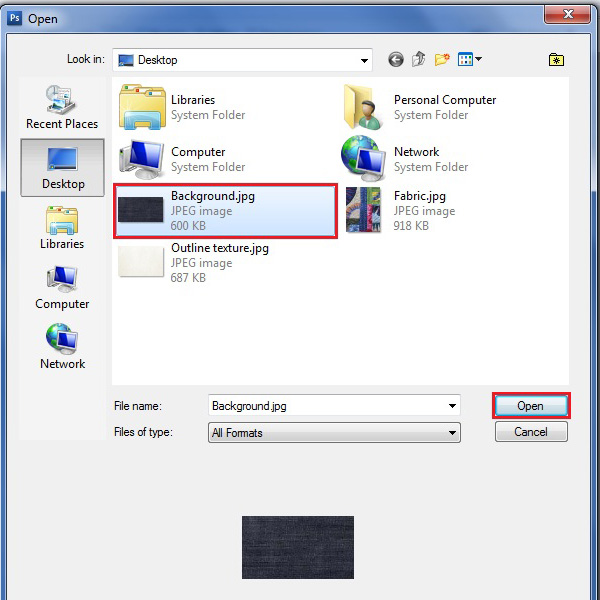
Select an image from the browsing window to open in Photoshop. Here we select the “Background” image from the menu and click on the “Open” button to load it.
Step # 3 – Enter a Text
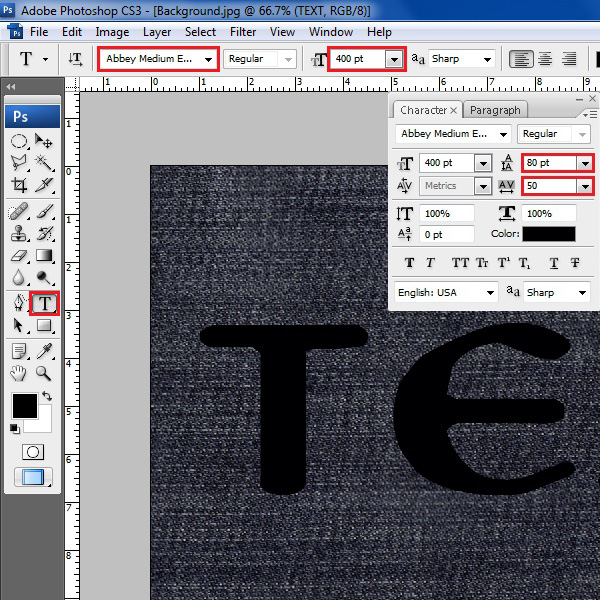
Select the “Text” tool from the menu and choose the “Abbey Medium Extended” for the “Fonts”. Select its size as “400 pt” and write any text. Choose its “Leading” option to “80 pt” and “Tracking” option to “50”.
Step # 4 – Open the Stroke Panel
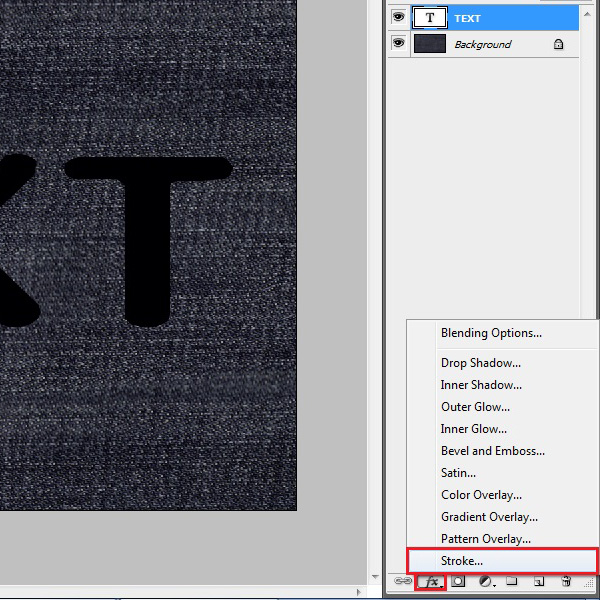
Now click on the “Add a layer” button which is located at the bottom of the layer’s panel. Select the “Stroke” option from the menu to open it.
Step # 5 – Adjust the Stroke Effects
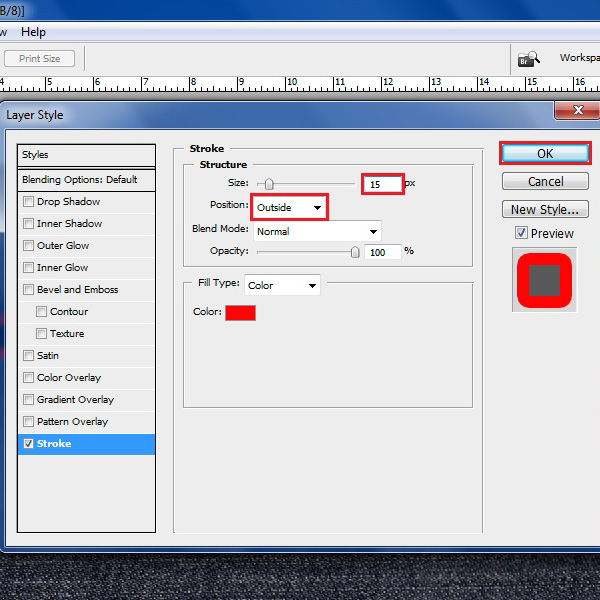
In this window, choose the “Size” to “15 px” and “Position” to “Outside”. Now click on the “OK” button to apply these settings on the layer.
Step # 6 – Create a Layer
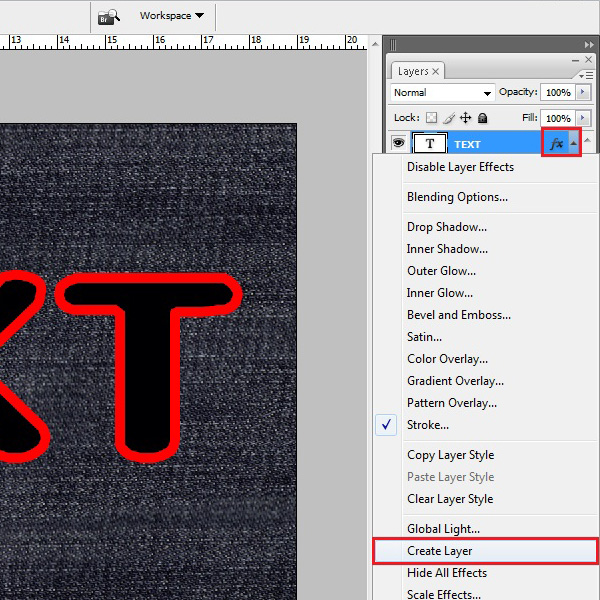
Right click on the “Reveal layer effects” option of the layer and select the “Create layer” option from the menu.
Step # 7 – Go to the File Menu
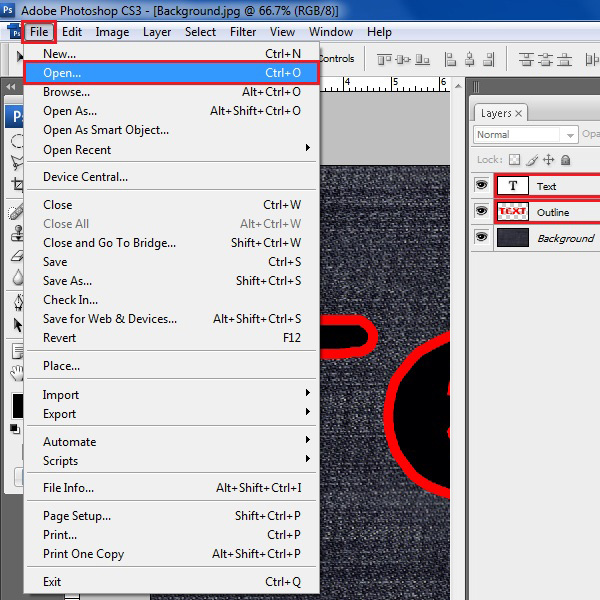
Now change the name of the layers as “Text” and “Outline” respectively. After changing their names, go to the “File” menu and click on the “Open” option.
Step # 8 – Open an Outline Texture
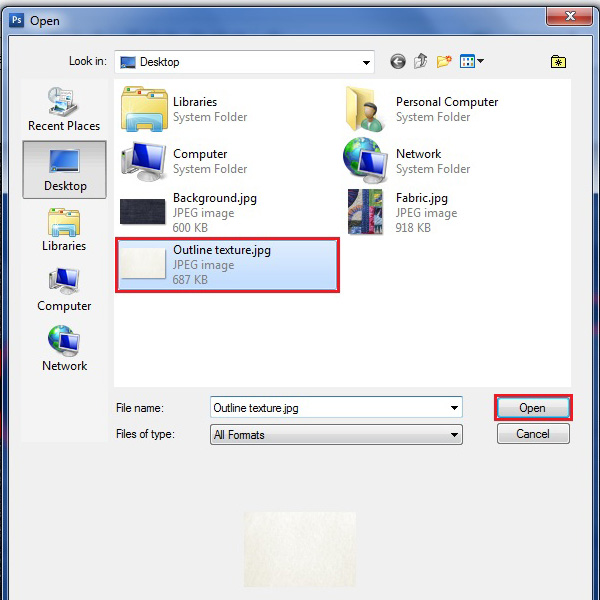
Select an “Outline texture” image from the browsing menu and click on the “Open” button to load it.
Step # 9 – Create a Clipping Mask
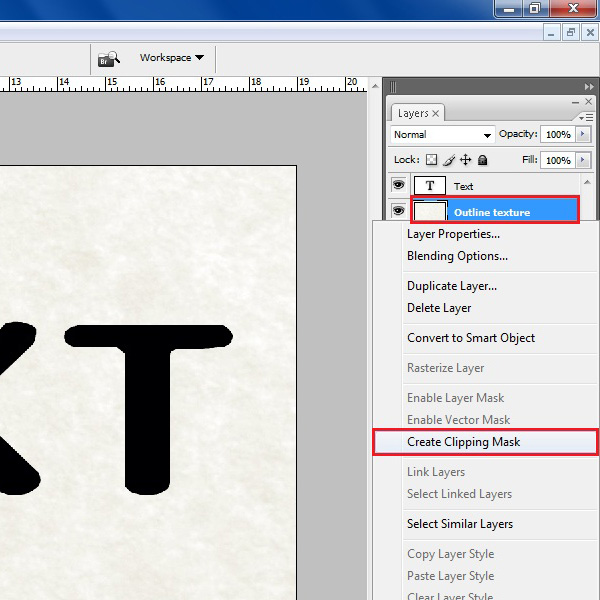
Drag the texture image over the main document and change its layer name to “Outline texture”. Now move this layer on top of the “Outline” layer, right click on it and select the “Create clipping mask” option from the menu.
Step # 10 – Open its Blending Options
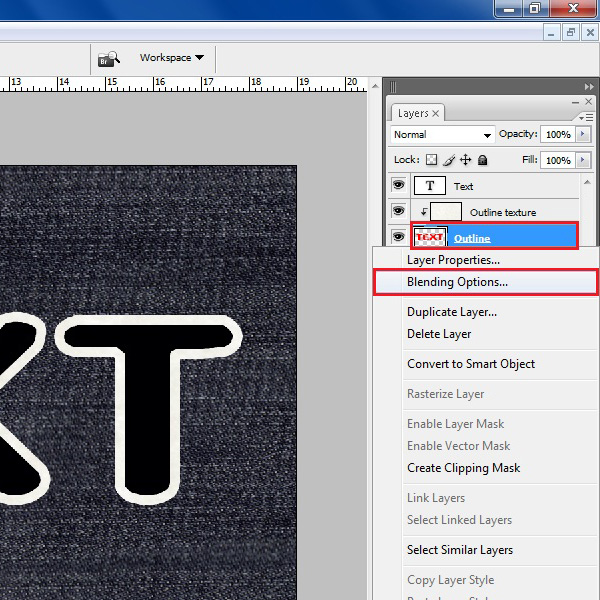
After clipping it, right click on the “Outline” layer and choose the “Blending option” from the menu.
Step # 11 – Adjust its Drop Shadow Settings
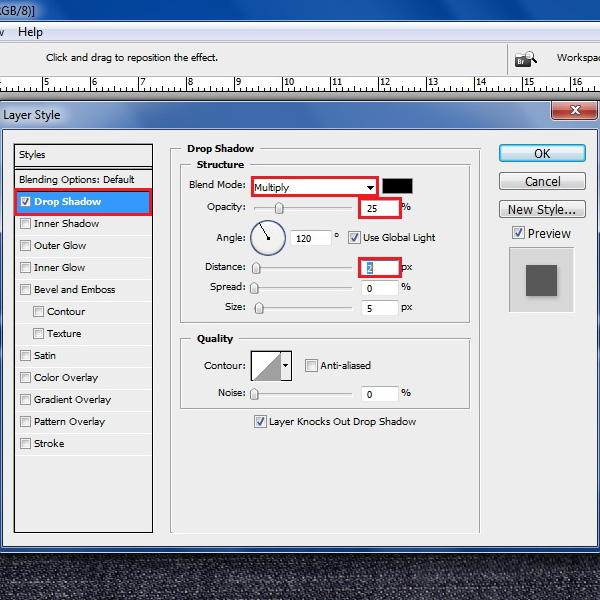
Move to the “Drop shadow” tab and change the “Blending mode” to “Multiply”. Now change the “Opacity” to “25%” and choose its “Distance” to “2 px”.
Step # 12 – Adjust its Bevel and Emboss Settings
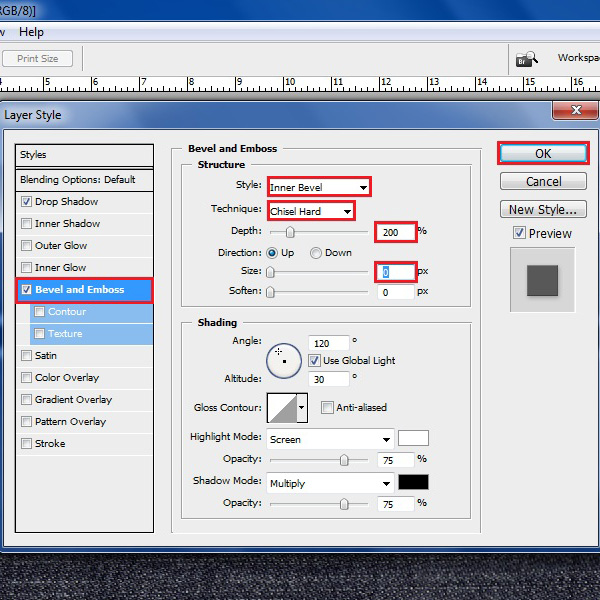
Now go to the “Bevel and Emboss” tab and choose the “Style” to “Inner bevel”. Select the “Technique” to “Chisel hard”, change its “Depth” to “200 %” and its “Size” to “0 px”. Click on the “OK” button to apply these changes on the layer.
Step # 13 – Go to the File Menu
Go to the “File” menu and select the “Open” option from the list to open another image.
Step # 14 – Select a Texture for the Text
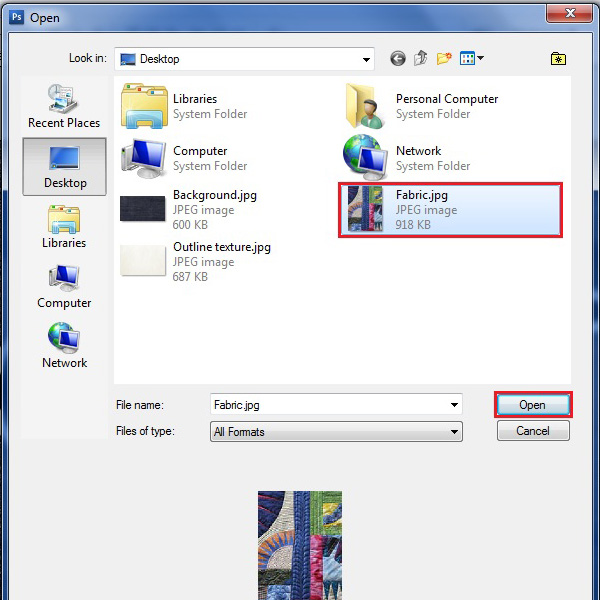
Now choose a “Fabric” texture image from the browsing menu to apply over the fonts. Click on the “Open” button to continue.
Step # 15 – Create a Clipping Mask
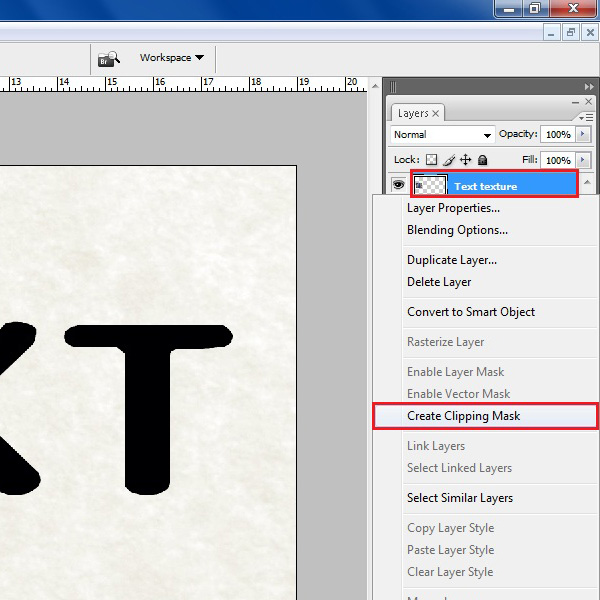
Drag this image over the main document and change its layer name to “Text texture”. Right click on this layer and select the “Create clipping mask” option from the menu.
Step # 16 – Add Multiple Texture Layers
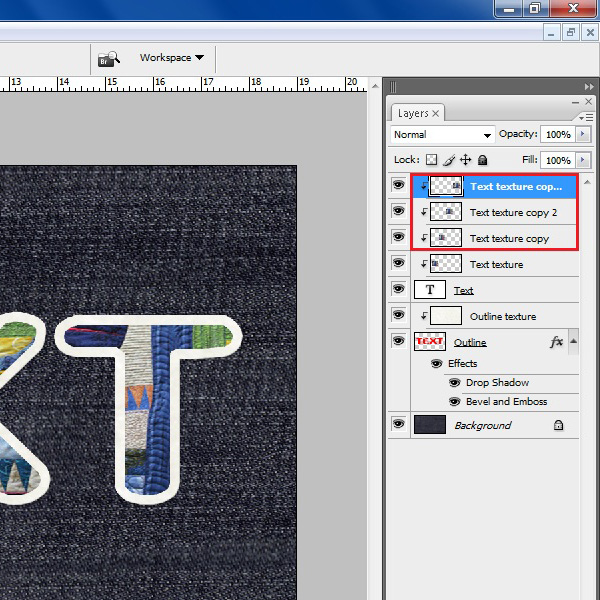
Now create a copy of this layer and move it over the next character. Similarly create duplicate layers for rest of the characters.
Step # 17 – Open its Blending Options
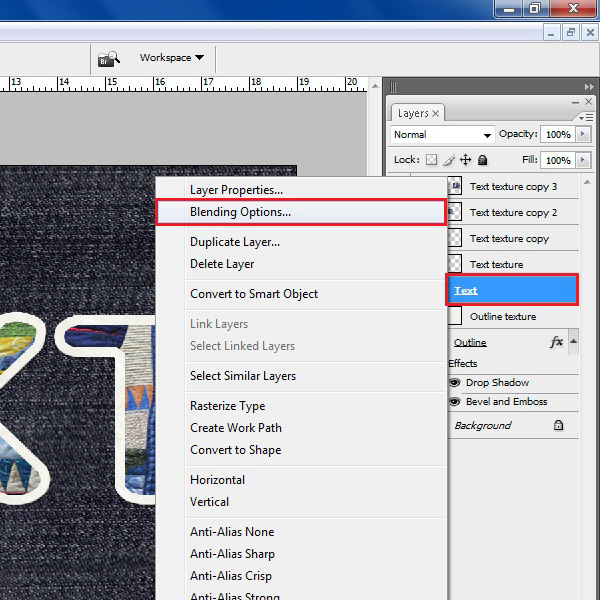
Now right click on the “Text” layer and open the “Blending options” from the menu.
Step # 18 – Adjust its Bevel and Emboss Settings
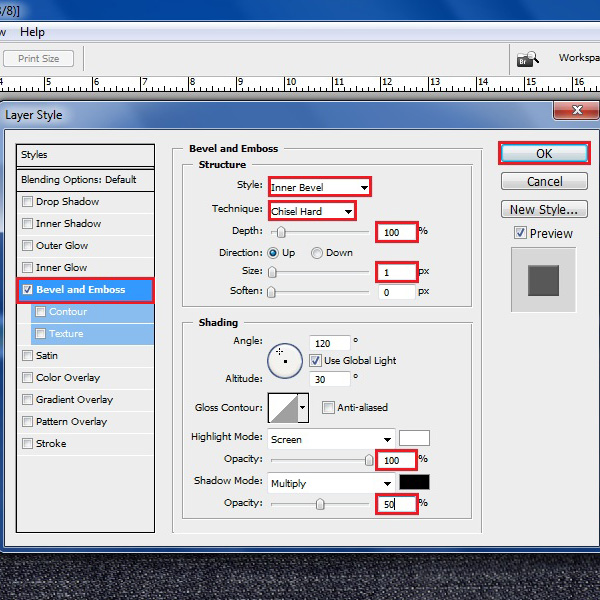
Go to the “Bevel and emboss” tab and choose the “Style” as “Inner bevel”. Now change the “Technique” to “Chisel hard”, “Depth” to “100 %” and “Size” to “1 px”. Choose its highlight mode’s “Opacity” to “100 %” and shadow mode’s “Opacity” to “50 %”. Click on the “OK” button to apply these settings.
Step # 19 – Add a New Layer
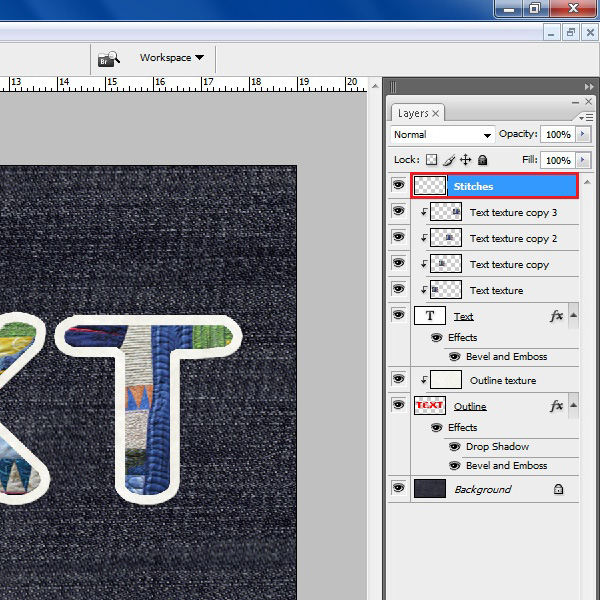
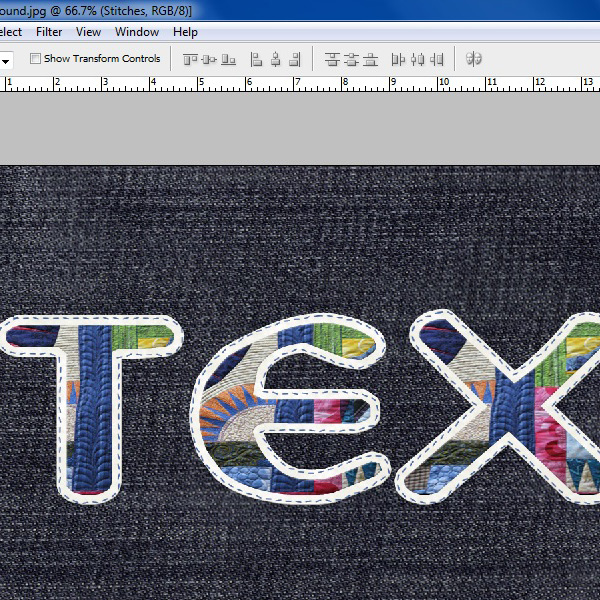
Insert a new layer and change its name to “Stitches”. Select this new layer and move it on top of all layers.
Step # 20 – Select the Text Layer
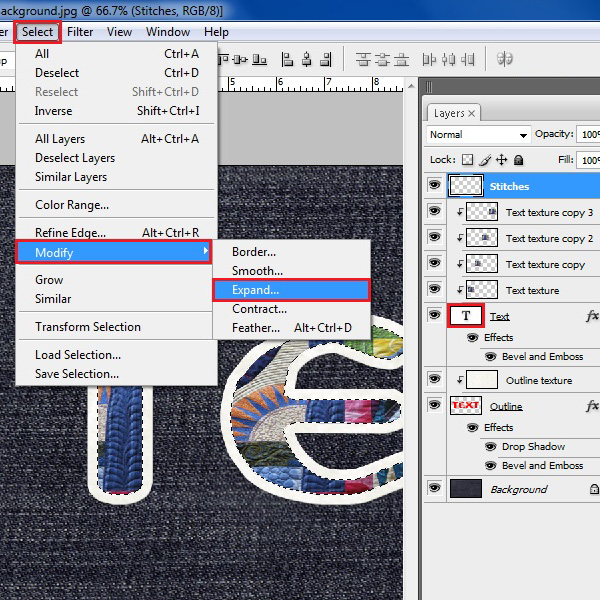
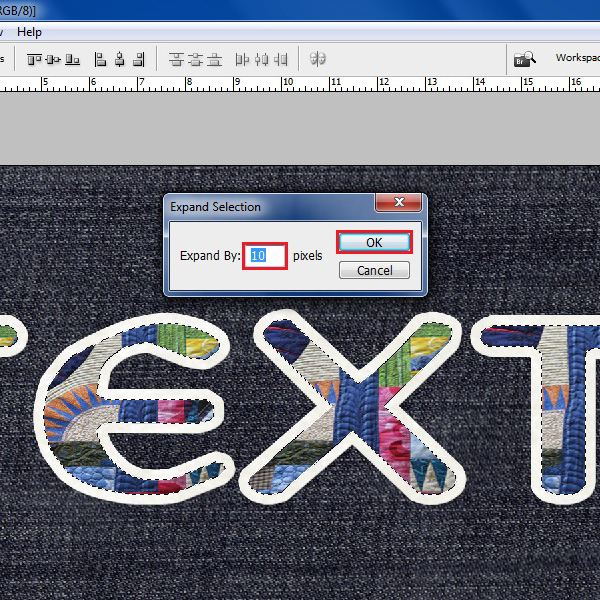
Now select the “Text” layer by holding “CTRL” key from the keyboard. Go to the “Select” menu, move over to “Modify” and click on the “Expand” option.
Step # 21 – Select the Expansion Amount
In this window, choose “10 px” for the expansion and click on the “OK” button to proceed.
Step # 22 – Make a Work Path
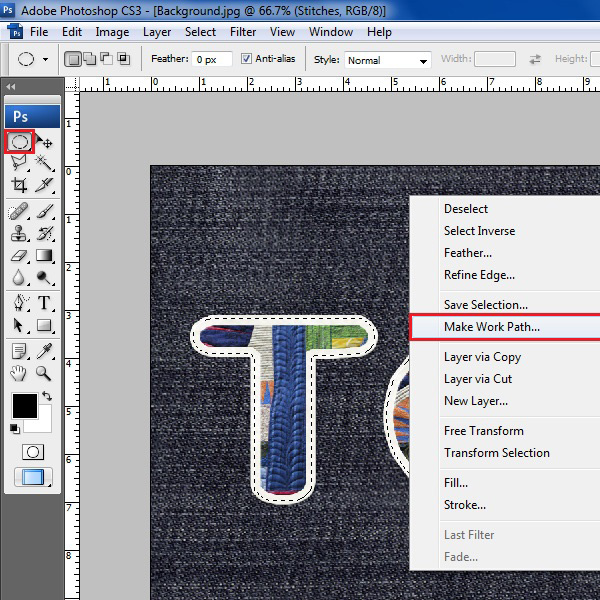
Select the “Marquee” tool from the menu, right click on the main page and select the “Make work path” option from the menu.
Step # 23 – Choose the Tolerance Amount
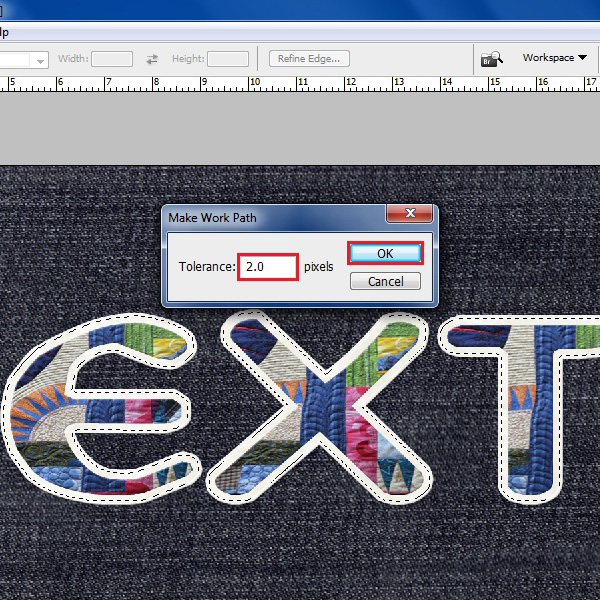
In the work path settings window, choose the “Tolerance” amount to “2.0 pixels” and click on the “OK” button to proceed.
Step # 24 – Open the Brush Settings Panel
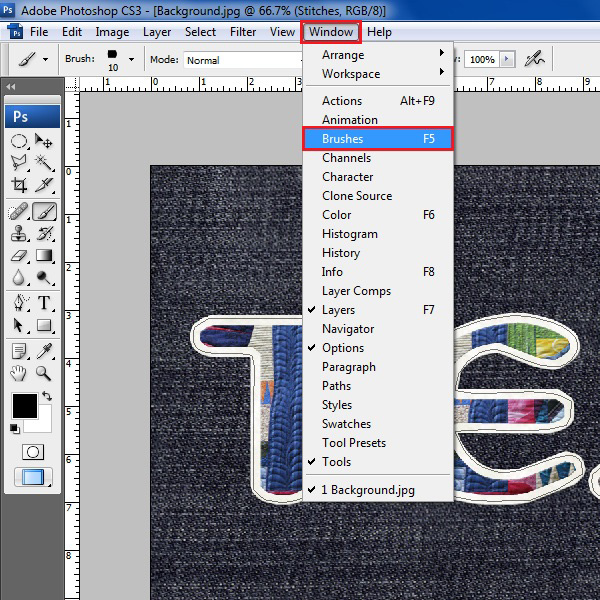
Now go to the “Window” menu and select the “Brushes” option to open the brush settings panel.
Step # 25 – Adjust the Brush Settings
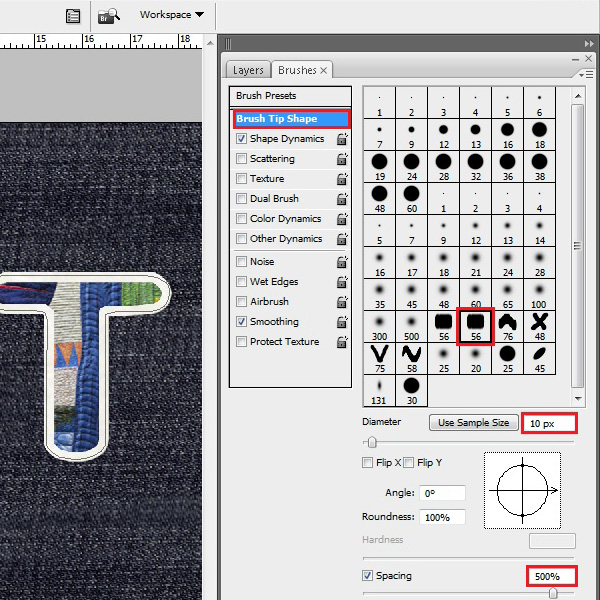
In the brush settings panel, select the “Stitching 2” brush type which is included in sample files. Now choose its “Diameter” to “10 px” and “Spacing” to “500 %”.
Step # 26 – Adjust Shape Dynamics
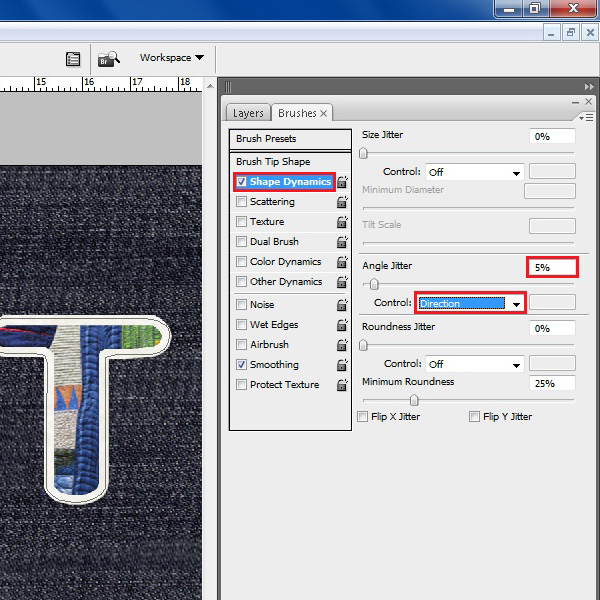
Go to the “Shape dynamics” tab and change its “Angle jitter” to “5 %” and “Control” to “Direction” from the menu.
Step # 27 – Make a Stroke Path
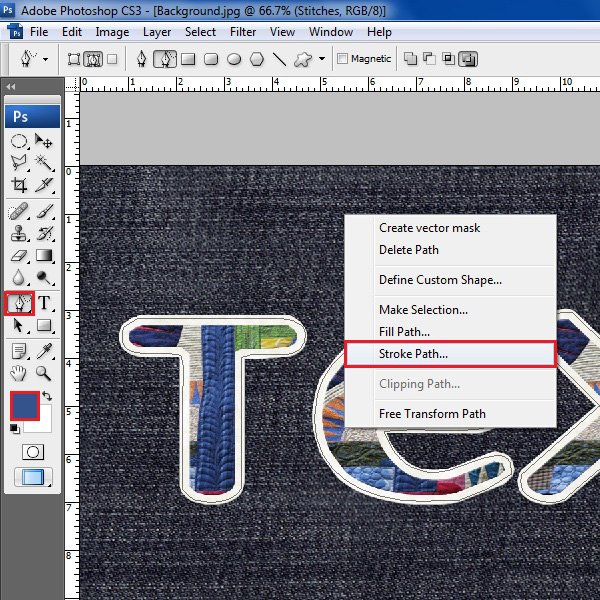
Pick a dark blue color from the text and select the “Pen” tool from the menu. Now right click on the main page and select the “Stroke path” option.
Step # 28 – Choose a Pen Tool
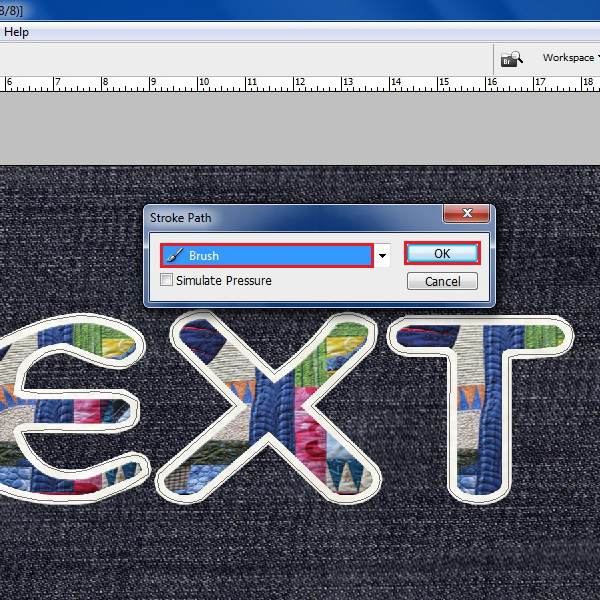
Now select the “Pen” tool from its drop down list and disable the “Simulate pressure” option. Click on the “OK” button to apply these settings.
Step # 29 – Clear the Image
In the final step, press “CTRL + H” keys from the keyboard to hide the selection path and your Scrap book characters are ready to use.
 Home
Home