This tutorial is going to show you how to create a great simple neon text in photoshop.
Step # 1 – Starting a New Document
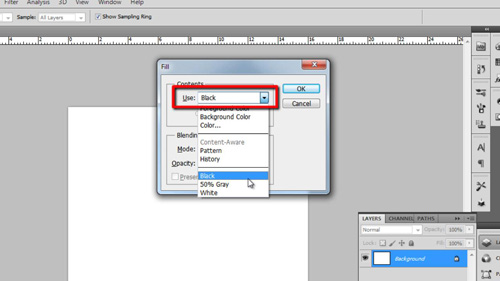
Start Photoshop and create a new document, set this to the “Default Photoshop Size” and click “OK”. Obviously you can add this neon text to your already existing image if you wish. Press “Shift” and “Backspace” on the keyboard and in the “Fill” window that appears select “Black” from the drop down box and click “OK”.

Step # 2 – Entering the Text
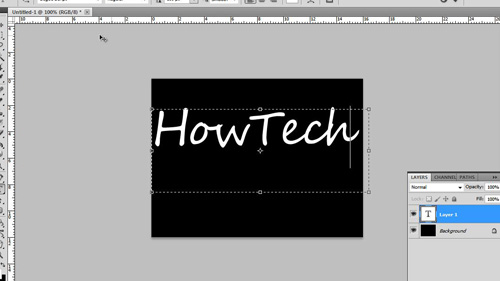
Select the text tool from the toolbar on the left. From the color swatch at the top select white, choose an appropriate size, here 100 works well. You will also need to choose a font, joined up text, such as that in “Segoe Script” works well. Drag the text box onto the canvas and enter your text. Use the move tool to reposition the text wherever you want it.

Step # 3 – Adding Color and a Glow
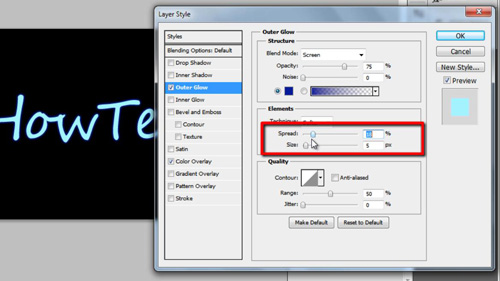
Double click on the text layer and the “Layer Style” window will appear. Select the color overlay button and click on the color selection option – choose a light color here, such as a cyan blue. Now click on the “Outer Glow” option on the left, click on the color selection button and choose a dark color to match the one we selected earlier, for example, here we are selecting a rich, dark, blue. Increase the “Spread” setting to “18”, “Size” setting to “35” and the “Opacity” to “90”. Click “OK”.

Step # 4 – Creating a Neon Tube Effect
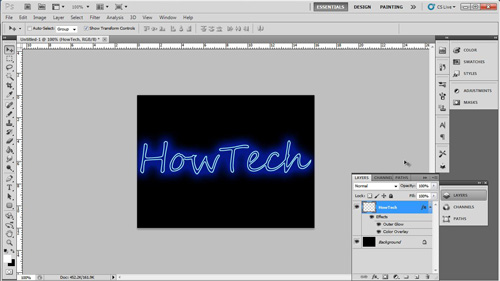
Right click on the text layer and click “Rasterize Type”. Press “Control” on the keyboard and click on the “T” icon in the layers panel. This will create a selection around the text. Now, click on “Select” in the main menu and navigate to “Modify” and click “Contract”. You will need to select a contraction setting, here we need 2 pixels, but this will vary depending on the size of your text. Click “OK”. Click the text layer and hit “Delete” on the keyboard and then press “Control” and “D” and that is how to create effective neon text in photoshop.

 Home
Home