In this tutorial you are going to learn how to add rain in photoshop.
Step # 1 – Creating a New Layer
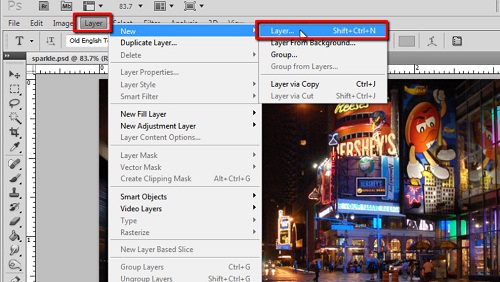
Open the photograph that you want to add the rain to. The effect will work best if it is a wet scene already, adding rain to a sunny photo with no puddles will look unrealistic. Click “Layer” in the main toolbar, navigate to “New” then click “Layer”. In the window that appears click “OK”.

Step # 2 – Adding a Background with Fibers
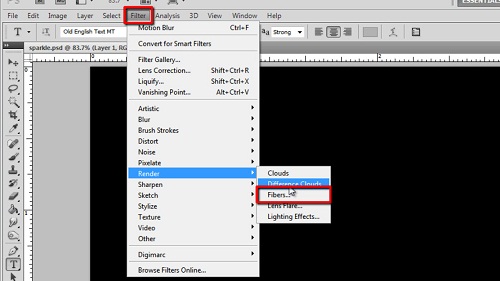
Press “Shift” and “Backspace” on the keyboard and the fill window will appear. In the “Use” drop down menu make sure “Black” is selected then click “OK”. In the main menu click “Filter”, navigate to “Render” and click “Fibers”. In the window that appears drag the “Variance” slider all the way to the right and click “OK”.

Step # 3 – Tweaking the Rain
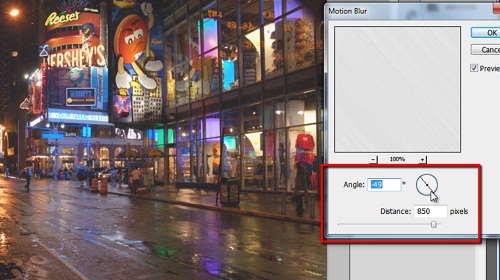
In the layers panel click on the “Opacity” option and lower the opacity. Keep lowering the opacity until the rain looks realistic. Here it looks about right at “15%” although this will probably be slightly different in your photo. Now click “Filter”, go to “Blur” then click “Motion Blur”. This is where you can really tweak the rain so it looks real, adjust the angle to change the angle of the falling rain. Distance generally looks better near the higher end of the slider – here about “850” works well. This is the simple process for simulating rain in photoshop.

 Home
Home