This tutorial is going to how you how to create smoke in photoshop which can be a fun effect to add to a photograph.
Step # 1 – Creating a New Layer
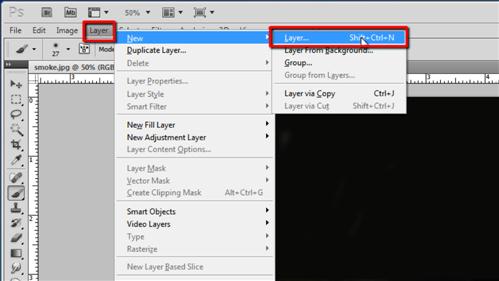
Start Photoshop and make sure that you have the image you want to add smoke to open, in this example we have a picture of a cigarette. Create a new layer by clicking “Layer”, navigating to “New” then clicking “Layer”. In the dialog box that appears click “OK”.
Step # 2 – Adjusting the Brush Settings
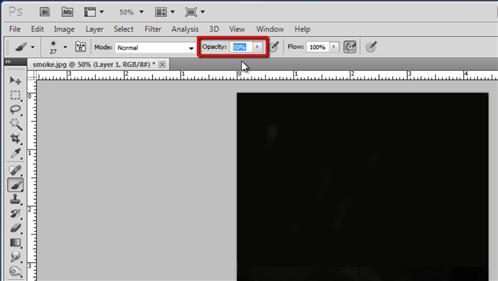
Select the brush tool from the tools available on the left. Set the “Opacity” of the brush to around 50% and use the color change option to select white as the foreground color. Click on the “Brush” tab on the right of the window and in the check boxes that appear make sure “Airbrush” and “Smoothing” are selected.
Step # 3 – Drawing the Smoke In
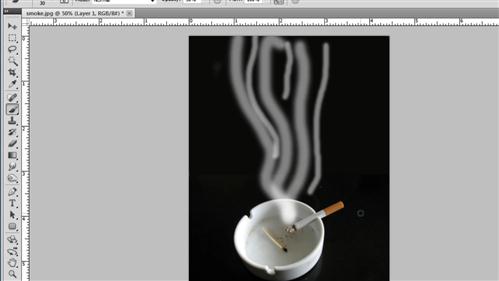
You are going to have to choose a brush size and what you select will depend on the resolution of your original image. Here around 60 pixels works well – aim for a similar looking size on your photo. Now draw some wavy lines away from the source of the smoke. This bit requires a bit of creativity. Now set the brush size to around half of the original setting – here 30 pixels, and draw some additional wavy lines.
Step # 4 – Adjusting the Shape
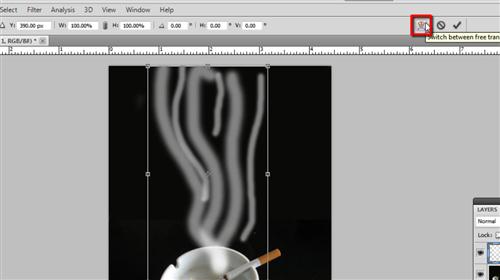
Now press “Control” and “T” on the keyboard and the smoke will be selected, click on the “Warp” icon on the toolbar to change the shape by sector. Use these to adjust the smoke until it takes on the shape you want.
Step # 5 – Maximising the Smoke
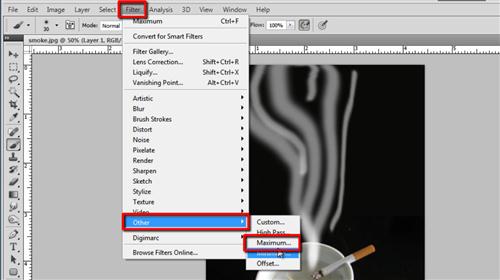
It still doesn’t look particularly realistic so go to “Filter”, navigate to “Other” then click on “Maximum”. Use the slider on the bottom to move from the far left, over to the right, essentially you just need to stop when the smoke looks just right. When done, click “OK” and that is how to create smoke in photoshop.
 Home
Home