Time lapse video is basically shooting a lot of images over a given length of time and then cramming them back together into a video that is shorter then that time.
Requirements.
• Pictures frames using DSLR camera or any camera with an interval timer function.
• Adobe photo shop.
Step 1 # loads your files into a stack.
Go to File > Scripts > Load Files into a Stack.
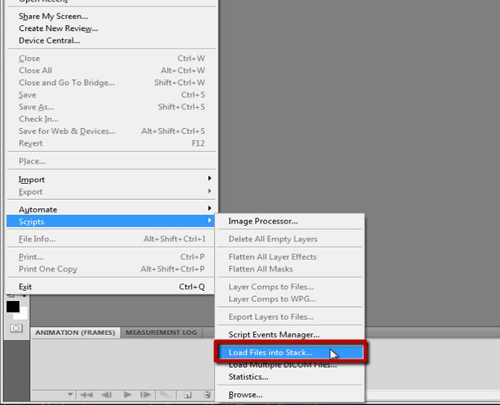
Locate your files. Wait then click OK.
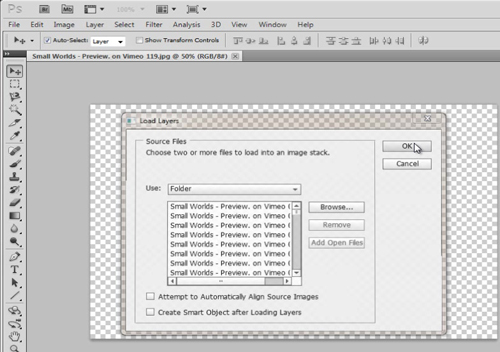
Step # 2 Making sequence.
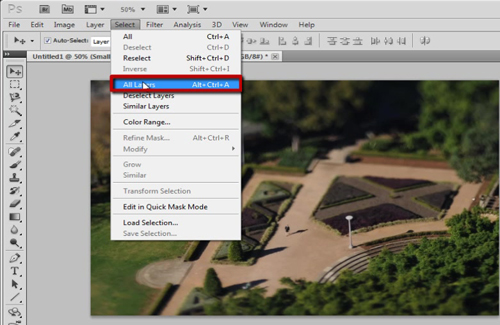
Select all the layers in your stack. Including layers panel or the animation panel.
Now click on the flyout menu of the Animation panel and then click Make Frames from Layers The frames for your video will now appear on the Animation panel.
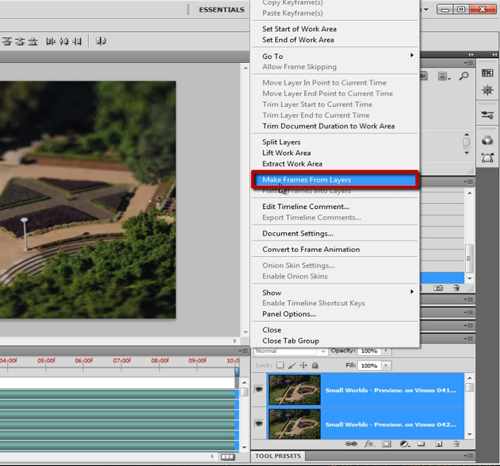
You can now convert your frames into frame animation by clicking again on the flyout menu of the Animation panel and then clicking on Convert to Frame Animation.
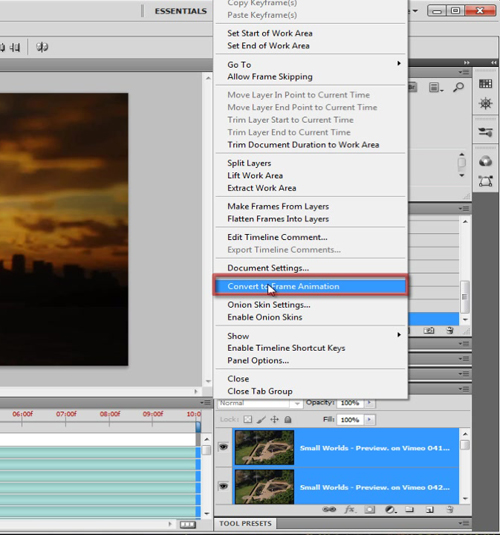
All frames are loaded in reverse. That’s because when we loaded the images into Photoshop as a stack. They were loaded sequentially into the Layers panel and thus they were loaded with the last photo being the top layer.
Now we have to fix this select all of your frames in the Animation panel and then click on the flyout menu then click Reverse Frames.
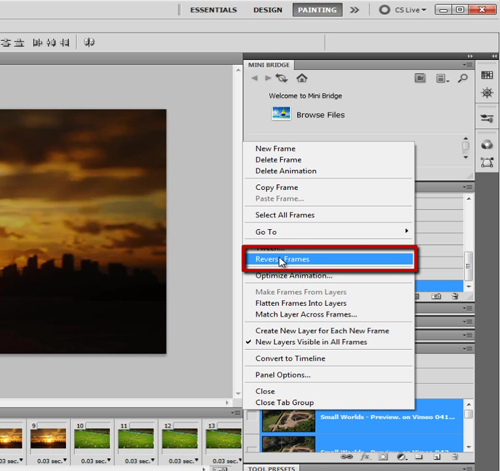
Now your frames are in the proper order. In the Animation panel, you can set the time between each frame. With all your frames selected, click on one of the small triangles on the bottom of each frame and select No Delay.
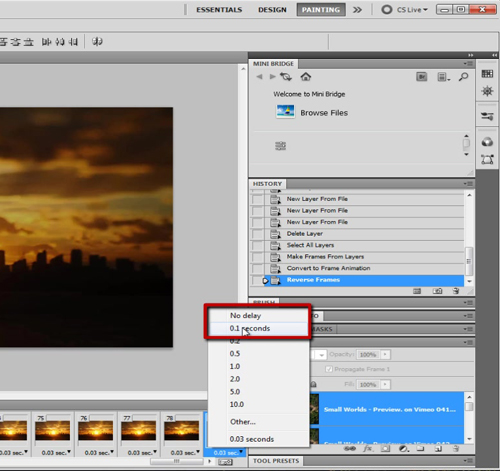
Step 3: Exporting the video
Now you can export the video. Click on File > Export > Render Video.
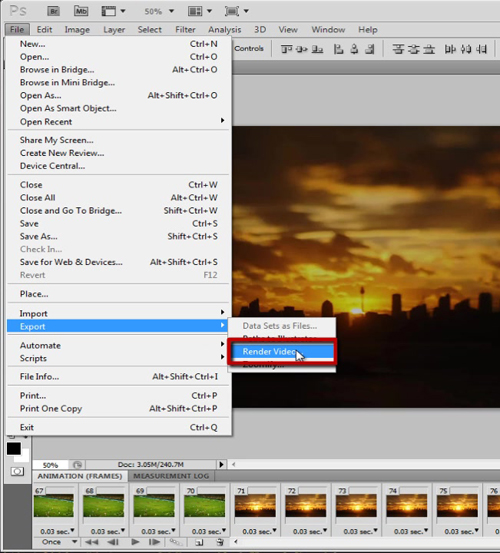
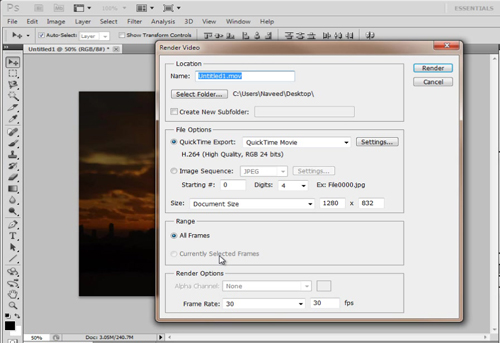
Pick the destination of your video on your computer, the file type of your video and the settings with which you’d like to produce your video. Wait for a few minutes and your video is now ready.
 Home
Home