In this tutorial, we will teach you how to design a sparkly logo for a jewelry shop in Photoshop.
Step 1– Writing the text
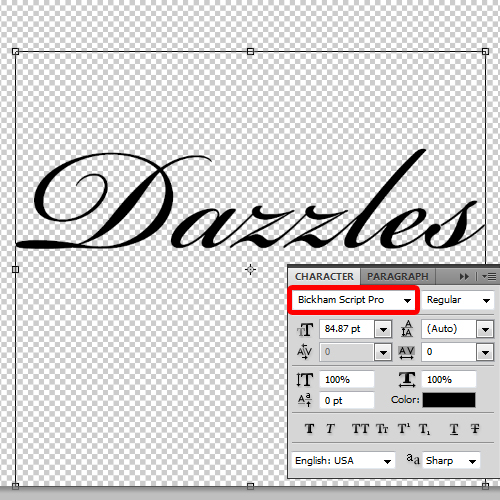
Over here, we will get started with the text first. For that, we will use the type tool to insert the name of the brand. Now change the font style to “Beckham script Pro”. With that done, increase the size of the text by pressing the Ctrl T key and using the corner placeholders to expand the text on the canvas.
Step 2 – Butterfly Silhouette Vector Stock Graphic
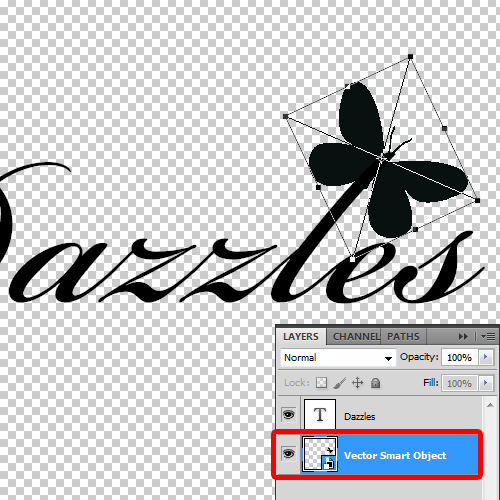
Now we will import a vector silhouette of a butterfly. You can download this vector stock graphic from blancodesigns.com.br.
Bring the vector image to Photoshop, tilt it and resize it according to the artwork. With that done, we will position the silhouette on the letter L. and drag the layer below the text layer. After that, rasterize both the text and the image layers.
Step 3 – Using the magic wand tool
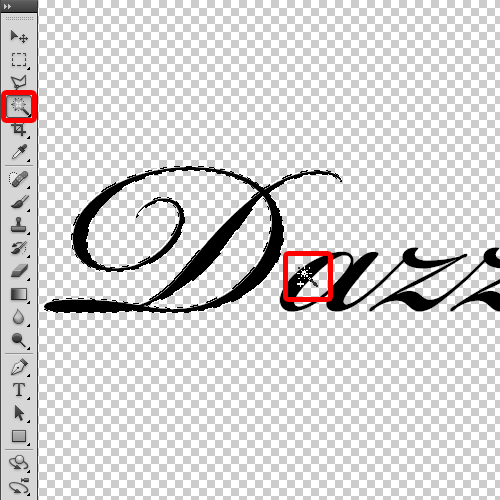
Next, use the magic wand to make a selection of the text. All you have to do is pick up the text and click on the rasterized text.
Step 4 – The clouds filter
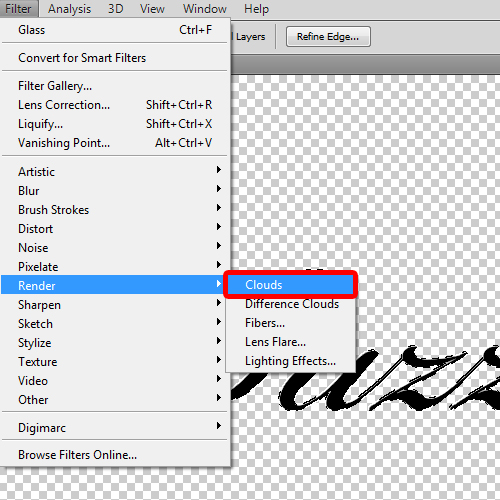
Once selected, go to the filters menu, move over to “render” and then click on the “clouds” option. Make sure the foreground color chosen is black and the background color is white otherwise the filter won’t work.
Step 5 – The Glass Filter
Now move to the filter menu once more, select “distort” and then click on the “glass” option. Leave the default values as it is and click on ok.
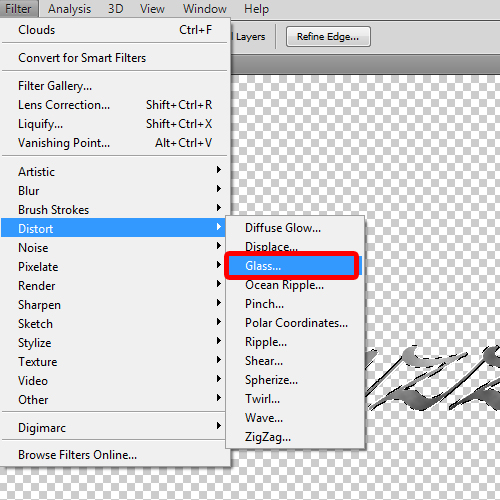
Step 6 – Opening up the curves option
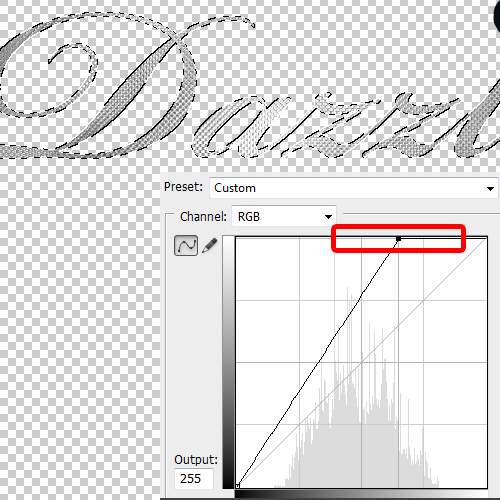
With that taken care of, adjust the white balance of the image. For that, move to the image menu, choose “adjustments” and then select the “curve” option. Just move the top placeholder of the curve towards the left side to increase the white balance. You can experiment with different values according to your artwork.
With that done, our text is ready. Now we will apply the exact same steps for the silhouette as well, adding the clouds filter, the glass filter and finally increasing the white balance.
Step 7 – Gradient Background
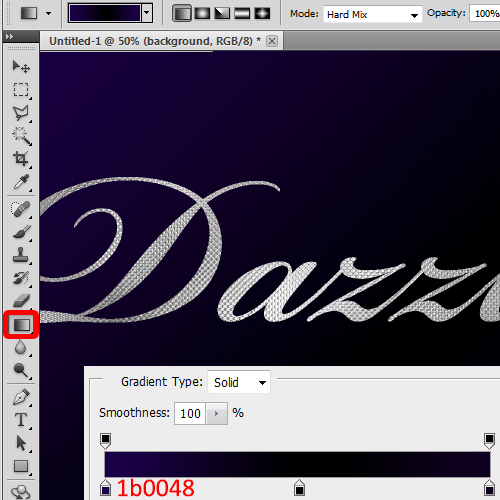
With that done, create a new layer and name it background layer. Here, we will use the gradient tool to apply a gradient on the background layer. We have basically applied a linear gradient, using dark purple for the right and the left side, while using black for the center. The color code for purple used is “1b0048”.
Step 8 – Adding stroke to text
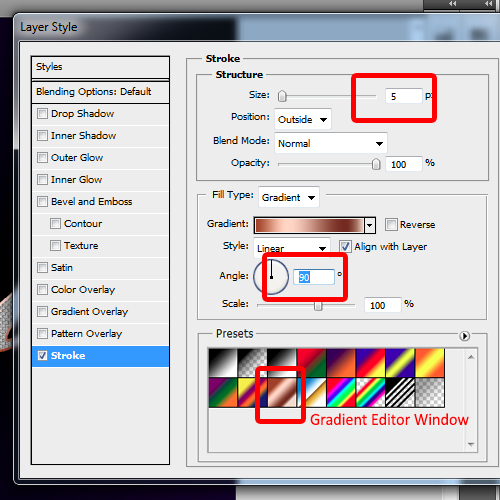
Now open up the blending options of the text layer. Here, select the “Stroke” option and change its fill type to gradient. With that done, select the copper gradient style from the options here. Next, change the size to 5 pixels and then change the angle to 90 degrees.
Step 9 – Bevel and Emboss
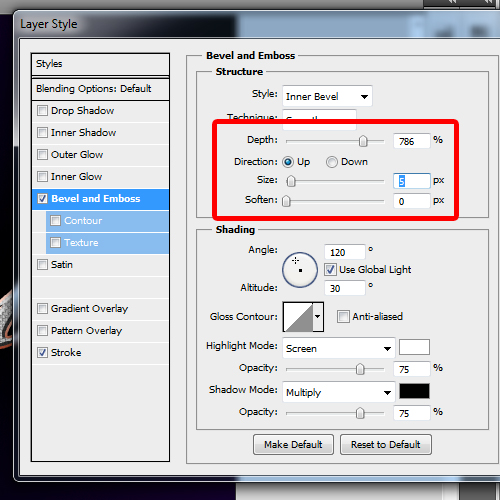
Now go to the “bevel and emboss” option and set the levels of depth to 786 % and size to 5 pixels. With that done, copy this layer style and paste it on the butterfly silhouette layer. You can make changes in the blending option settings according to the shape if needed.
Step 10 – Changing Hue/Saturation Levels
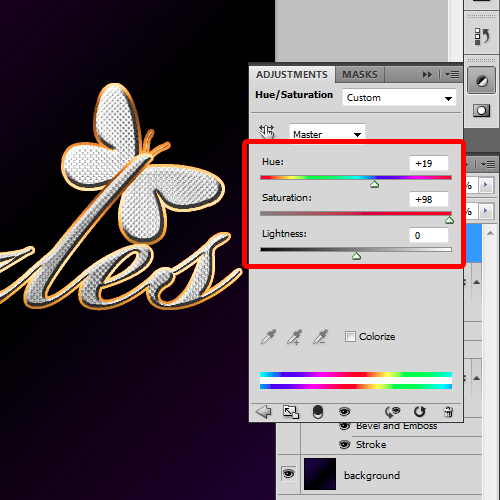
Once this is done, create a Hue/Saturation layer and adjust the bar so the outline of the logo looks golden. For this particular design, we have kept the Hue levels at positive 19 while the saturation level is kept at 98.
Step 11 – Brushes and Text
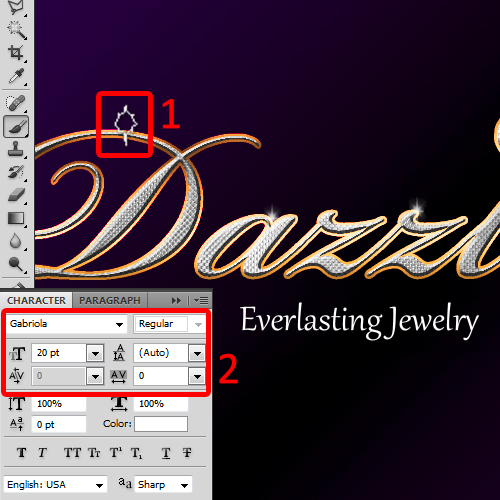
Now create a new layer and use the brush tool to add shining sparkles on the logo. We have already downloaded and installed the glitter and sparkles brush pack from brusheezy.com. Apply the brush on the corners of the artwork and change the color to white.
In the end, we will use the type tool to insert the tagline and the logo is ready. We have used Gabriola for the font, keeping the size at 20 points and white for the color.
Our sparkly jewelry shop logo is now ready.
 Home
Home