In this tutorial, we will guide you how to do color correction in Premiere CS6.
Adobe Premier Pro is an efficient NLE platform which gives you a wide range of color correction tools.
Color correction is usually applied for gaining or reducing RGB curves depending on the shoot. It fulfills the script’s demand and also adds an artistic touch to your project.
For this tutorial, we will be working on wild life footage.
Step # 1 – Select Fast Color Corrector
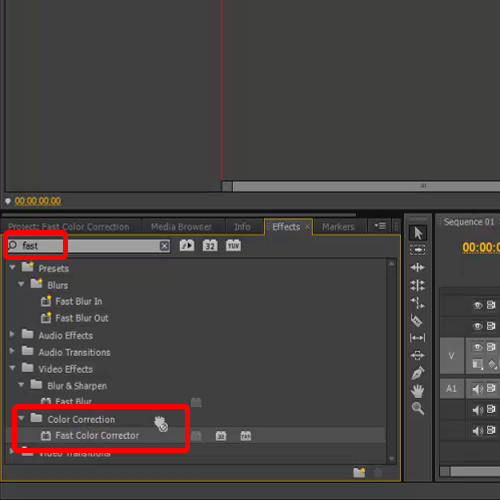
To begin with the color correction process in Premiere CS6, go to the effect panel and type “Fast” in the search filed. You will be promoted with the “Fast color Corrector” video effect within the color correction bin. Just Drag & Drop the effect on to the video layer.
Step # 2 – Open Color Correction
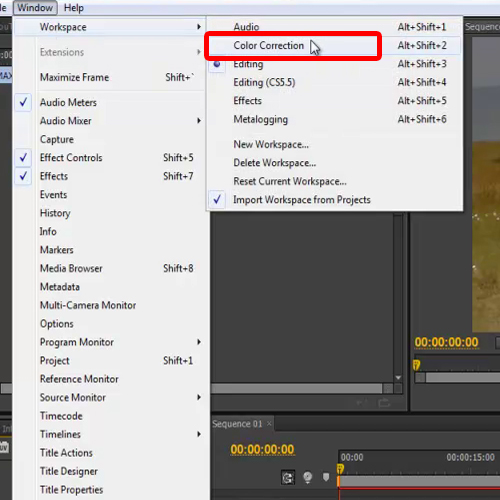
Now select the Color Correction workspace from under the windows tab. This interface is more suited for the kind of work we’ll be doing in this Premiere tutorial.
Step # 3 – Choose output mode
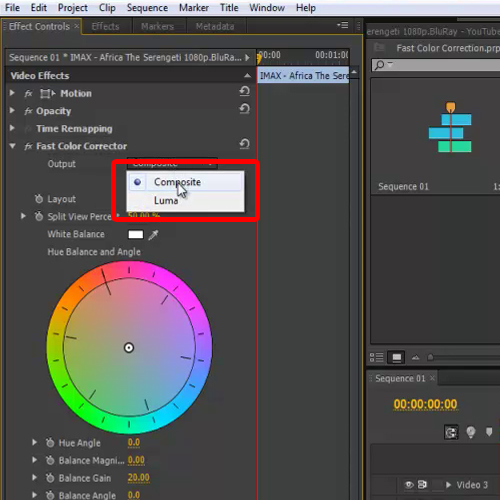
Once done, move to the effects control panel and go to the fast color corrector menu.
Here you can determine on what output mode you will like to do the color treatment. Composite will allow you to do treatment in RGB (colored) mode while Luma will desaturate the whole sequence.
Step # 4 – Enable Split View option
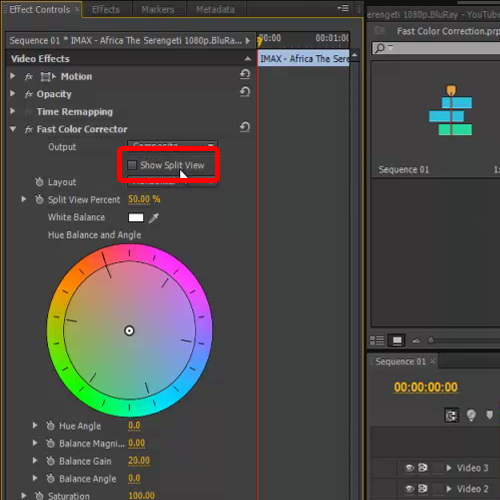
You can also tick on the check box titled “show split view” which enables you to see the footage before and after applying effects, and that too in real time.
Step # 5 – Adjust input levels
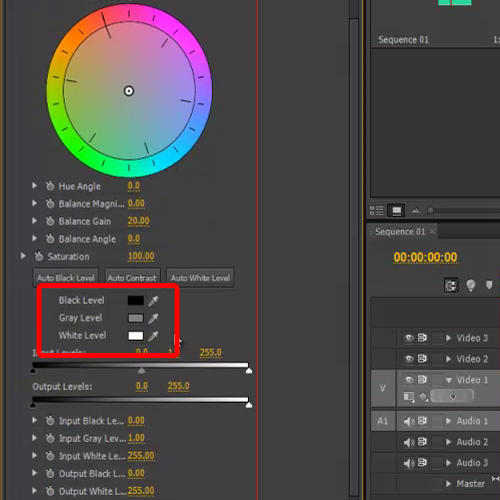
Now move to the input levels where you can see three markers i.e White, gray and black.
If we move the white marker towards the left side, the footage will start gaining more light and the shot will become brighter. The gray marker, on the other hand, will saturate both the colors simultaneously.
By moving the Black marker, you will see that black chrome will be added to the footage and the shot will become darker. Now you can see the before and after effects by enabling and disabling the Fast color corrector video effect from the menu. You can also change the contrast of the footage by playing with the output levels below.
Step # 6 – Set Hue Balance and Angel
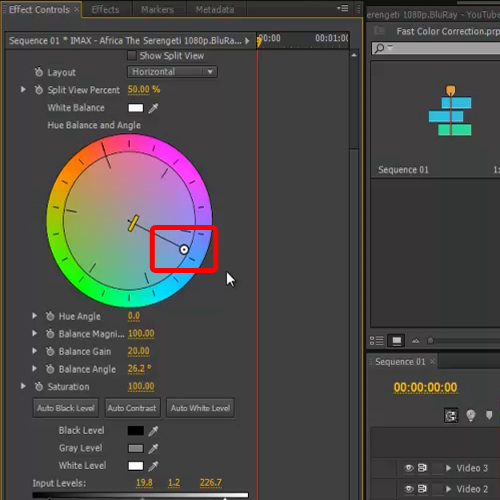
Now move to the Hue Balance Angel option. This tool is used to add atmosphere to the scene. Drag the marker from the center towards the border of the circle and position it on the color you want to add to the clip.
Step # 7 – Reduce saturation level
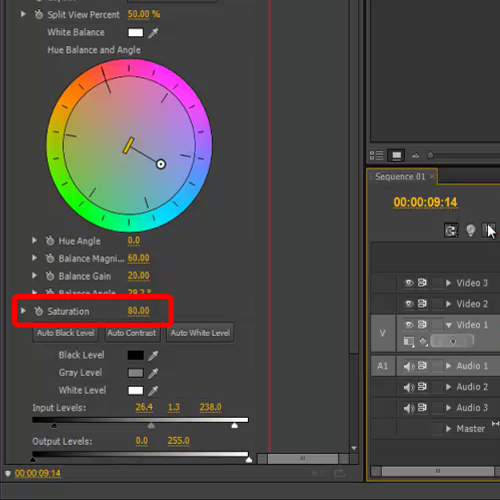
Now, we will be reducing the saturation to 80. Furthermore, you can play with the different options given below the circle. As you change the settings, you can view the output in real time.
It’s a good idea to always adjust the settings and see how the output will look like. For example in this premiere tutorial, we will adjust the Input Levels slightly to give the video a natural color.
Once done, hit enter to render the video and preview the new treated video.
 Home
Home