Making graffiti in Photoshop can be a fun effect to add to a photograph, it can really make it look as if your text has been sprayed onto a wall.
Step # 1 – Opening a Base Image
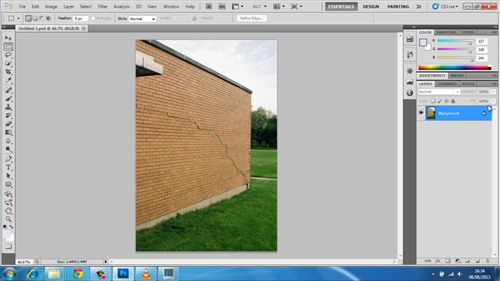
First of all you are going to need to start Photoshop and open the image of a wall that you want to use as your base image. Here you can see we have a simple wall without too many marks on it – this is a brick wall, chosen because having a texture makes the effect more realistic.
Step # 2 – Starting to Create the Text
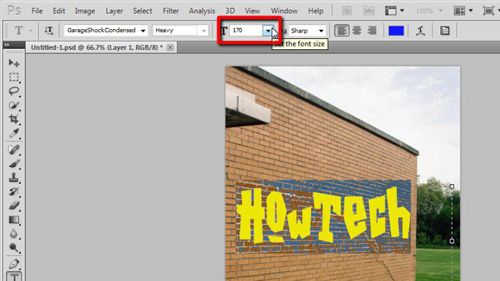
The first thing you need to do is duplicate the background layer, so make sure it is selected and then press “Control” and “J” on your keyboard. “Layer 1” will appear. Now we are going to create our text so click on the “text” tool from the menu on the left. Click on the color swatch at the bottom of the toolbar and choose a main color for the graffiti, click “OK” when selected. At the top you also need to select a font – this will depend on your personal preferences. Here we are using “Garage Shock” which you can easily download from “www.dafont.com”.
Step # 3 – Creating a Stroke around the Text
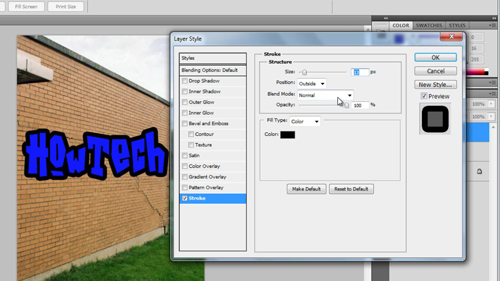
Drag a text box onto the image and type in the text that you want to appear as graffiti – you might need to adjust the size of this text, the size you choose with depend on the resolution of your image. Now click the “fx” icon in the layers menu and in the menu that appears click “Stroke”. You will see a line appear around your text, use the “Size” slider to increase the size of this until it looks just right. Click in the “Color” box and select a second font color for your graffiti.
Step # 4 – Setting Up an Inner Shadow
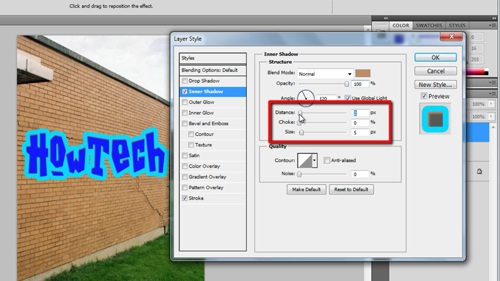
Click the “Inner shadow” box on the left and it will become checked. On the right click in the color box and then take a color sample from the wall, choose a lighter part of the wall. Change the “Blend mode” to “Normal” and increase the “Opacity” to “100”. There are three sliders below this – how you set these will depend on the size of your image, simple play around with them until you get a good looking graffiti effect. Here they work well set at “12, 0, 0”. Click “OK”.
Step # 5 – Preparing the Text for Perspective Changes
In the layers panel right click on the text layer and click “Convert to smart object”. Press and hold “Control” on the keyboard and then click the thumbnail for the text layer and it will become selected. With the selection made, copy it by pressing “Control C” and then click on the eye icon to the left to hide it. Click the “New layer” icon at the bottom of the layers panel, press “Control and D” if there is still a selection in the new layer, now click “Filter” in the main menu then “Vanishing point”.
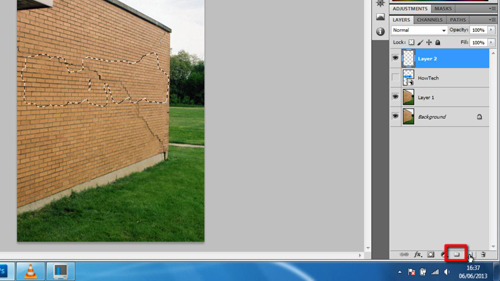
Step # 6 – Placing the Text
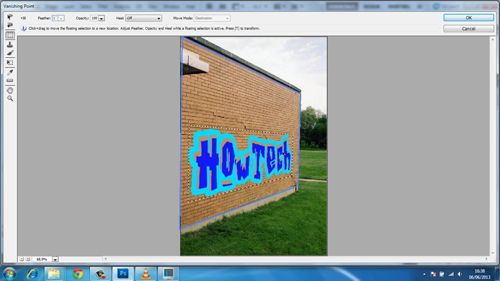
A new window will open and you need to make sure the “Create pane tool” is chosen. Then click on the four points of your wall, essentially you are trying to capture its perspective. Once you have done this press “Control V” to place the text onto the image then use the mouse to drag it to the right location – it should adjust it perspective automatically, as you can see here it already look rather effective.
Step # 7 – Transforming the Text
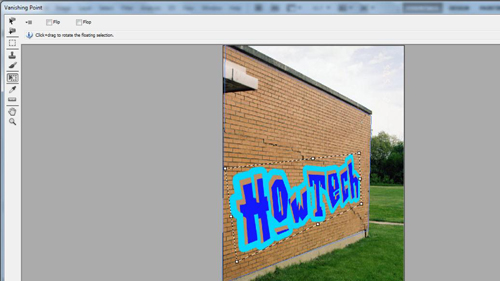
Select the “transform tool” from the left and you can use this to make size, shape and rotation adjustments. Here we are just giving the text a bit of an angle to make it look less artificial. Click “OK” when you are done.
Step # 8 – Finishing off the Image
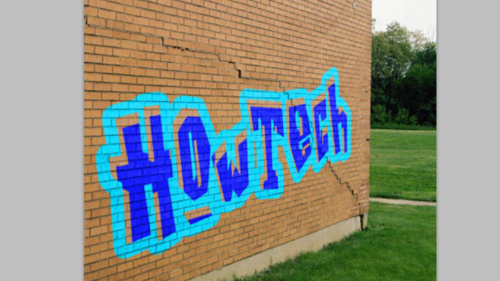
In the layers panel click on “Layer 1” and drag it all the way to the top. Press “Control U” and in the window drag the “Saturation” slider all the way left then click “OK”. In the layers panel find the perspective text layer and hold “Control” as you click on its thumbnail, a selection will appear then click the “layer mask icon” at the bottom. Now click the wall image thumbnail to the left of the selection we just created, in the box that currently reads normal click “Hard Light”. You can now see that the brick wall texture comes through nicely. That’s pretty much it, you now know how to do graffiti in Photoshop!
 Home
Home