In this video tutorial we will show you how to install Xcode on Mac
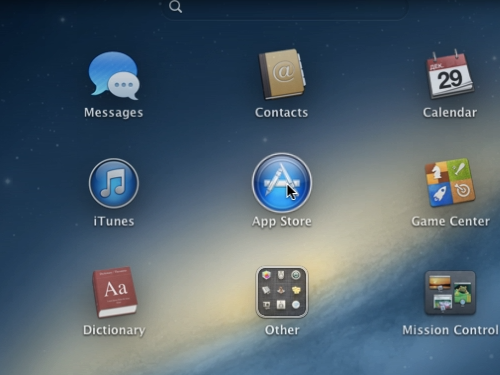
Go to the “Launchpad” and start the “App Store”.
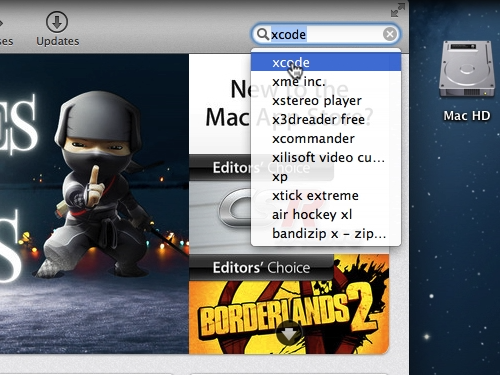
When the “App Store” is launched, go to the search field and type “xcode”.
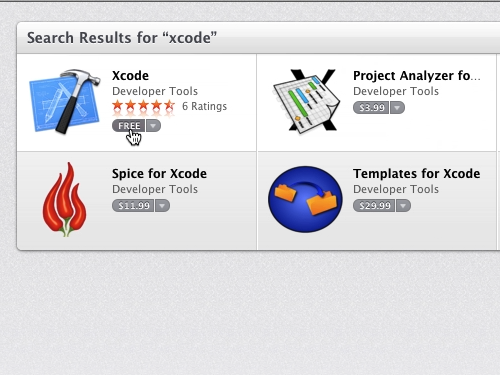
In the search results select “xcode” and press the “Free” button.
An “Install App” button will appear, click on it.
The “App Store” will ask you to enter your Apple ID and password. Press the “Sign In” button and the download process will begin.

After the download is complete, go to the “Launchpad” and open the “Xcode” application.
The “Xcode” has been successfully installed.