In this tutorial you are going to learn how to photoshop fisheye effect which can be a fun effect normally only possible on expensive cameras.
Step # 1 – Selecting the Entire Image
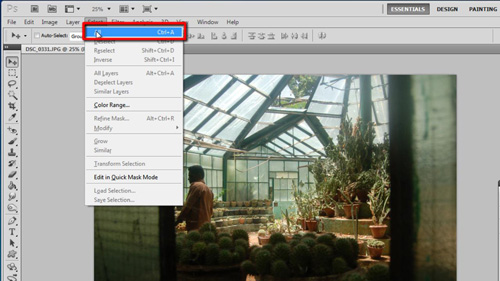
Load the image that you want to apply the effect to into Photoshop. We want to apply the effect to the entire image so click “Select” in the main menu, then click “All”.

Step # 2 – Loading the Transformation Options
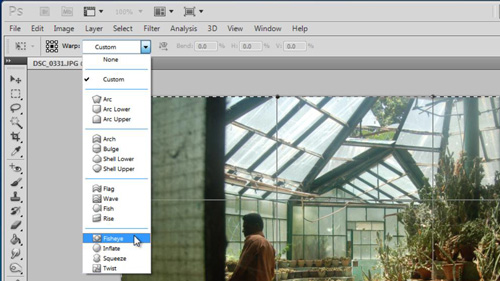
Now, click “Edit”, navigate to “Transform” and in the menu that has appeared click “Warp”. A new toolbar will appear below the main toolbar giving you the warp options. From the drop down box that reads “Custom” select the “Fisheye” option. This will introduce a fish eye effect to your photograph.

Step # 3 – Adjusting the Effect
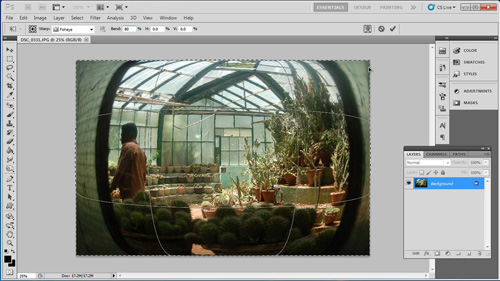
Now that the effect has been applied, let’s look at how we can adjust the settings to make it stronger (or weaker). You will see a box called “Bend” that by default reads “50.0”, increase this to increase the intensity of the fish eye effect. Here you can see when we change it to “80” that the effect becomes noticeable stronger. Alternatively, changing it to “20” gives a much more subtle fish eye image. This is the process for learning how to photoshop fisheye effect.

 Home
Home