In this tutorial you will learn how to set up push Gmail in iPhone mail. Pushing your mail to your notification center is a useful trick, so that you don’t miss important emails.
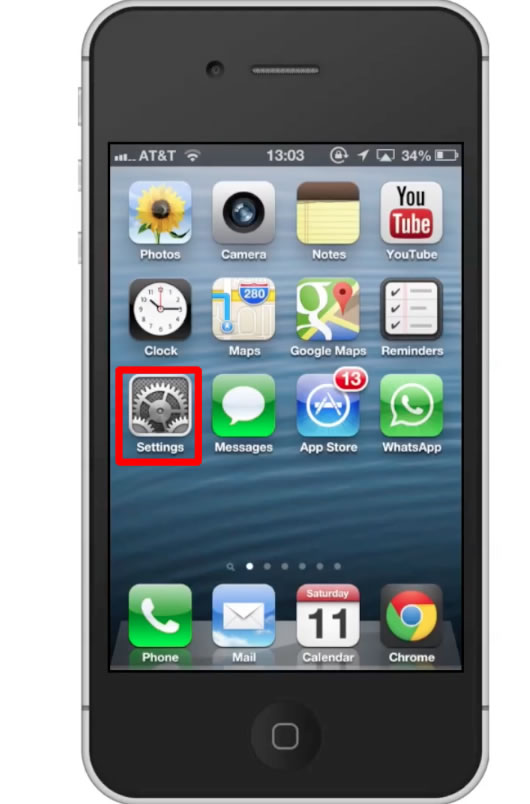
Step #1 – Tap Settings App Icon
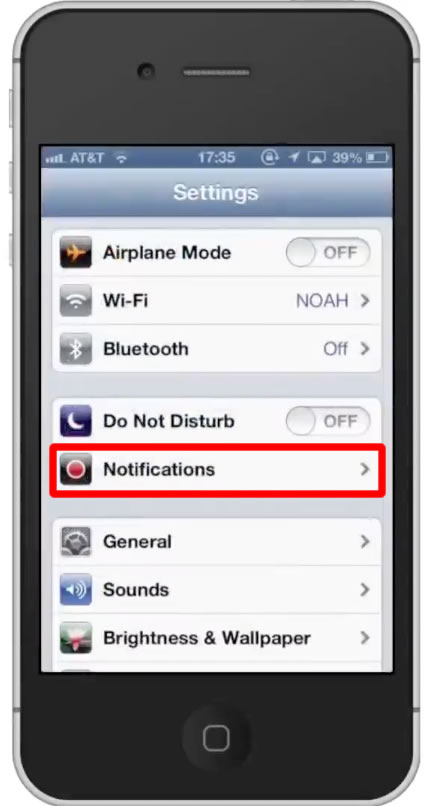
Step #2 – Tap the Notifications tab
After this, scroll down to the “Not In Notification Center” section of the page.
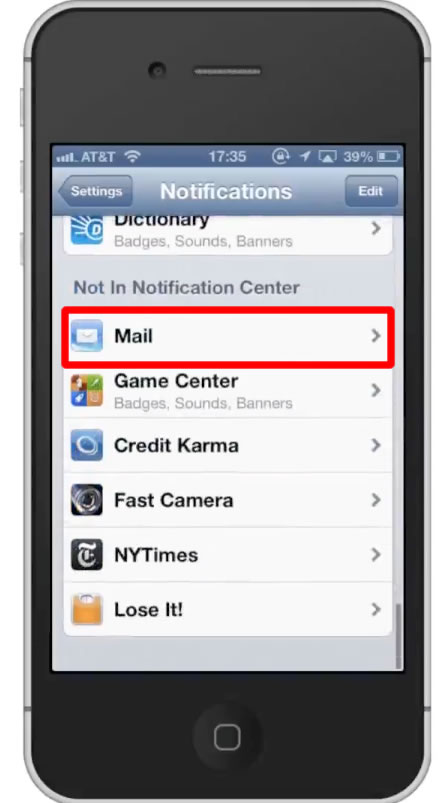
Step #3 – Tap Mail
In here, we will be able to adjust which email accounts we want pushed to our iPhone.
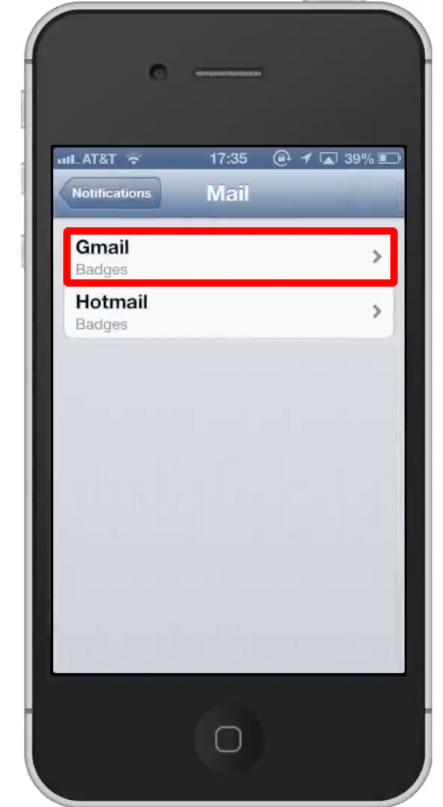
Step #4 – Tap Gmail
We will then be taken to the notification center where we can adjust the settings.
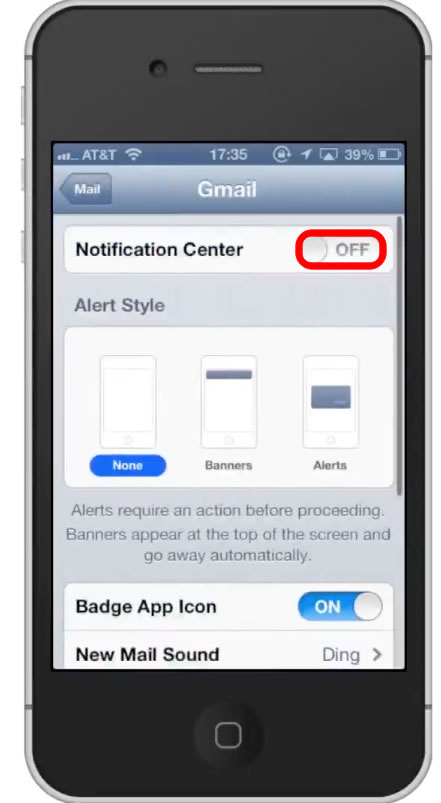
Step #5 – Turn on Notification
Turn on the Gmail notifications by tapping the “off” button.
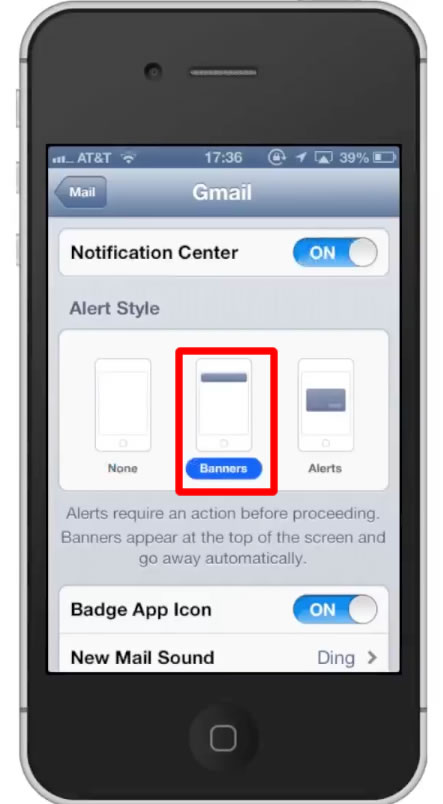
Step #6 – Change Alert Style
You can either choose none, banners, or alerts. Lets choose the banners option.
Leave your comments below or contact us by email. This was a Howtech.tv tutorial. Thanks for watching!