If you have many users of a database, try converting it to spilt database structure. Your database will be divided into two main parts; first is the front end file containing all the objects (queries, macros, forms, reports and modules). The second part is the backend file that is linked to all the frontend files. Backend can be stored in location which can be shared with many users. The front end is distributed to each user’s desktop and linked to the shared database. This reduces network traffic as the file does not have to be retrieved every time. Database manager and database splitter helps in the process of creating such architecture.
Splitting your database has several advantages; if you are sharing it over LAN or with a large group of people, a back end version is made so that all the updates can be viewed by everyone using the file.
In this Access tutorial, we will teach you how to create a split database in Access.
Step # 1 – starting the split
To create a split database in Access, go to the database tools tab and click on the “Access database” button.
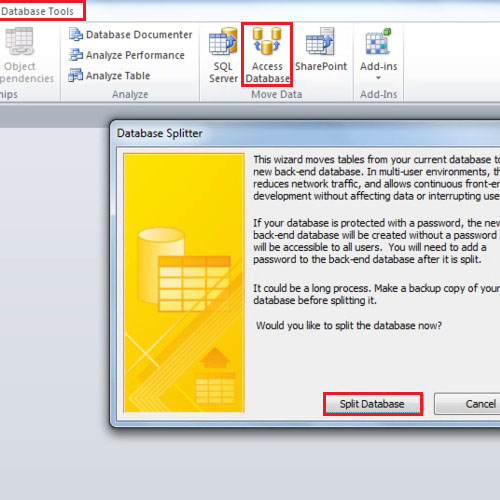
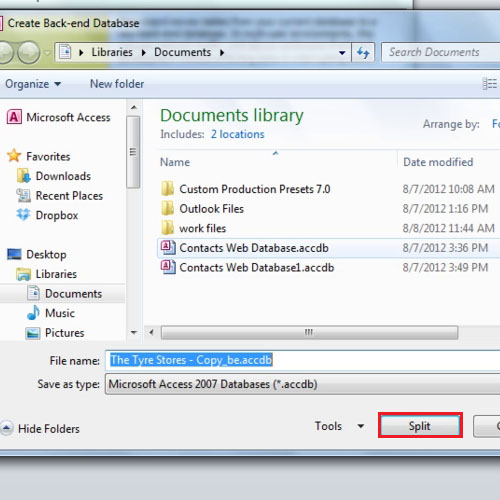
Step # 2 – Saving the file
Click on the “split database” button. In the “save” dialogue box, you will notice that the file name ends with “.be” which means back end. Once you are done, click on the “split” button. After splitting, the database becomes the backend file and is saved in a location that can be shared with others.
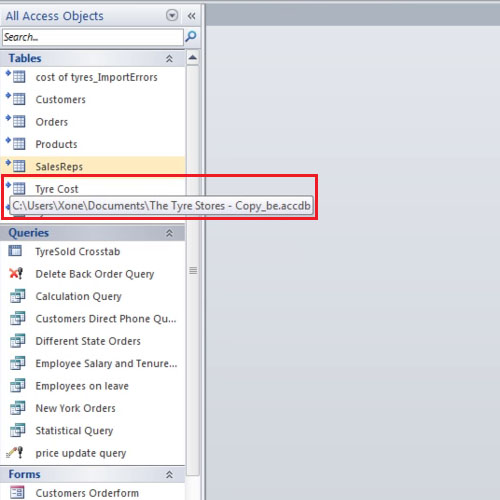
Step # 3 – Linked Tables
Your database is now front end. In this Access tutorial, you will notice small blue arrows right next to the tables. These blue arrows indicate that the tables are linked and data is not stored here but on another file on your computer. Hover the cursor over the table and you will see the address to the backend file.
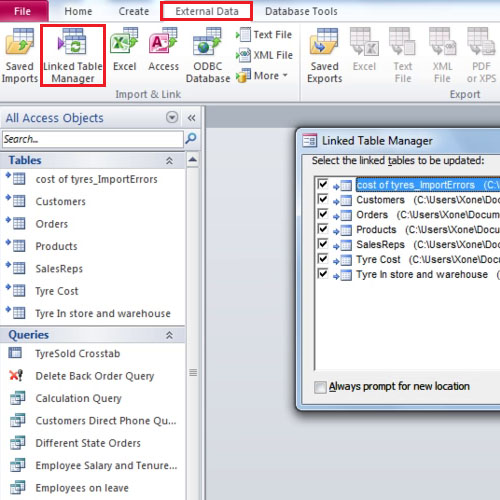
Step # 4 – updating database
To update your data on the back end, go to the “external data” tab and click on the “link table manager” button. Once it opens, select all the objects and click ok. A dialogue box will appear telling you that all the records have been updated.
The data at the back end gets synchronized instantly but changes made to the structure do not get saved. Through the use of this option, you can save a lot of time that would otherwise be spent in updating and synchronizing the data.