To make creative artwork it is beneficial to know how to use stationary art brushes and live paint bucket tool in Adobe Illustrator. Brushes in Illustrator can be custom made in the shape of different images that you create. These can be then further on colored in using the live paint tool. You can use this method to design a unique art piece that can be used further on.
Step # 1 – Make illustrations for art brushes
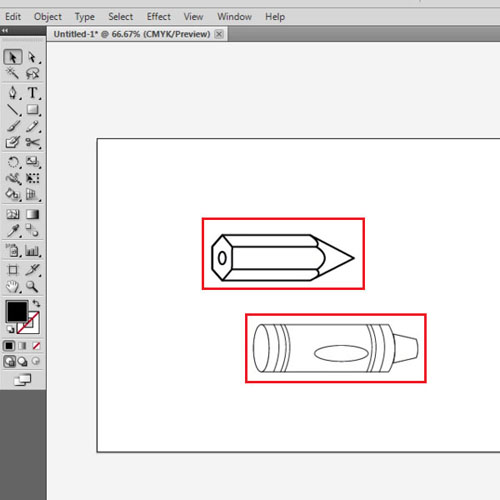
Over here an art brush in the shape of a pencil and a crayon are used. Create them by means of the tools in Illustrator or pick up an existing image of a pencil and a crayon and simply trace it using the pen tool. Here, traced images are used. To paste them on this canvas press “ctrl + v”.
Step # 2 – Change the stroke of the image
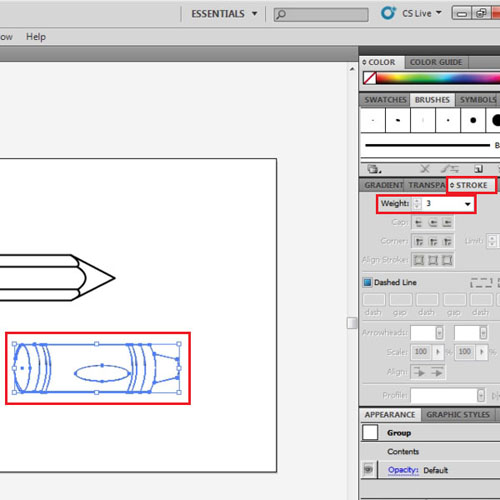
You can change the stroke weight of these images so as to specify the stroke weight of the brush itself. Change the crayon stroke weight to 3.
Step # 3 – Create an art brush
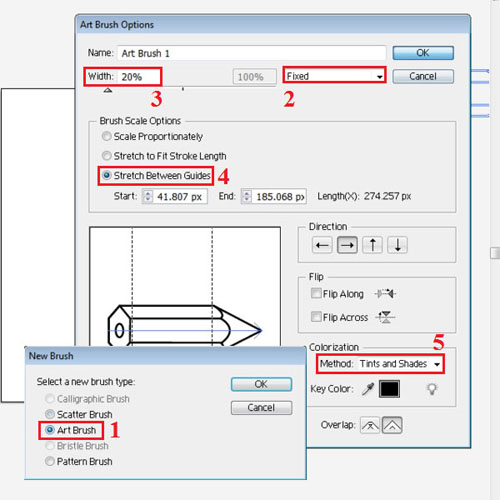
Now select one object and drag it to the brushes panel. A popup option menu emerges. Select “art brush” and now its settings will open. Reduce the width for this case to 20% this value differs according to your requirement.
From the brush scale options select “stretch between guides”. Now two guides appear on the image of your artwork below. Adjust the area between guides so as to specify the portion of the brush that you want Illustrator to stretch.
Step # 4 – Make a crayon art brush
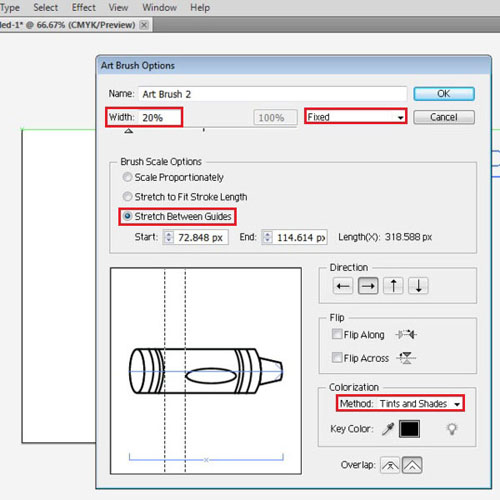
Repeat this process to make the crayon image an art brush as well. Adjust the settings of it as shown below.
Step # 5 – Insert text
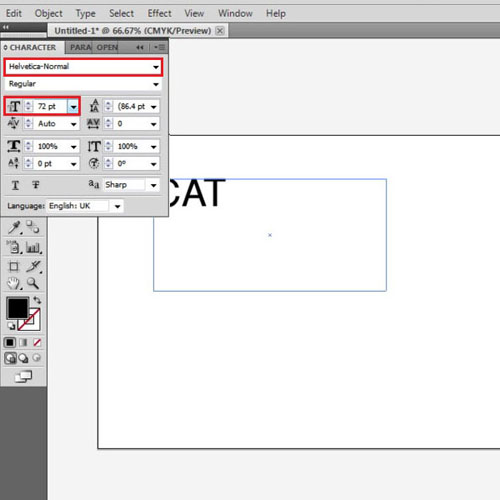
After you are done with this then select the “text tool”. For the text right now the font type is “Helvetica-Normal” and the size is “72”.In the text box write “cat” in caps lock.
Step # 6 – Expand the text
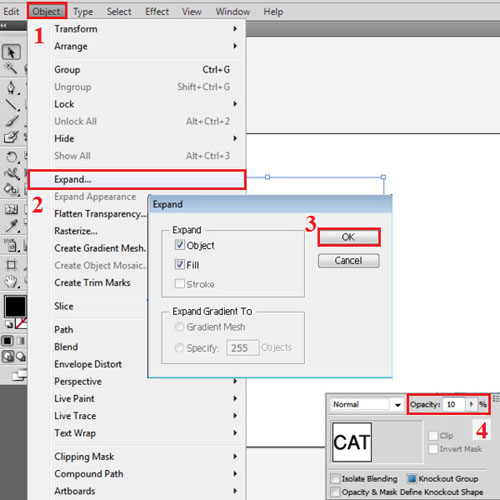
Now select it by means of the “selection tool”, go to “object” on the menu panel and expand the text. Decrease the opacity to 10%.
Step # 7 – Adding art brushes to “C”
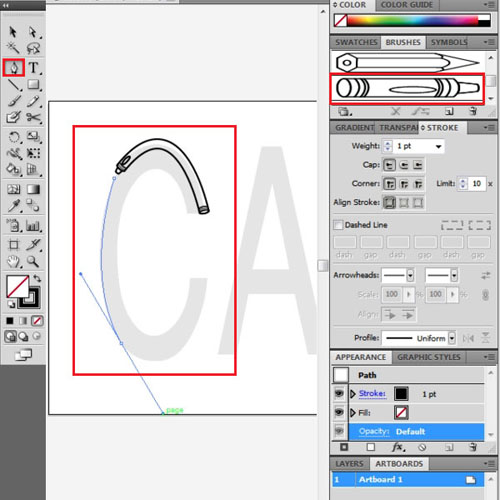
Now, to apply the art brushes and form letters from them first create paths. Increase the size of the text by means of the bounding box to view it more clearly. Use the pen tool to create a path over “C”. After you draw the curve, go to the brushes panel and select the crayon art brush. The path that you just created is now one formed by the crayon. If you do not deselect this art brush and make a new anchor point then this crayon stretches more to encompass the new point as well. To create this letter by adding more crayons, deselect the path every time you enter each art brush. To deselect, click anywhere on the page by means of the “selection tool”. The selection tool appears temporarily if you keep pressing “ctrl” or you can select it by pressing “v”. Keep adding more crayons using the pen tool.
Step # 8 – Add art brushes to “A” and “T”
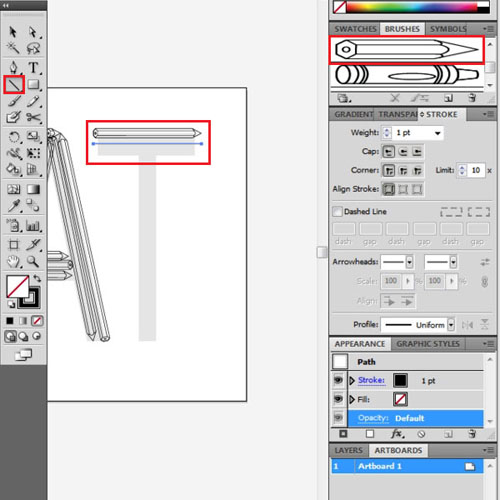
Similarly, you can also add brushes to the other two letters. Since they are not curved, so use the “line segment tool”. Trace the letter through this and repeat the same procedure as you did with the letter “c”. This time select the “pencil” art brush.
Step # 9 – “Expand appearance” of the art brushes
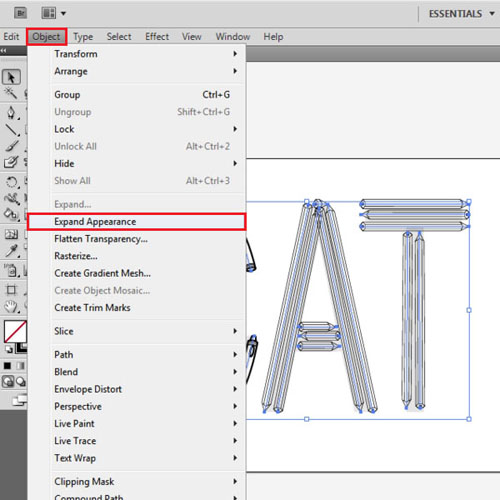
Color can also be added inside these brushes in Illustrator. To do this first select all art brushes. Use the selection tool, keep pressing down the “shift” key and select all brushes. Go to “object” and then select “expand appearances”.
Step # 10 – Create a live paint group
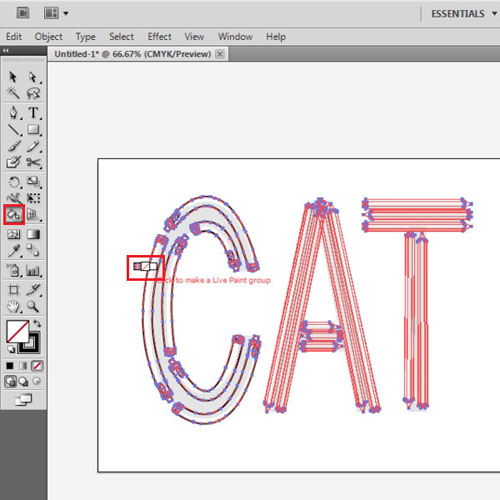
After this use the “live paint bucket” tool to click on this complete illustration and make a “live paint group”.
Step # 11 – Color the brushes
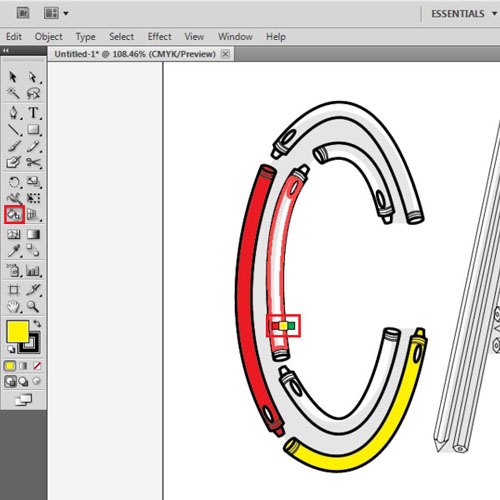
After deselecting all, you can start coloring on each art brush separately. Colors from your swatch panel can be seen in three boxes above the ‘ live paint bucket ‘ tool. Press the right and left keys on your keyboard to switch the colors.
Select each art brush and fill it with the color you want. Over here red, yellow and blue are used.
Step # 12 – Remove the background text
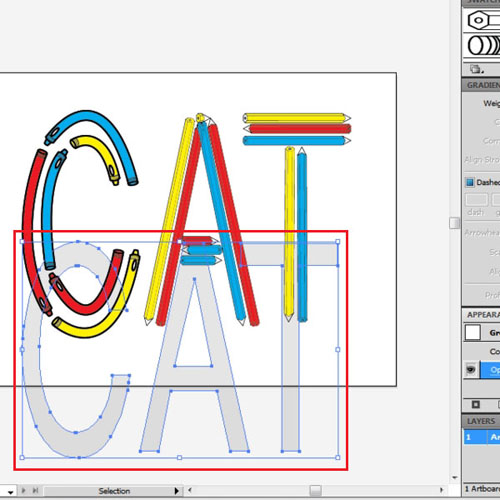
Notice how the text that you initially wrote in grey is still present and visible at the back. To remove this, drag that text box below the created image, and when selected, press “backspace” to delete it. This method can be applied on any image or text that you wish.
 Home
Home