You might often think of making your document look more attractive and interesting using various methods. MS Word 2010, in this case has the best solution for you. It provides you with a variety of pictures, clip arts, shapes etc. that you can add to your document to give it a more complete look. But at times, you might want to use a particular style of art in order to differentiate your document from that of others. This Office 2010 tutorial guides you on how to use “Smart Art” in your document, and give it just that perfect touch that will make it the favorite amongst many others for those who go through it.
In this tutorial we will be focusing on how to work with Smart Art in Microsoft Word 2010.
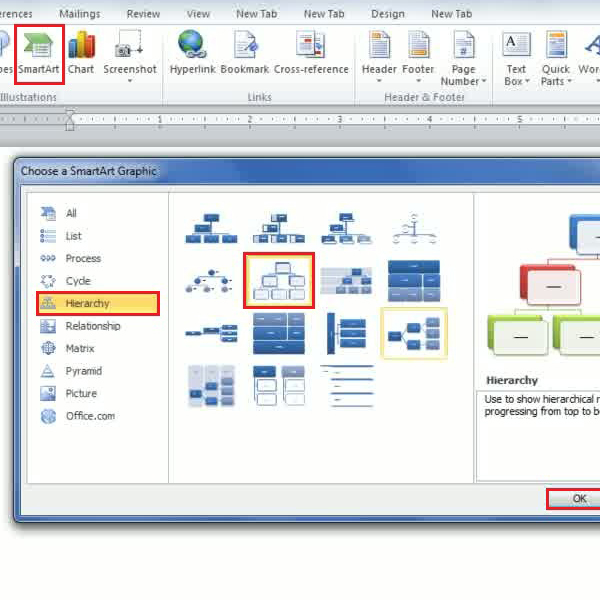
Step # 1 – Inserting smart art
To kick start to the procedure, you must firstly open a blank MS word document and go to the “insert” tab given in the top menu. Next, you will need to click on the option titled “Smart Styles”, after which you will be able to view a variety of styles that can really enhance the appearance of your. Let’s suppose, in this case, you choose to use the “Hierarchy” art option. Its name clearly depicts using this smart art option will allow you to arrange information in some kind of specific order.
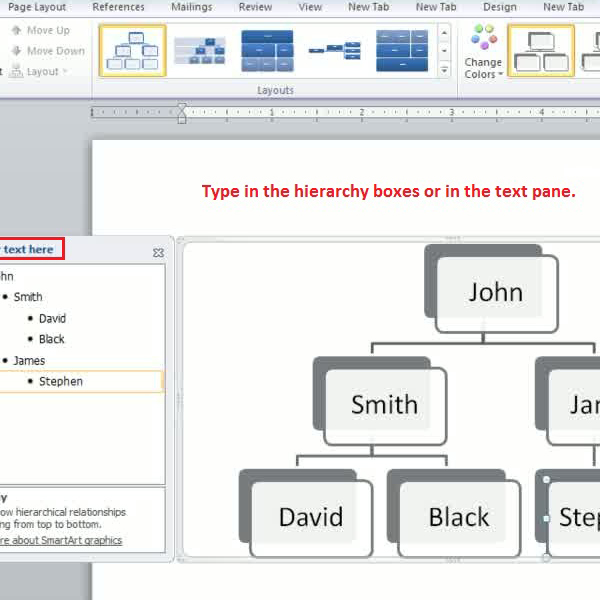
Step # 2 – Typing out data
Once the chart selected is placed in the document, you will need to type in data in the given individual boxes/field .You can do so by either directly typing in data inside the box or in the “Text Pane” which automatically appears on your screen when you are working with smart art options. Let’s suppose, in this case, you want to enter the names of employees in an organization according to the various levels of hierarchy present.
You can also delete any particular box/field given in the chart which may be redundant to you by simply selecting it and pressing the “delete” key given on your keyboard.
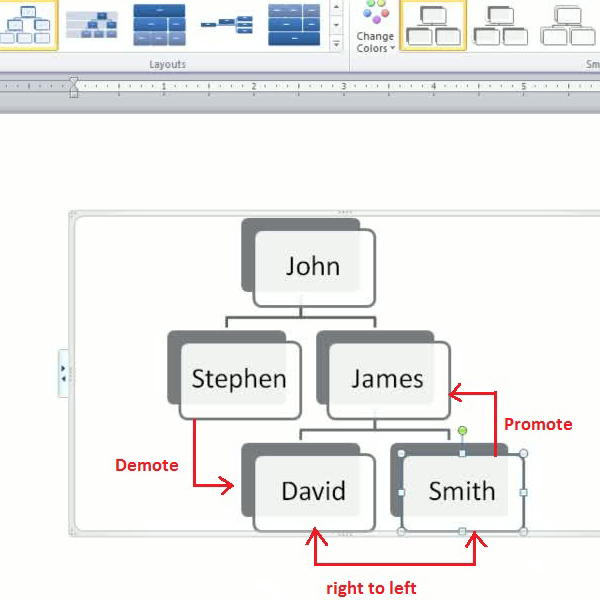
Step # 3 – Promoting, Demoting, and moving Right to left
If once this organizational chart has been created, you might find you want to make some changes and move one person up in the chart while bringing the other one down in the hierarchy. In order to do so, you will need to click on the “Promote” tab given in the “create graphic” area. You can also click on the “demote” button given in the same section, in order to bring a certain employee down in the company’s hierarchal chart.
You may need to move around various positions in the chart, and to do so you will have to select the tab titled “Right to Left” in the same “create graphic” area.
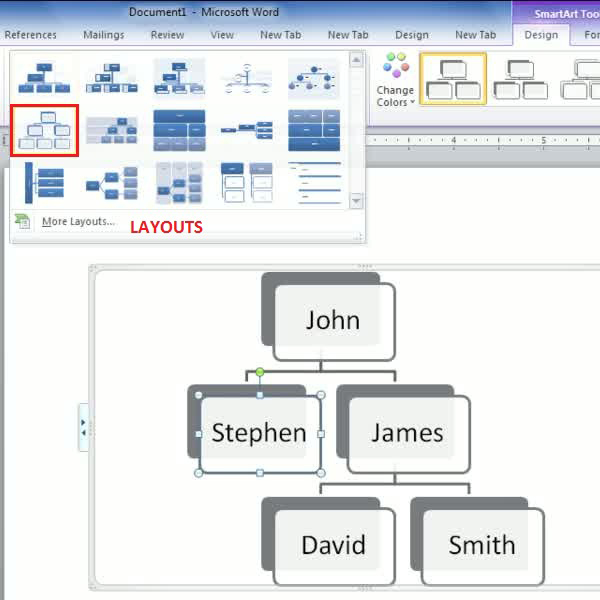
Step # 4 – Working on the Layout
Once the smart art is placed in your document you can give it any sort of layout. In the “Layout area” you will find a variety of styles after which you can also click on the “layout” dropdown to see the complete list of designs provided.
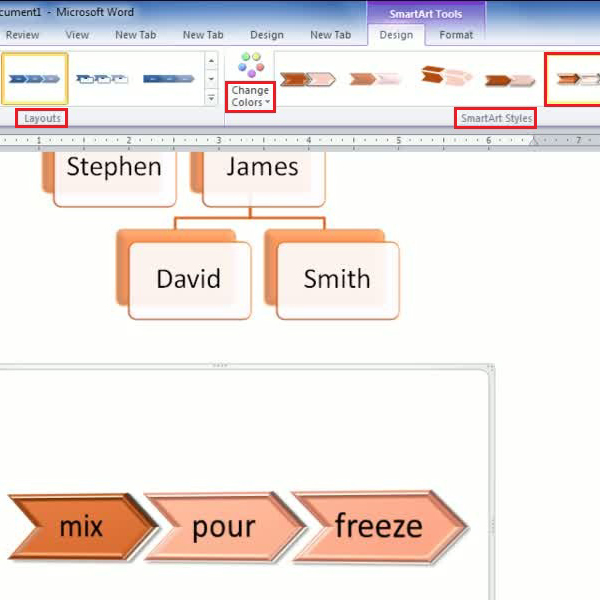
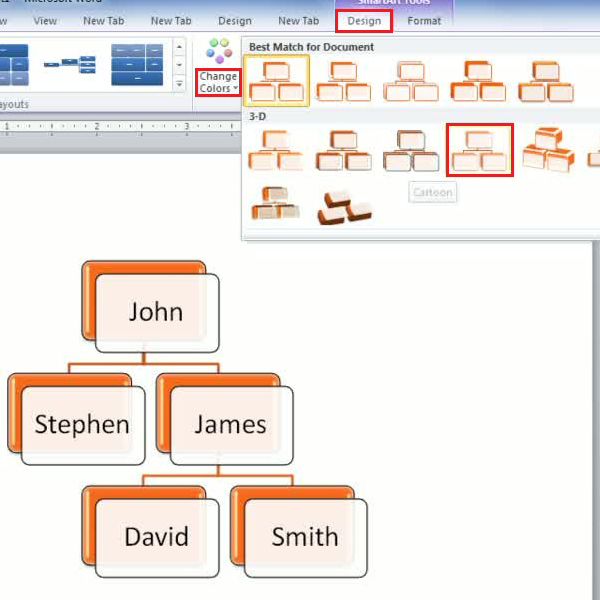
Step # 5 –Using Colors and Styles
After you have chosen a particular layout for the smart art, you can make it even more attracting by using different colors and styles. In order to do so, you must go to the “Change color” drop down arrow and choose a desired color. Adjacent to it you will find a section titled “Smart Art Styles”. All the styles given here will be in different shades of the color you just selected for the smart art. Let’s suppose, you selected a light orange color and “cartoon” style for your smart art.
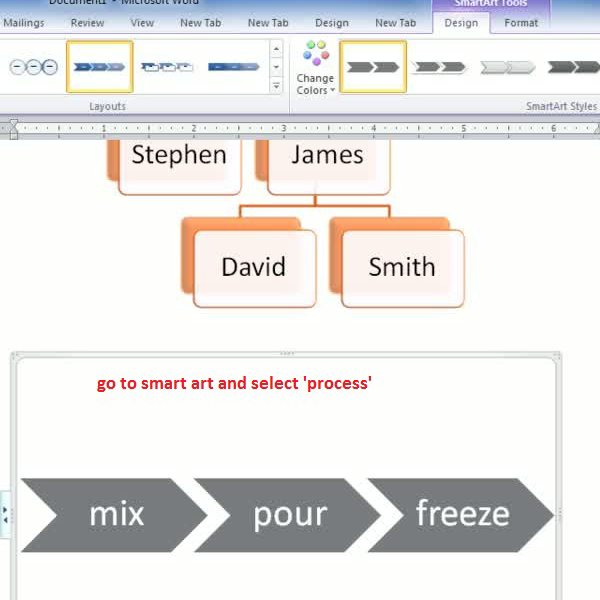
Step # 6 – Using Smart art for a process
Smart arts are also used to show some step by step process and are located in the smart art pane. You must go to the “Smart Art” button and a window will pop-up; after which you will need to navigate to the “Process” tab and select the style of smart art you would like to use to depict a particular process. Let’s suppose, you chose the ‘Basic Chevron Process style’. Once it is placed in the document, you can type out the text for every step in the spaces given, indicating the procedure.
Step # 7 – Working with the Layout, color and style
In the previous steps you learned to modify smart art using different layouts, colors and styles. Likewise you can apply these features in this “process smart art” by going to every drop down arrow present in the ribbon. You can experiment with various colors and styles, in order to apply one that best suits your smart art.