Photoshop often proves to be an extremely helpful and useful software when it comes to designing icons and editing images. The variety of tools it provides and the functions it allows one to perform is what differentiates and sets it apart from other software of its kind. Even though at first, using Photoshop my appear to be difficult, it is important to grasps a clear understanding of how the various tools work in order to be able to perform effective tasks with this software.
It gives a clear opportunity to you of creating products that have a great edge over other similar ones, and makes your images stand out when displayed. Photoshop can also be used to add different text effects which can also greatly enhance your designs.
In this tutorial, you will learn how to wrap text in custom shapes in Photoshop.
Step 1 – Working on the path
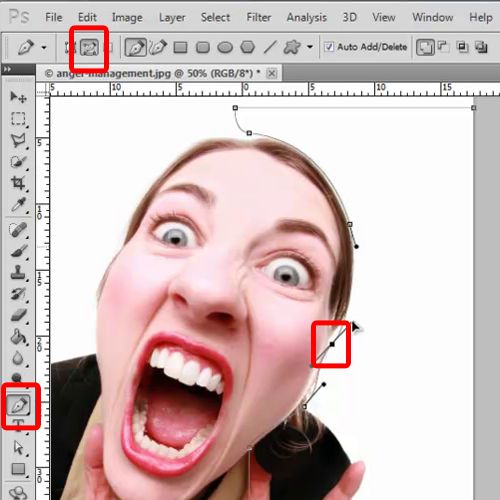
Amongst different Photoshop text effects is one where you can wrap text in custom shapes. For that you will firstly need to select the rectangular shape tool and click on the paths option given on the top of the page. Next, you must draw the desired shape on the canvas where you would like to add the text.
Here, we don’t want the text to overlap the image. Instead we want to wrap the text around the image. For that, we would have to adjust the work path a bit. To do this, pick up the direct selection tool, click on the path, add anchor points to your work path and adjust the work path according to the image.
Step 2 – Adding the text
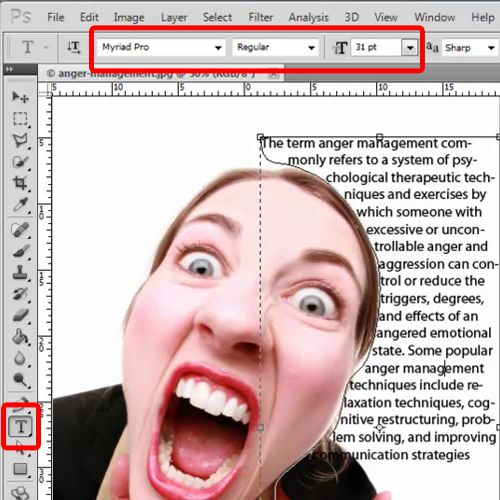
Once this has been done, you will need to pick up the text tool and add your desired text. For this tutorial, we have chosen “Myriad Pro” for the font, keeping the font size to 31. You will also be required to adjust the line spacing according to the image, until you get the best result possible.
Step 3 – Cropping the image
Now, use the crop tool to crop the image. Click on the text layer, move over to the paths tab, right click on the work path option and click on the make selection option in order to proceed.

Step 4 – Creating a new layer
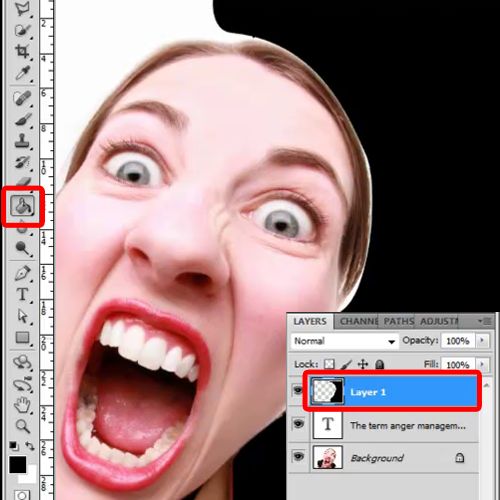
Now, you must move back to the layers tab and create a new layer .Here, fill the selection with black color. Move this layer below the text layer and hide this layer for now, since we’re going to use this one later on in the process.
Step 5 – Changing the blending mode
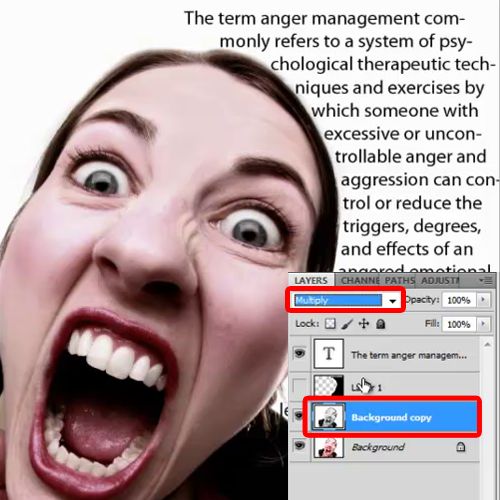
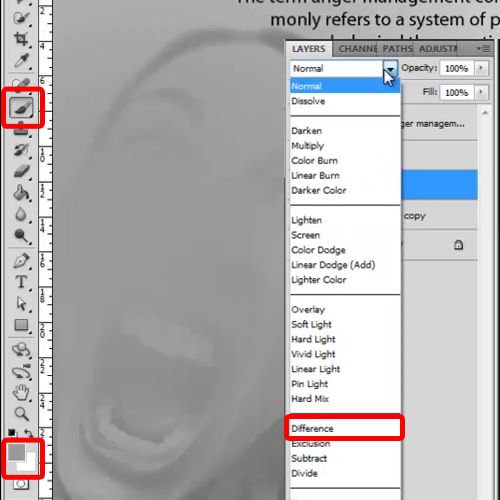
Now desaturate the background layer and duplicate it. Once this is done, you will need to change the blend mode of the duplicated layer to the option titled “Multiply”.
Step 6 – Using the brush tool
Now pick up the brush tool, use a soft brush, choose “999999” for the color fill, increase the size of the brush till it covers the whole canvas and apply it. Once this is done, change the blend mode of the layer to “Hard Mix”.
Step 7 – Using the Chrome Filter
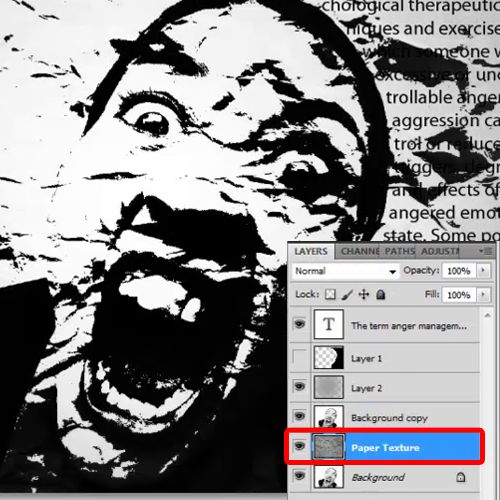
Now, we would be adding a grunge pattern to the canvas. Adjust the size according to the canvas, desaturate it and move this layer below the image layer.
Step 8 – Applying a color fill
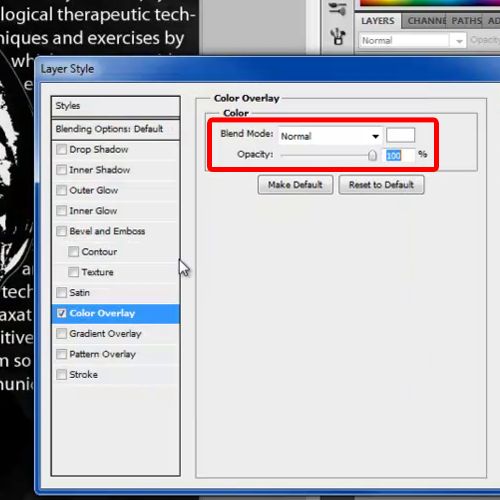
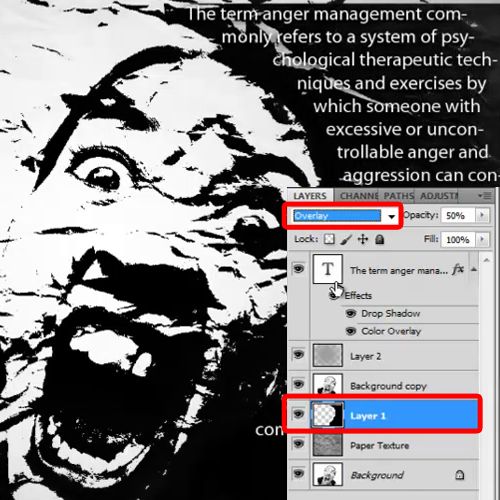
Now make the shape layer visible again and reduce the opacity of this layer to 50 percent. Open the layer style options for the text layer, move over to the color overlay tab and choose white for the color fill.
Step 9 – Changing the pixel values
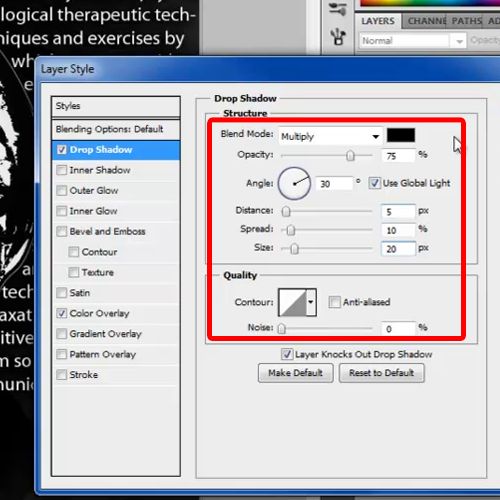
Click on the drop shadow tab, choose 5 pixels for the distance, 10 pixels for the spread and 20 pixels for the size.
Step 10 – Changing the blending mode
Now change the position of the shape layer according to the image, so that it looks like one continuous image and change the blend mode of this layer to “Overlay”.
Step 11 – Winding up the procedure
That is it for your basic structure. Now you can add more text and effects to the image, refine it a bit and add to the design. Play around with the effects a bit; see what you can come up with.
You can use Photoshop text effects to even further on enhance the output of your design.

 Home
Home