Learning how to xray in photoshop is a great skill for making fun images of yourself or friends.
Step # 1 – Opening the Required Images
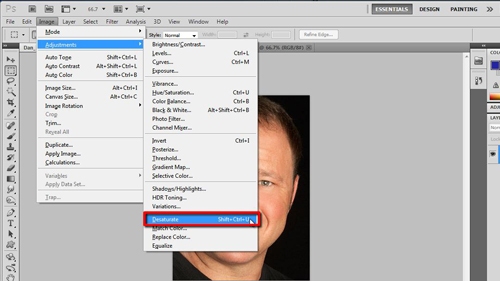
Start Photoshop and load an image of the person and an image of an xray skull, these are the images we will use to create the final image. You need to desaturate the image of the person, click “Image” then “Adjustments” then “Desaturate”.
Step # 2 – Merging the Images
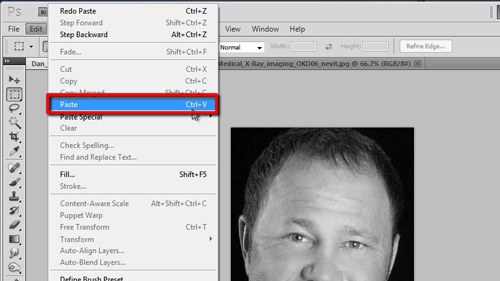
Navigate to the image of the skull. Press “Control-A” on the keyboard to select the whole image and copy it. Go back to the portrait image and paste the image of the skull here, it will appear over the portrait image.
Step # 3 – Setting the Transparency
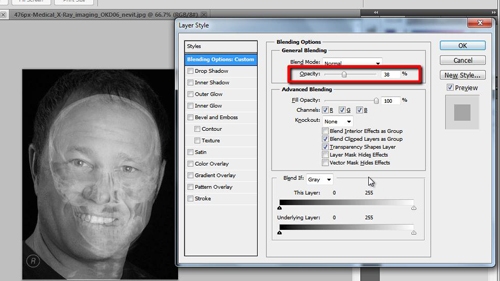
In order to make the image look like an xray you are going to need to make the face of the person visible through the skull. In the layers frame in the right side of the window right click on the image of the skull, in the menu that appears click on “Blending options…”. This will open a new window and at the top you will see a slider labeled “Opacity”, simply drag this slider until the skull looks visible through the face, here that is at about 38%. Click “OK”.
Step # 4 – Fitting the Skull to the Face
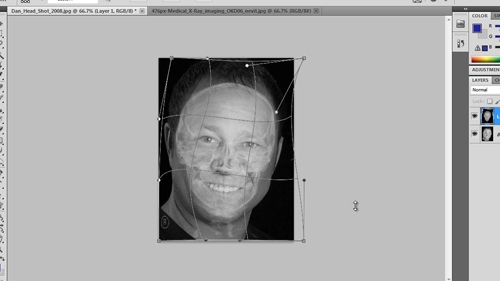
We now need to adjust the skulls proportions so that it lines up with the portrait we have chosen. Right click anywhere on the image and in the menu that appears click the “Free transform” option. You need to adjust the image on a grid basis, so click the grid button on the toolbar, this will divide the image into nine sections, drag the grid until the skull lines up nicely with the face, this can take some time to get just right. When done click the “tick” button in the menu to apply the transformation.
Step # 5 – Cropping the Image
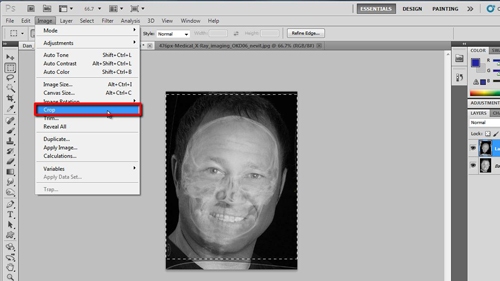
The transformation will have changed the borders of the image, here you can see a distortion at the bottom. To tidy everything up, crop the image, by using the “Marquee tool” to drag a selection around the unaffected area of the image, then click “Image” and “Crop”. This completes the process and that is how to xray in photoshop.
 Home
Home