Making a vector grass background in Adobe Illustrator is easier than you think. For this tutorial, you will need to download and install a separate plug-in for Adobe Illustrator called Phantom CS. This plugin helps in making patterns and backgrounds. Follow the step by step guide and learn how to create grass in Illustrator.
Step # 1 – Create a colored rectangle
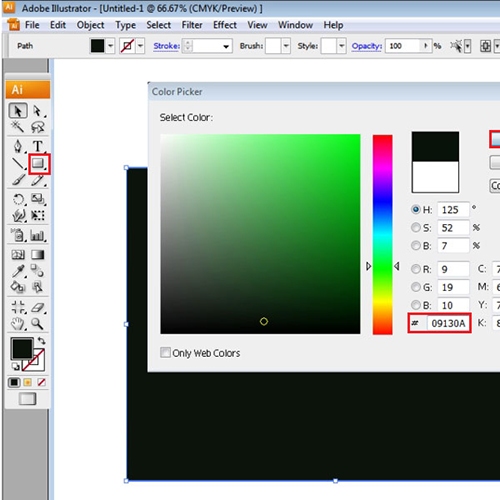
First of all, create a rectangle from the shape tool. Keep its measurements the same as that of the page which in this case is “800px x 600px”. Change its color to dark green by double clicking the color box. Once the color picker window opens up, enter the color value as “09130A”.
Step # 2 – Make a second rectangle
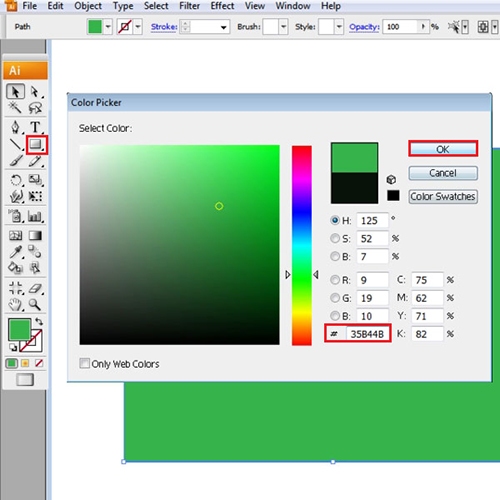
Make another rectangle with the same measurements. Change its color value to #”35B44B”.
Step # 3 – Add the “roughen” effect
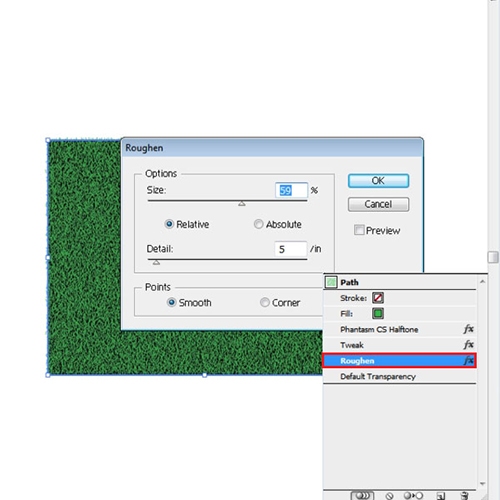
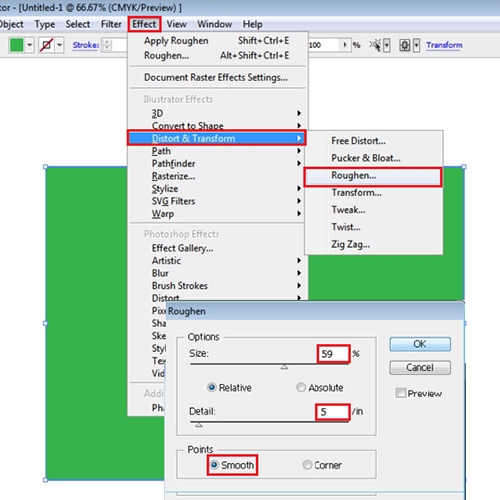
Select the newly created rectangle and go to the “effect” menu on top. From the drop down menu that appears, move over to “distort and transform” and select the “roughen” option. It leads you to a settings menu. From these options set the “size” to “59” and “detail” to “5”. Choose “smooth” for the points and press “ok”. Once done you can see this effect on the appearance panel. Drag the “roughen” effect below the “fill” option.
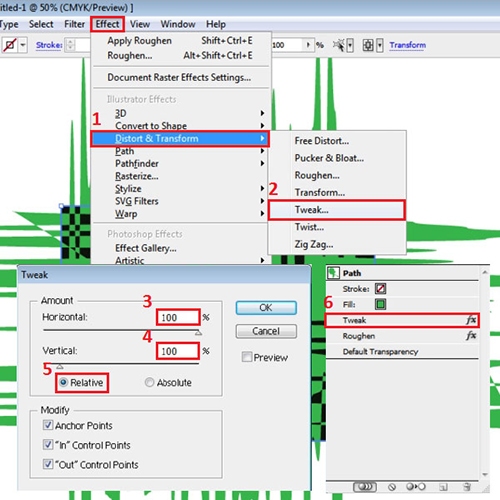
Step # 4 – Add the “tweak” effect
Now add another effect to this illustration. Go to the “effects” menu, then to “distort and transform” and select the “tweak” option. This opens the tweak settings window. Over here increase the “horizontal” and “vertical” amount to “100%” and choose relative for the distribution. You can preview the output and press “ok” once you are satisfied. In the appearance panel on the right, bring the “tweak” effect above the “roughen” effect.
Step # 5 – Apply the “Phantom CS” effect settings
The last effect that you need to apply is “Phantom CS”. This effect is a separate plug-in. So if it does not already exist in the “effect” menu, you will have to download it separately. This plug-in allows you to make grass in Illustrator much more easily.
Once you download the plug-in, save it in the plug-in folder where Illustrator setup files are saved. Once downloaded and installed, go to the “effect” menu, drop down to “Phantom CS” and select the “halftone” option.

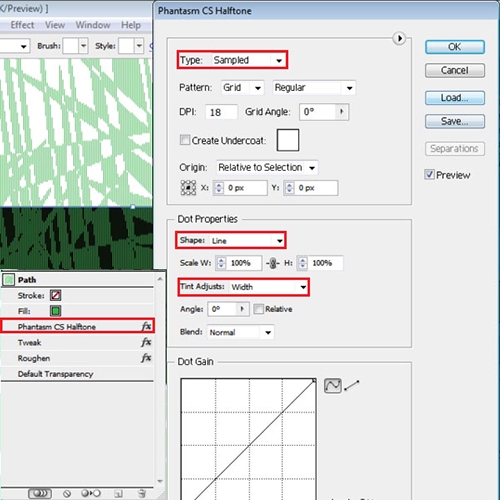
Step # 6 – Adjust the “Phantom CS” effect settings
Once the Phantom CS Halftone window opens, change the Type to Sampled, Shape to Line and Tint Adjust to Width. With that done, click on “ok” to apply these changes. Once done, move to the appearance panel and bring the “phantom CS halftone” effect above both the “tweak” and “roughen” effects. With that done, your grass background is complete.
Step # 7 – Alter the effects
You can alter these effects even after you have already applied them. Do this by going to the appearance panel and double clicking on the effect you want to alter. It opens the settings menu and you can change them according to your requirement.