In this tutorial you’ll learn how to create a funky text effect in Photoshop. Adobe Photoshop can be used as a funky text generator with the use of simple effects and with the basic adjustment of different layer style options.
To understand how to create such a text, follow the steps given below.
Step 1 – Enter text
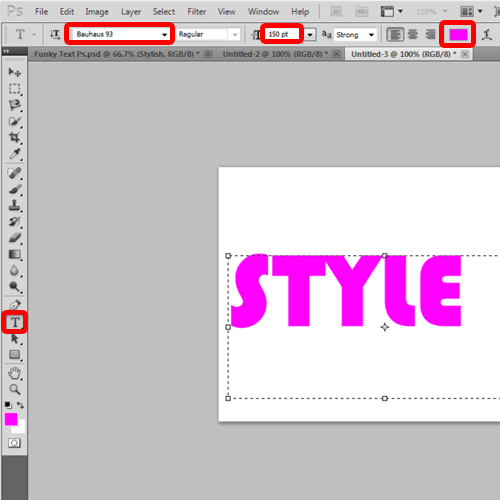
First of all, let’s pick up the Horizontal type tool from the tool bar and type in the text. Over here, we will be using “Bauhaus 93” for the font, keeping the font size at 100pt and using “Pastel Magenta” for the color from the Swatches that are located on the top right corner of the window.
Step 2 – Rasterize the layer
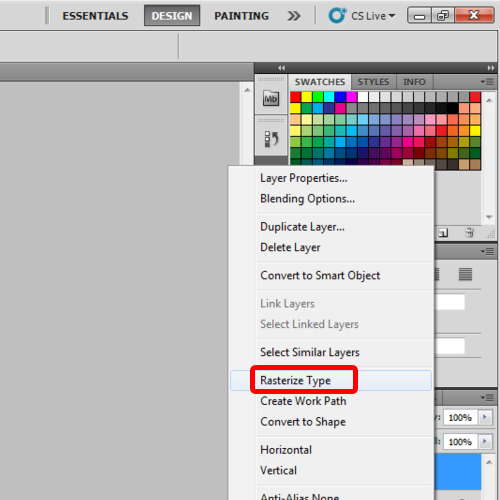
With that done, right click on the text layer and rasterize the text layer.
Step 3 – Open the layer style window
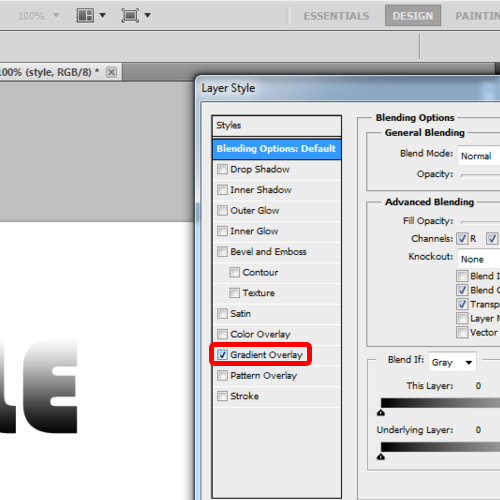
Now double click on this layer and you’ll get a Layer Style window. Here on the top left side, click on the gradient overlay option.
Step 4 – Open the gradient editor window
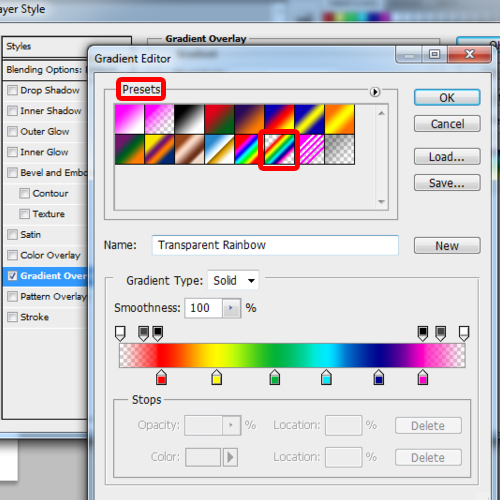
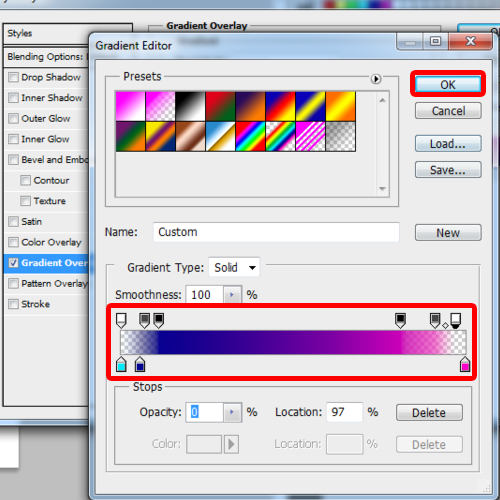
With that done, let’s double click on the gradients bar and the gradient editor window will open up. Over here, you can choose the “transparent rainbow” option from the presets section.
Step 5 – Adjust the sliders
With that done, let’s move the sliders a bit to suit our requirements. If you want to delete a slider, simply drag it to the left or right side of the window and release the mouse button. This will remove the slider from the gradient bar.
Over here, we’ll keep a Bluish and magenta combination and click on the Ok button.
Step 6 – Add the angle
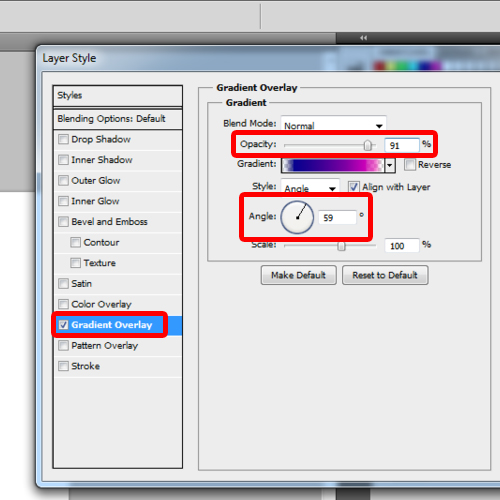
By adding these options, Photoshop acts as a funky text generator that can be easily used to create such text. To further on add the effects go back in the gradient overlay window, let’s choose the angle option for the style and keep the angle at 59 degrees. With that done, let’s reduce the gradient overlay opacity to 91 percent.
Step 7 – Select the “inner glow” option
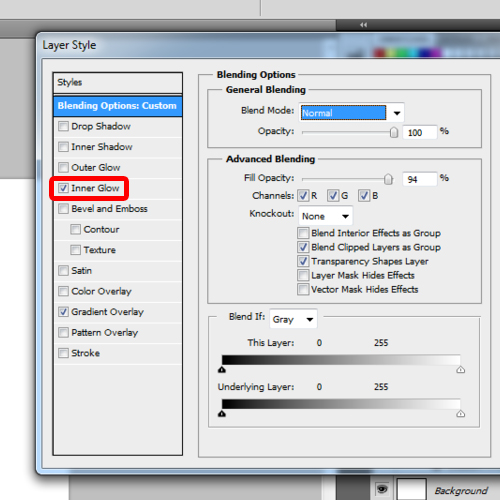
With that done, simply click on the “Inner glow” tab and that’s it. Now let’s close the window and move back to the canvas.
Step 8 – Work with the layers
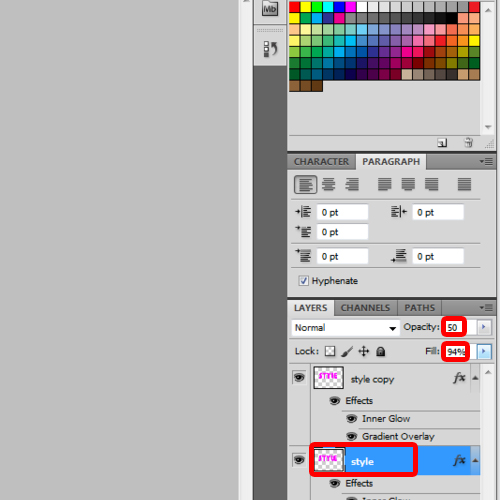
Over here, we will make a copy of the text layer and position it a little towards the left side. With that done, select the previous text layer and reduce the opacity to 50%. Now let’s select the first text layer and reduce the fill of the layer a little. Over here, we will keep it to 94 percent.
You can reposition both the layers according to your requirements and that’s it your funky text effect is now complete.
 Home
Home