In this tutorial, we will guide you on how to add watermark to video in Adobe Premiere.
Watermarks are the embedded visible images that are used to identify that a particular image or video belongs to a certain individual or company. The watermark can be a copyright statement or even a logo.
Step 1 – Importing in Adobe Premiere
To watermark video, we will first have to import the artwork in the project. For that, move to the media library, right click on the empty space and select the import option from the menu.

Step 2 – Preparing the Photoshop file
With that done, import the artwork that will be used to watermark video. Notice that the image has a transparent background. That is very important if you want to import only the logo. Otherwise the background color will also be imported and the logo will appear within a box on the screen.

Step 3 – Merging all the layers
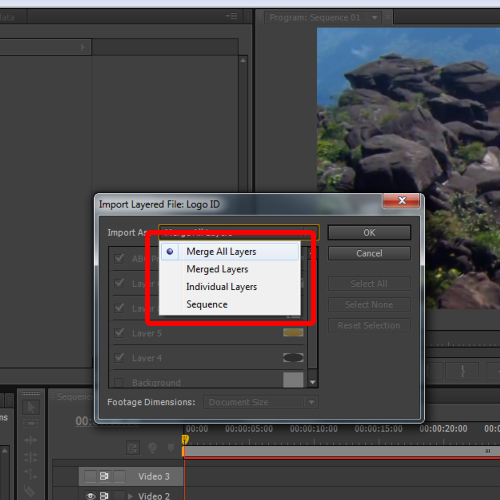
With that done, a dialogue box will appear asking whether you want to import this composition as a single layer, or want to import each individual layer. For this tutorial, merge all the layers since we want a single image on the screen.
Step 4 – Bringing the image on the video
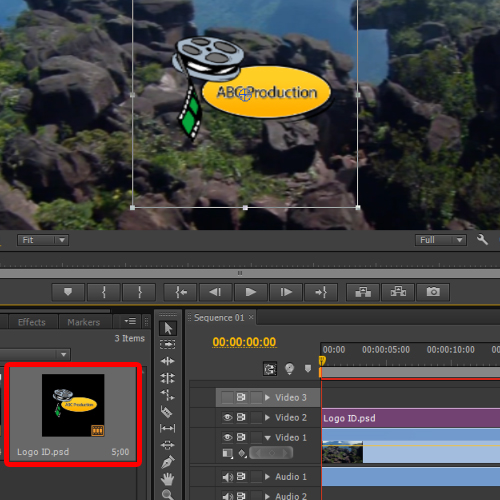
Once done, drag & drop the image layer on the overlay track to add watermark to video. With that done, stretch the layer to the same length as video 1.
Now you can see the logo appearing throughout the duration of the video. Transform the watermark layer and resize it according to the frame.
Step 5 – Configuring the Tint Effect on the Image
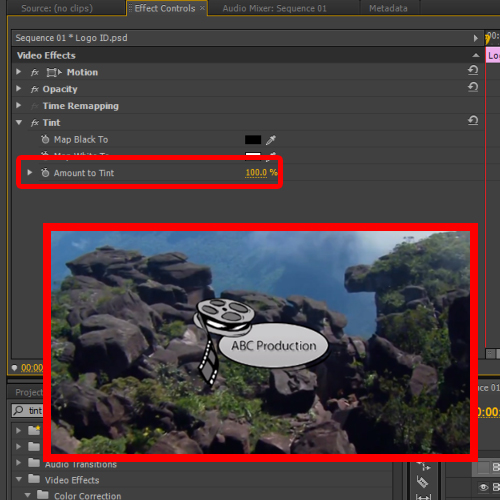
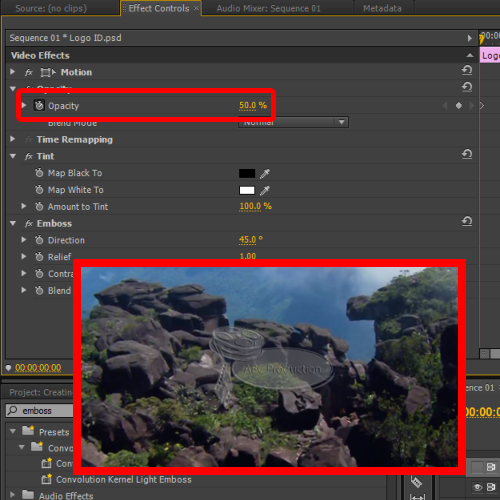
Once done, move to the effect control panel and apply the tint video effect to the layer. You can configure the amount of tint according to your requirements. This effect will desaturate the layer but you can still mix some color from the original image by reducing the amount of tint from the effect control panel. For this tutorial, we have kept the value to 100%.
Step 6 – Using the Emboss effect
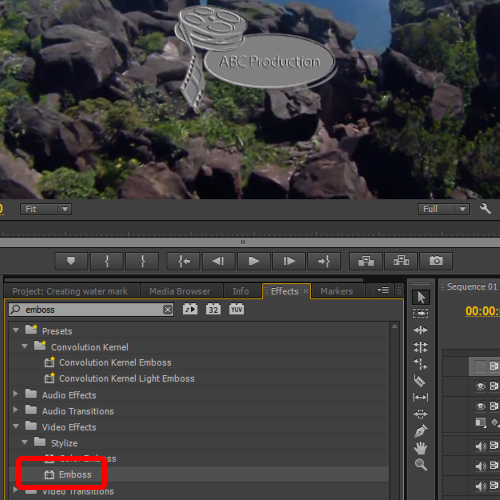
For the watermark, you can choose to put the original logo as it is or add different effects to it. For example, over here we have added the Emboss effect to our logo.
Step 7 – Reducing the opacity of the image
Once done, reduce the opacity to 50% so that the image becomes transparent. You can position the image where ever you want on the screen, but it is important to choose a prominent position. Therefore we have placed the logo in the middle of the screen.
With that done, render the sequence and preview the output. Our watermark is now complete.
 Home
Home