In this Photoshop tutorial, we will design a simple menu with a stunning background in Photoshop. We will be using simple designing techniques and easy to use tools to complete this menu. Its design is inspired from the Vista style and gives you a feel of Vista theme. Making such designs allow you to learn more about Photoshop, its tools and how they are used.
Follow this step by step guide to learn how to create a Vista inspired menu in Photoshop.
Step # 1 – Insert a Lower Portion of Menu
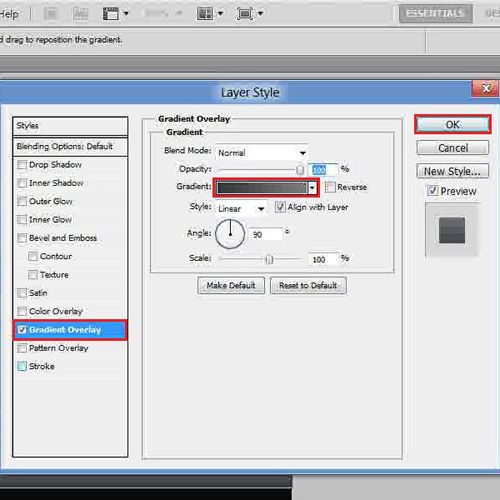
In the first step of this tutorial, launch Adobe Photoshop and load an image which you want to set as the background. Now select the “Rectangular” tool from the menu located at the left corner of the window and draw it on the canvas. Once done, adjust it size and place it at the bottom of the image. Change its layer name to “Lower part” and double click on it to open the blending options. Now move over to the “Gradient Overlay” tab, and choose the color for the left gradient as “000000” and for the right gradient as “0c0c0c”.
Step # 2 – Insert an Upper Portion of Menu
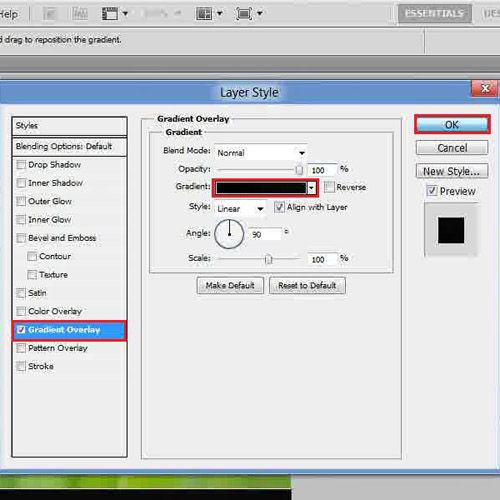
In the next step, duplicate the layer and move it on top. Now change its name to “Upper part” and open its blending options. Move over to the “Gradient Overlay” tab, and choose the color for the left gradient as “35393d” and for the right gradient as “787b7d”. Now click on the “Stroke” tab, set its size to “2px” and click on the “OK” button to apply it on the layer.
Step # 3 – Apply the Gaussian Blur
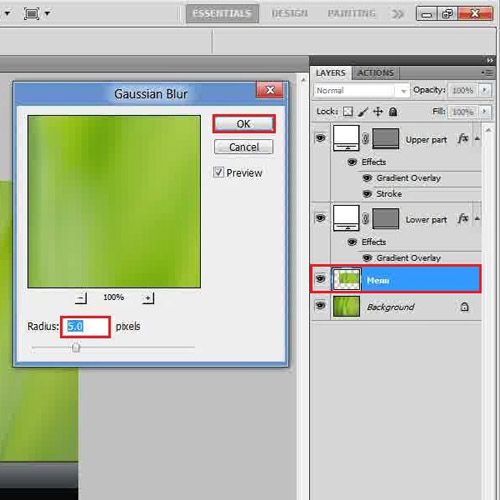
Now click on the “Background” layer, select the “Rectangular” tool and draw it on the canvas. Once done, hold down the “Ctrl” key and click on this layer and press the “Del” key to remove it. Now press the “Ctrl+J” keys on the keyboard to duplicate the selection and change its name to “Menu”. Apply the “Gaussian Blur” filter on this layer by using the radius of “5pixels”.
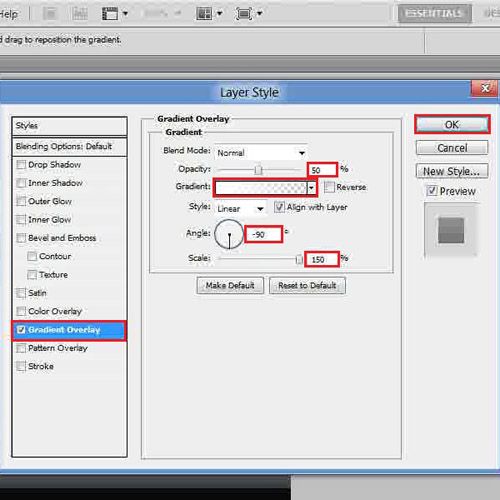
Step # 4 – Adjust the Gradient Overlay Settings
In the next step, open the blending options of this layer and move over to the “Gradient Overlay” tab. In this tab, set the opacity to “50 percent”, choose the “White to Transparent” gradient, set the angle to “-90 degrees” and scale to “150 percent”.
You can explore these properties to learn more about Photoshop so as to use them on other illustrations and images when required.
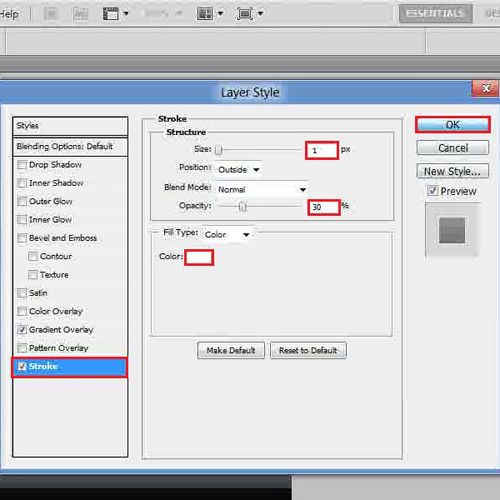
Step # 5 – Adjust the Stroke Settings
Now move over to the “Stroke” tab, set its size to “1px”, opacity to “30 percent”, color to “ffffff” and click on the “OK” button to apply it.
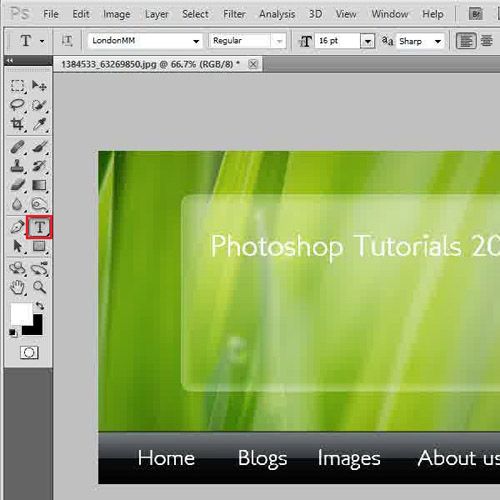
Step # 6 – Add Text in Menus
In the last step, insert some text according to your choice and the theme of the menu. After inserting text, you menu is complete.
The effects shown in this Photoshop tutorial can be applied to other illustrations as well.