Starburst background is one of the popular effects which can be seen hundreds of times in many posters, press ads, flyers and brochures. In this Photoshop tutorial, we’re going to learn how to create a classic “starburst” background. Creating starburst in Photoshop is easy. There are many way in which you can create this effect. This tutorial covers one easy method to do it. You can use this background that we will create for many different purposes later on.
Follow this tutorial to learn how to create a starburst background in Photoshop.
Step # 1 – Fill the background with color
First of all, we will pick up the paint bucket tool, choose “fff777” for the color fill and apply the color on the background layer.
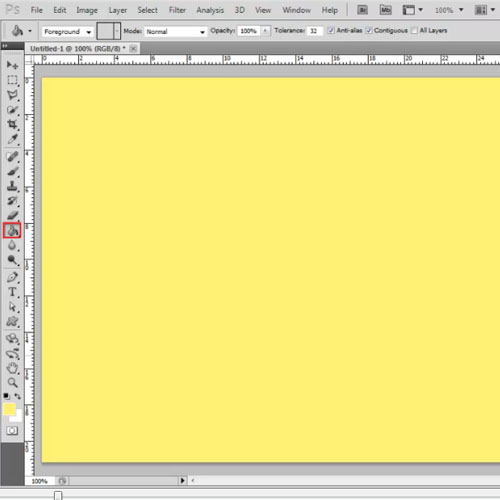
Step # 2 – Draw triangle on the canvas
Now, we would be using rulers to draw a proportionate triangle. For that, drag the grids on to the canvas in a way that they form proportionate squares as shown. Now pick up the pen tool and draw a triangle on the canvas. Use the black color for the fill. Once drawn, stretch the shape vertically.
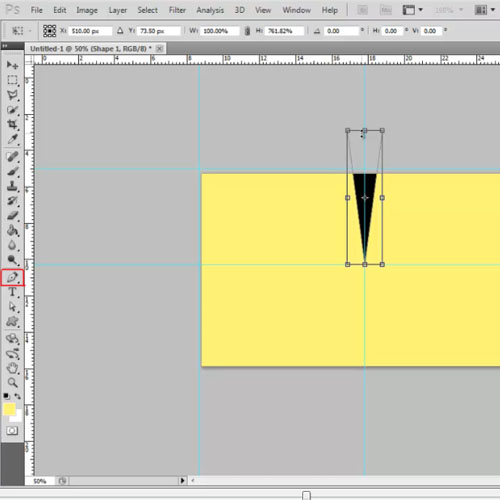
Step # 3 – Duplicate and transform the triangles
With that done, duplicate the layer and use the “transform tool” to tilt the shape. Position it to the center of the canvas, as identified by the grids. Similarly, keep duplicating the shape layer, tilt it and position it to the center of the canvas. Remember that the starting points of all triangles on the canvas should be the same. Increase the size of each shape layer to cover the entire canvas.
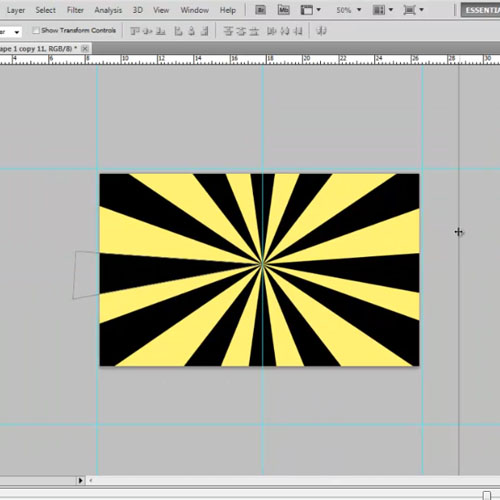
Step # 4 – Apply Color to the shapes
Once done, merge all the shape layers into one layer. With that done, open up the layer style options and move over to the “color overlay” tab. Choose “ffb500” for the color fill. A simple and basic starburst in Photoshop is now ready.
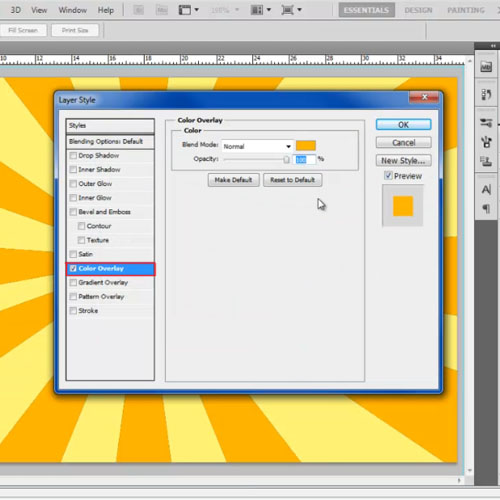
Step # 5 – Add any texture layer
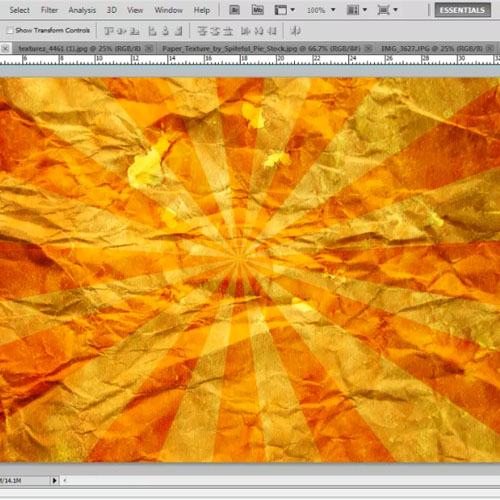
That ends the creation of a basic starburst background in Photoshop. Now you can add various textures to the image play around with the effects and add more to your image.
Over here, we have only used grunge patterns and paper textures to the image and played around with their blend modes to create this effect.
 Home
Home