Adobe Photoshop is one the best photo editing software available. It has many useful options and tools from which you can modify your images by a great extent. You can also add special features and different wonderful effects on your photos. In this tutorial, we would be guiding you on how to make lomo effect in photoshop.
Step 1 – Load Image on Photoshop:
First of all open up Photoshop in your computer and load the image which you want to edit. An image which has a centered object with vibrant surrounding colors are the best choice for this effect.
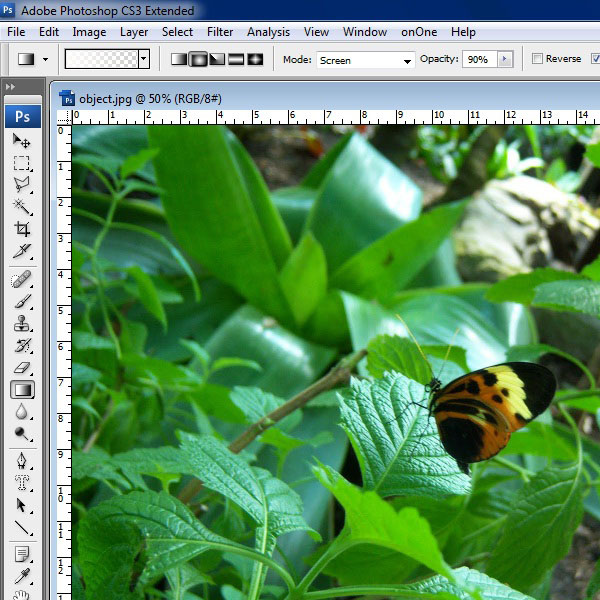
Step 2 – Open Brightness and Contrast Panel:
Now click on the “Image” option available in the menu on top of the window. Select the “Adjustments” option and then click on the “Brightness/Contrast” option from the menu.
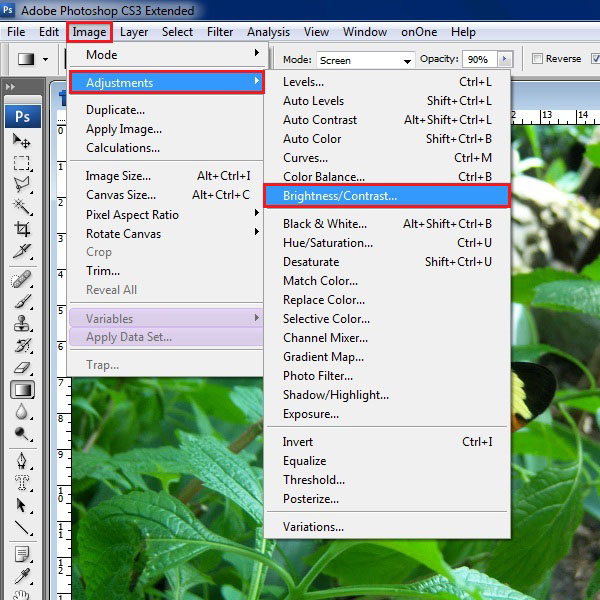
Step 3 – Increase the Contrast Level:
Once the brightness and contrast window is opened, increase the contrast level as shown in the image below. Once done, click on the “OK” button to save the changes made.
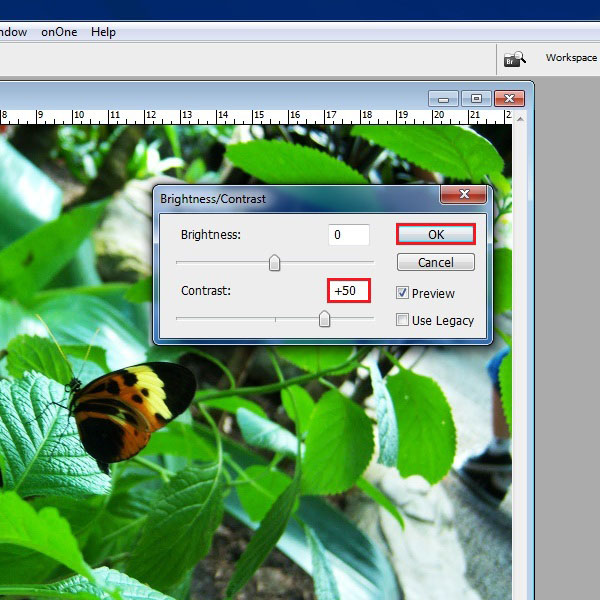
Step 4 – Opening up the Hue and Saturation Panel:
Now follow the same procedure and click on the “Image” option. After that selectthe “Adjustments” option and then move on to the “Hue/Saturation” option from the menu.
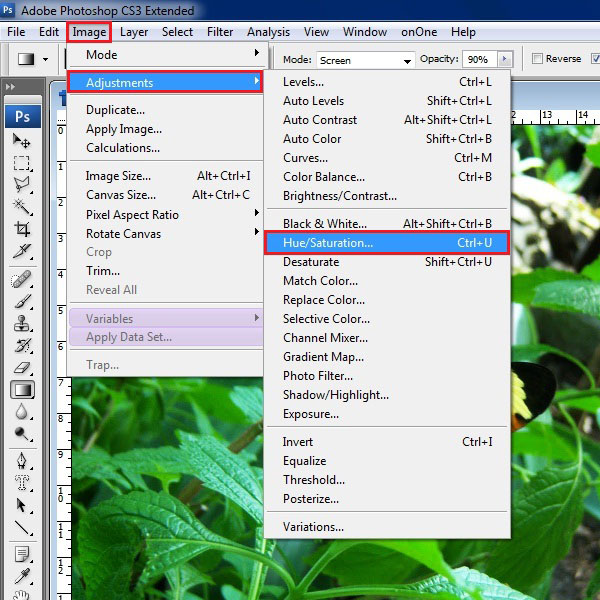
Step 5 – Increase the Hue Level:
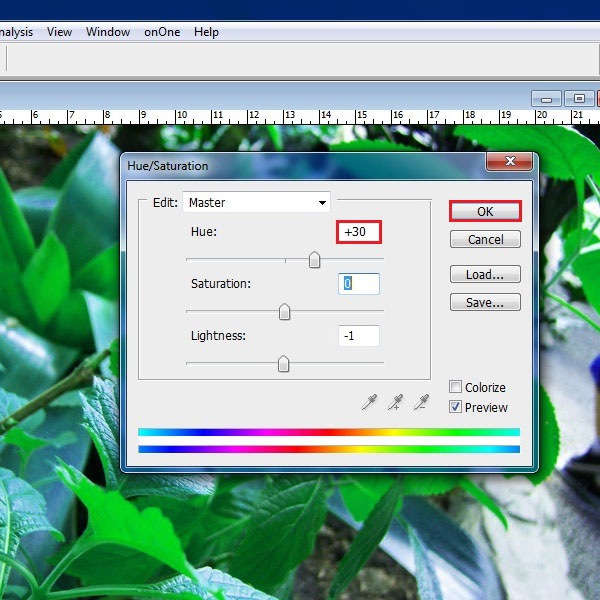
After opening the Hue and Saturation window, increase the level of “Hue” as shown in the image below. After setting the desired level, click on the “OK” button to save the changes.
Step 6 – Select the Image:
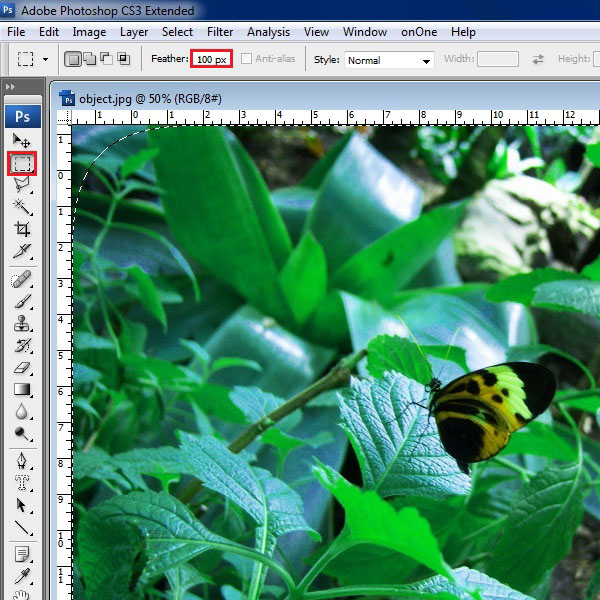
Now, click on the “Rectangular Selection” tool from the menu on left side of the screen. Set the “Feather” option to “100”. Now select the whole picture with the rectangular selection tool. Note that inorder for the effect to be more realistic, you have to make a selection without using the “Select all” command.
Step 7 – Inverse the selection:
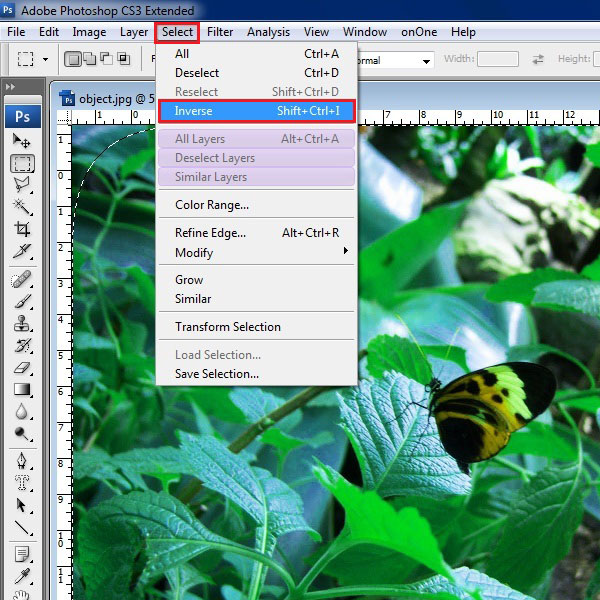
After selecting the whole picture, go to the “Image” option available in the menu on top of the window. Select the “Inverse” option from the menu to make the selection inverse.
Step 8 – Add a New Layer:
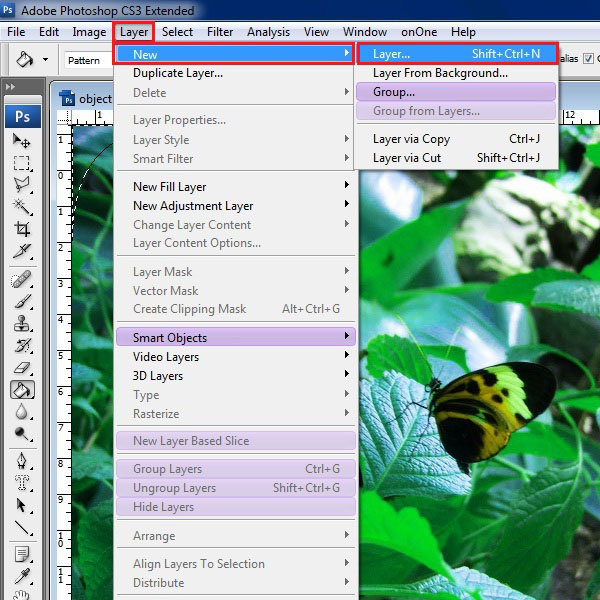
Now after making an inverse selection, go to the “Layer” option from the menu on top and select “New”. Here select the “Layer” option to add a new layer in the canvas.
Step 9 – Using the Paint Bucket Tool:
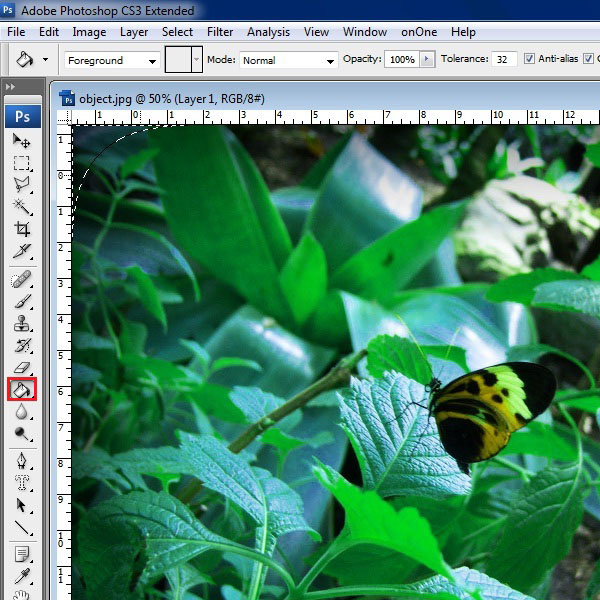
Here in this step, click on the “Paint Bucket” tool from the tool bar and use a black color in the foreground. Now go to the newly created layer and paint the selected areas of the image to make it appear in black color.
Step 10 – Use Blending Option:
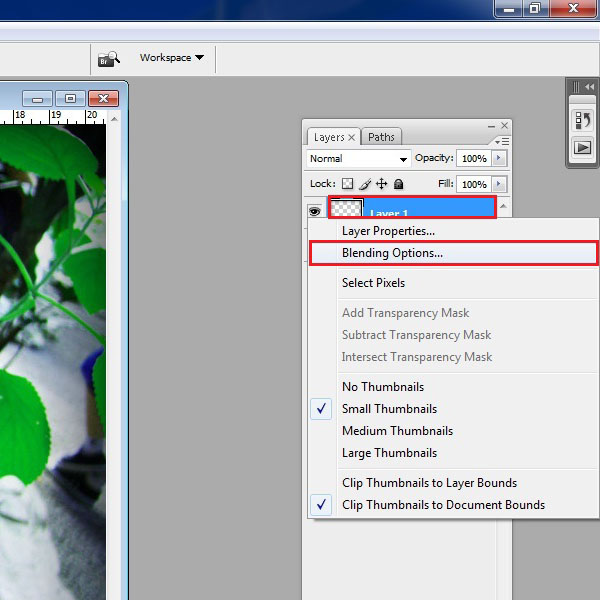
Right click on the new layer and select the “Blending Options” from the menu.
Step 11 – Changing the Blending Options to Overlay:
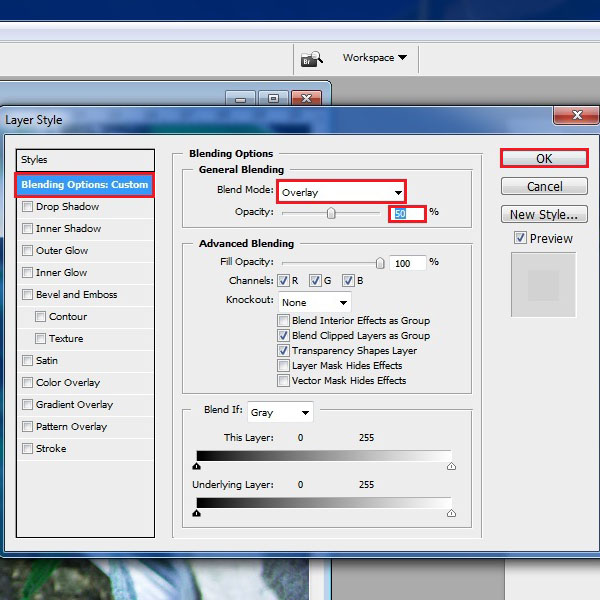
Change the “Blend Mode” option to “Overlay” and decrease the “Opacity” to “50%”. After that, click on the “OK” button to continue.
Step 12 – Using the Gradient Tool:
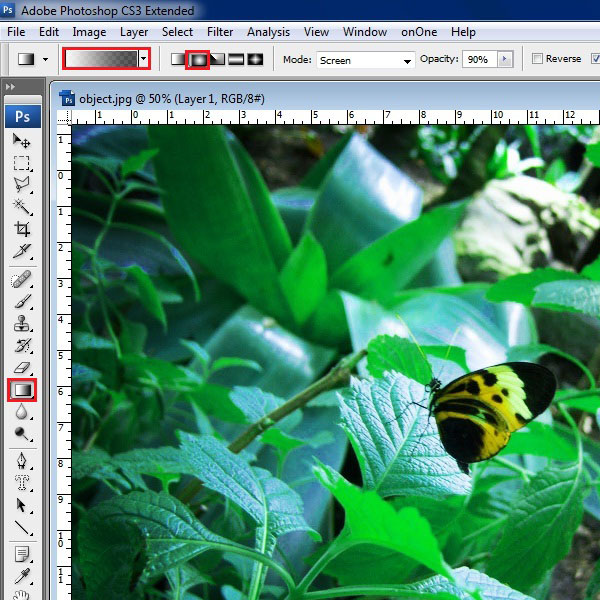
In the final step, select the “Gradient” tool from the tool bar and use thhe “Radial Gradient” type from the menu on top of the window. Make sure to add a white shade to the left side and a black shade to right side for your gradient. Now click on the center of the image and drag a line towards the far end of the corner.
And that is how to make lomo effect in Photoshop.
 Home
Home