With the rapid growth in the technological world, people can connect with each other in real time in a split second. Nowadays people can even access computers remotely through various applications and softwares. Such applications are widely used in schools and colleges for presentation and training purposes. It allows a user to virtually access any PC from his personal computer through internet or a local area network. These applications provide remote access to your computer from anywhere in the world. In this tutorial we will be using “Team Viewer” which is a free application which allows easy remote access between computers.
Follow through these simple steps which will help you to learn how to remotely access your computer.
Step 1 – Downloading and Setting up Team Viewer
1.1-Logging on to the website:
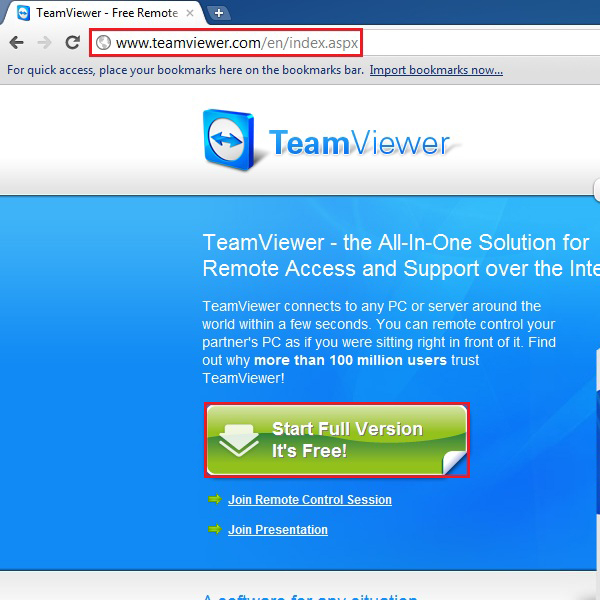
Go to the URL: www.teamviewer.com and click on the “Start Full Version” link available on the home screen (highlighted in the image below).
1.2-Downloading the Application:
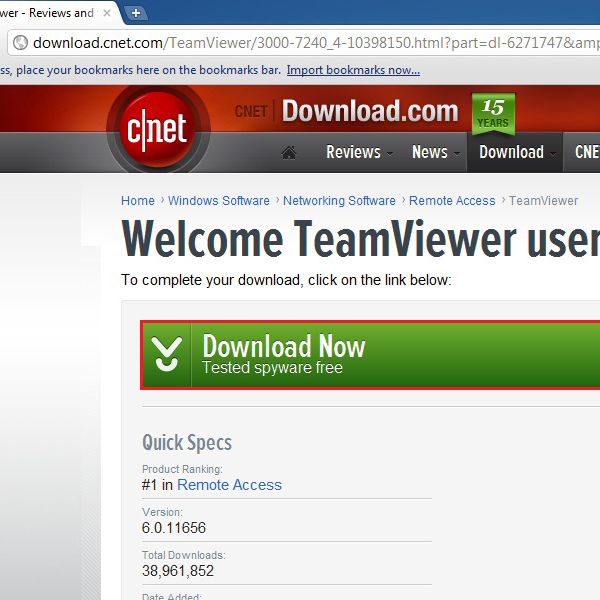
Once the new window loads, click on the “Download Now” button highlighted in the image below.
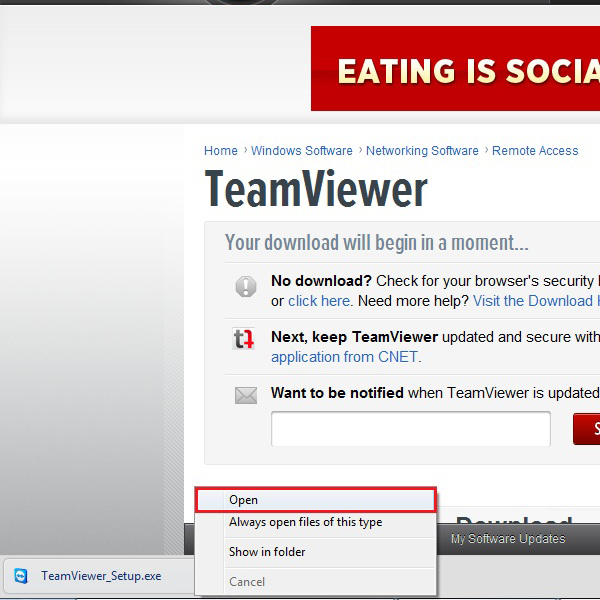
1.3-Browser Notification:
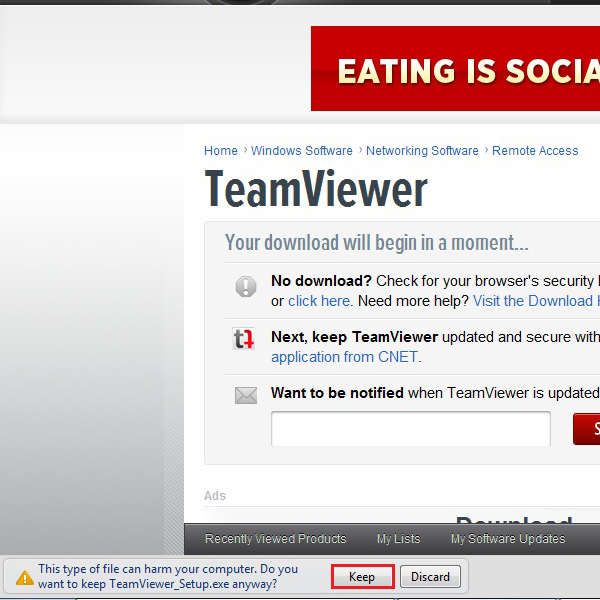
A message would appear at the bottom of the browser giving you the option of downloading or discarding the file. Click on the “Keep” button to start downloading.
1.4-Starting the Installation Process:
After the application has been downloaded successfully, open up the executable file.
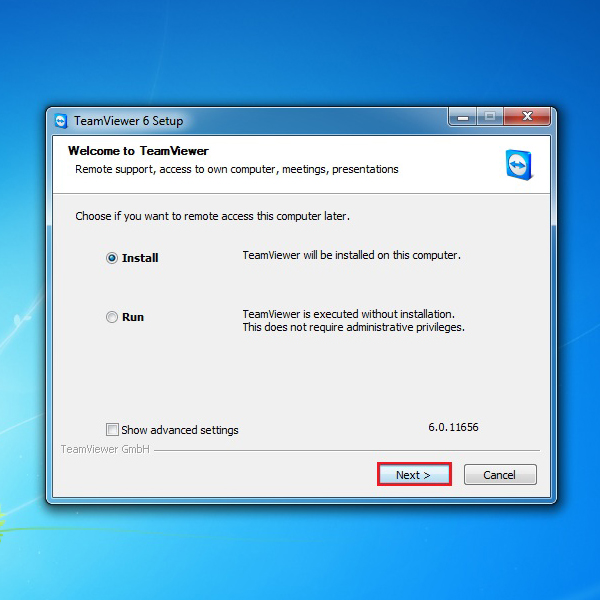
1.5-Choosing the Install Option:
A setup window will open. You can choose to either install the application or just run it without any installation. For this tutorial, select the “Install” option and click on the “Next” button.
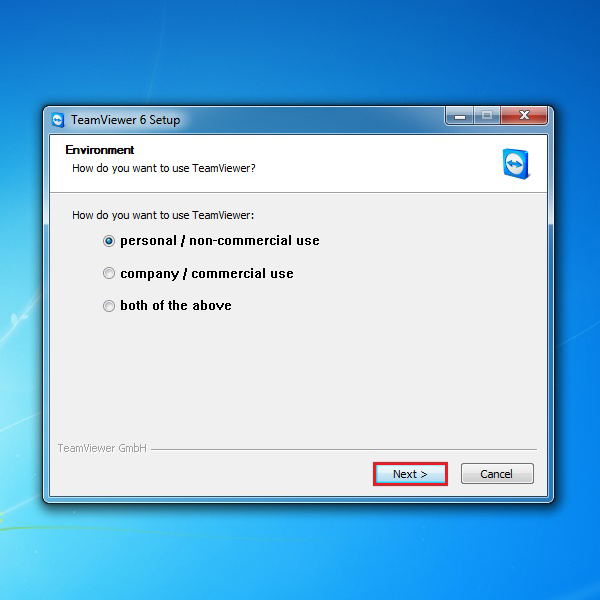
1.6-Choosing how you want to use the application
On the next window you will find three options. Choose the “Personal / non-commercial use” and click on the “Next” button.
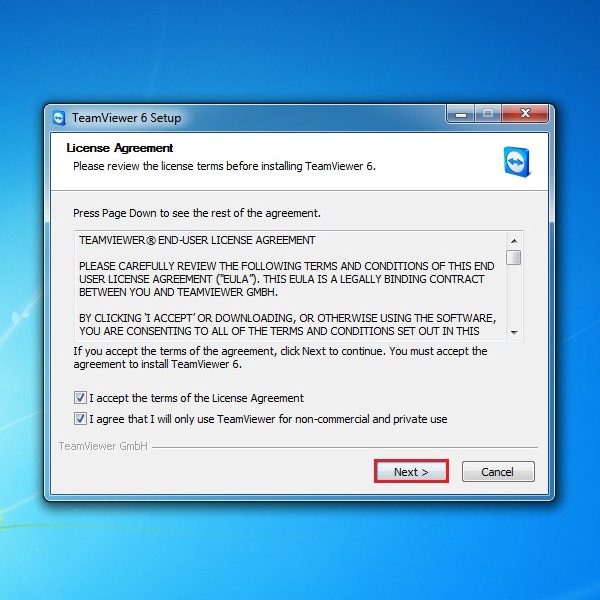
1.7-Agreeing to the terms and conditions:
ow you would be required to agree to the terms and conditions of using this application. Once done, click on the “Next” button to proceed.
1.8-Choosing the type of Installation:
After that you would be required to choose the type of installation. Select the default option and move on to the next step.

Step 2 – Remotely Access your Computer
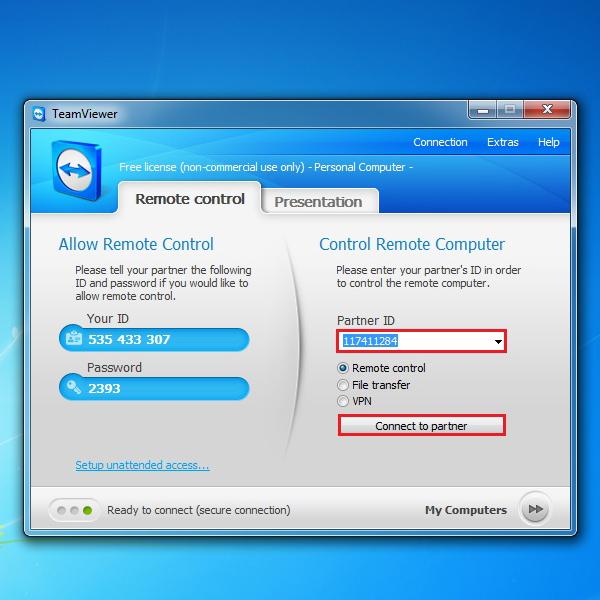
2.1- Entering in the Partner ID:
After the installation has been completed, open up the application. On the main screen enter the the Partner ID, choose the mode of connection and click on “Connect to partner” button. For this tutorial we will be using the Remote Control mode which allows us to access and control the other PC.
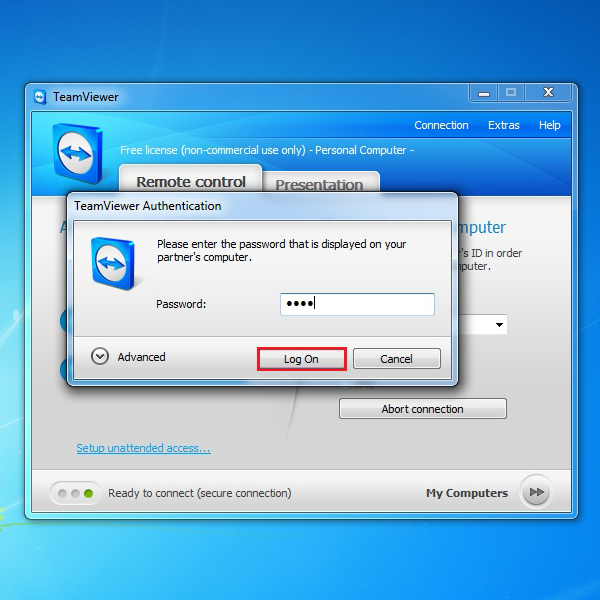
2.2-Input the required password:
A message will appear asking you to enter the password. Once done, click on the “Log On” button.
2.3-Connection Successful:
After your partner has accepted the connection request, you will see his/her desktop displayed right in front of you. Now you have complete access to the other person’s desktop.