It is quite difficult to play all different extensions with the same music player. Every music player supports a limited number of formats; therefore it can get quite hectic to install different media players or codecs to play certain music files. The best solution to this problem is to convert the file into a format supported by the music player you are currently using. There are various music converters available online which allow you to convert a music file into several different types of formats. Many websites have also been launched which allow users to convert the files online. This particular method has become popular largely due to the fact that it doesn’t require any sort of installation or registration. All you are required to do is upload the music file and convert it to your desired format.
In this tutorial we would be using “File Wiggler”, an online platform which converts music files into several different formats in no time. It is the most easy mp3 converter online which also happens to be available for free. Besides the mp3 format it also provides a number of other formats to convert your files into. Here we use a sample mp4 music file and convert it into an mp3 format file.
Follow these steps to learn how to convert mp4 to mp3.
Step 1: Upload Music File
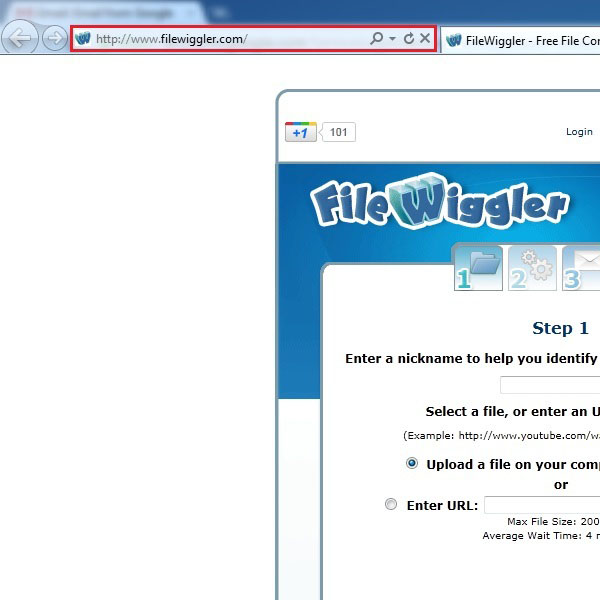
First of all open the URL: www.filewiggler.com
Once the web page loads, you would find an option titled “Upload a file on your computer”. Click on the “Browse” button next to it.
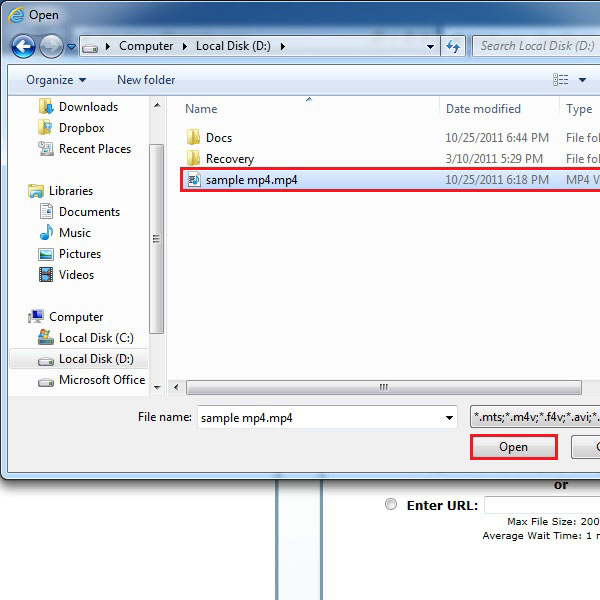
Step 2: Selecting the mp4 file format
A new window should open where you can browse and select the desired music file which you want to convert. After selecting it, click on “Open” and the file would start getting uploaded automatically.
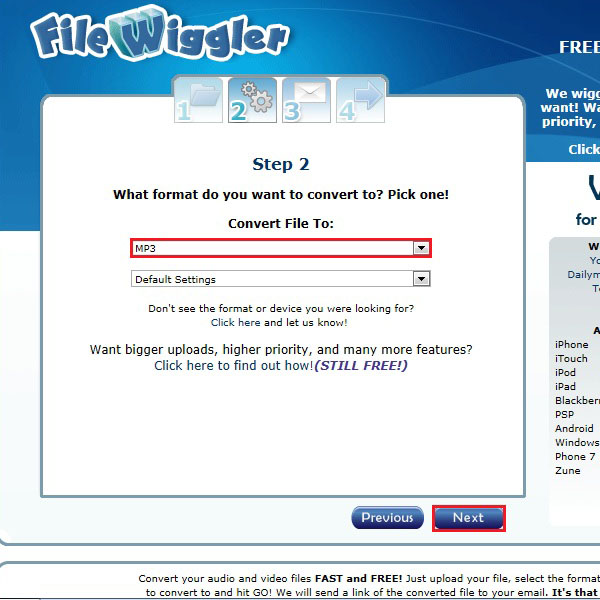
Step 3: Selecting a Desired Format
On the next screen File Wiggler will ask you to select the format in which you want to convert the file into. Here we choose the “MP3” format. After selecting it from the list, click on the “Next” button.
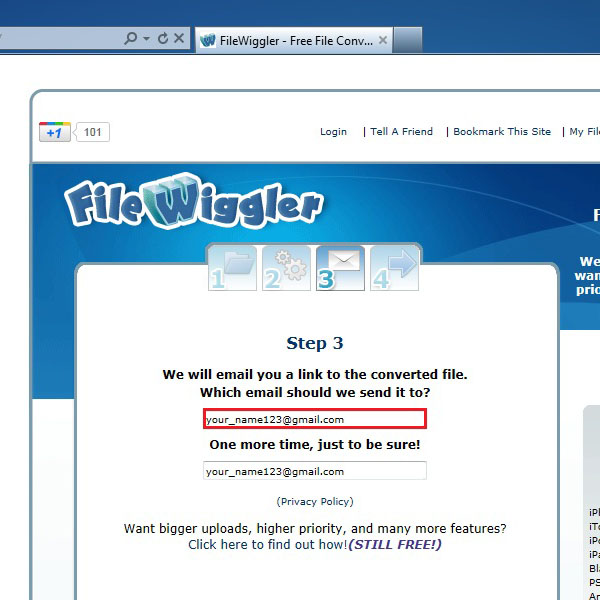
Step 4: Enter Email Address
On the next screen, you will be asked to provide your email address. This step is very important since File Wiggler will send the download link of the converted file to the email address you have put in. Enter your correct email address and click on the “Next” button.
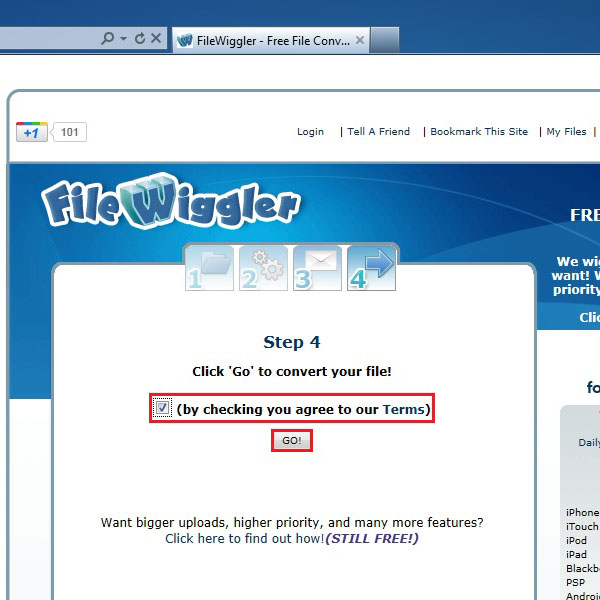
Step 5: Terms and Conditions
In the last step, click on the check box to agree with the terms and conditions of using this web service. After that click on the “GO” button below the check box. Once done, the uploading would automatically start.
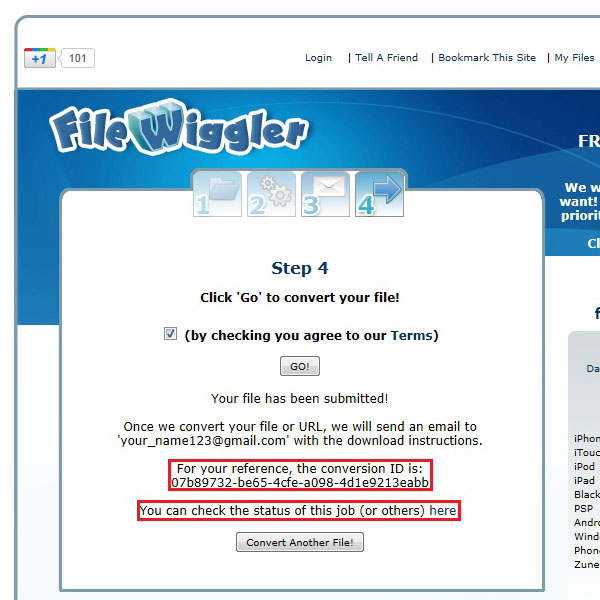
Step 6: Getting the File Reference Code
Once the uploading finishes, File Wiggler will provide you and option to check the status of your uploaded file. A unique ID code is generated with the help of which you can check the status. Copy this code and click on the link available below it to find out if your file has been converted or not.
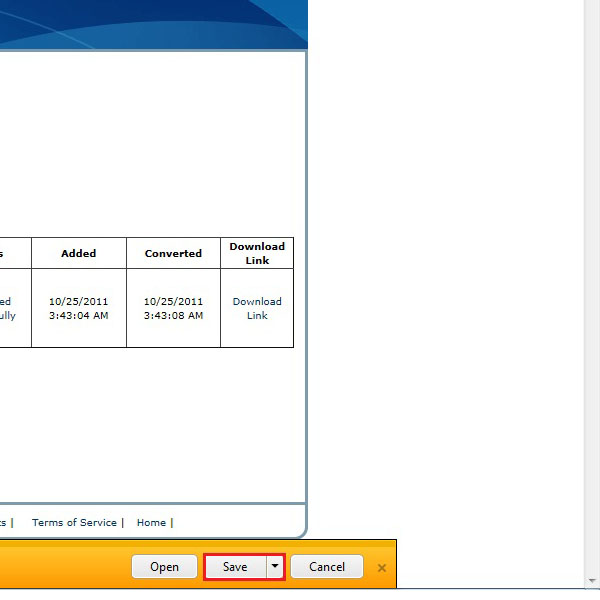
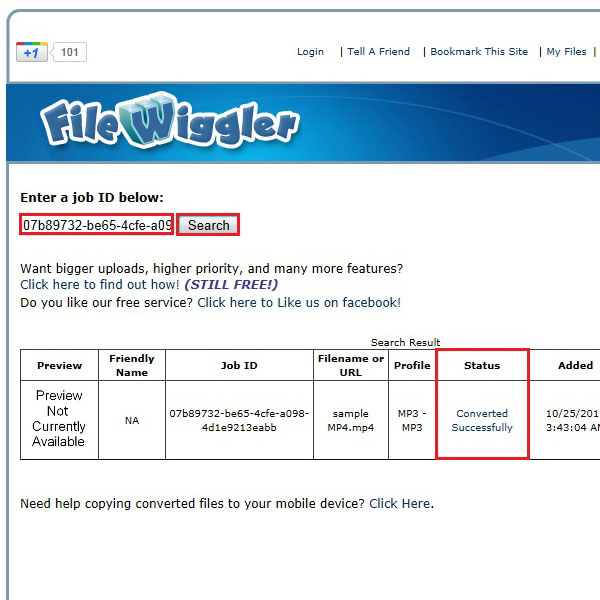
Step 7: Checking the Status
Once the new page loads, locate the search box and enter the reference code that you had received in the previous step. Once done, click on the “Search” button to find out the status of your file. Once done, it will show you the status of the file you uploaded. If converted successfully, you can download the file from the link provided at the last column of the table.
Step 8: Download the File
Now simply click on the download link and your browser’s default download manager will ask you to open or save the converted file. Click on the “Save ” button to download the converted file.