Photoshop is a highly useful software that gives one the opportunity to discover a variety of tools and play around with their pictures. Various effects can be applied to images while using Photoshop brushes and Photoshop textures in order to enhance them. The software not only allows you to completely transform the image in question into something remarkable but also allows you to learn about tons of effects you could use at a later stage.
One such is the halftone effect that is fairly simple to apply and provides appealing results. In this tutorial we will teach you how to create a halftone effect in Photoshop.
Step 1 – Entering Text
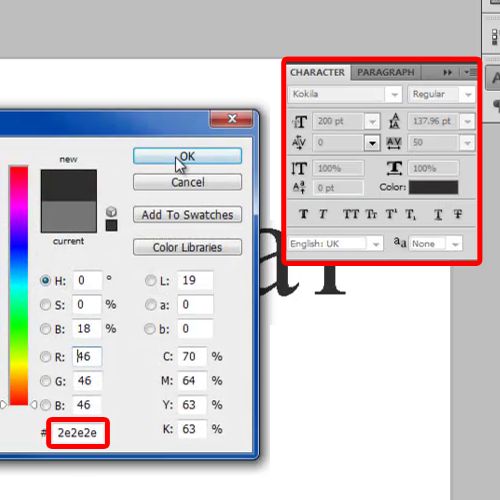
In order to begin with the process, you will firstly need to select the “text tool” and enter the desired text. For this tutorial, we have used “Kokila” as the font, using 200pt for the size, 50 for spacing and “2e2e2e” for the color. You will need to enter all these values etc before proceeding in order to get desired results.
Step 2 – Using the Gaussian Blur
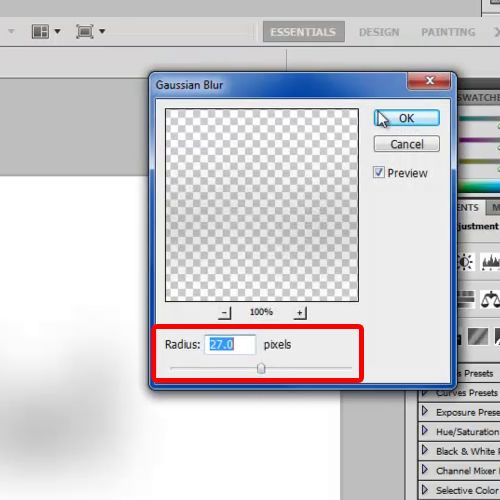
Next, you will need to place the text at the centre of the canvas and rasterize the layer. For this, you must go to the filter menu, move over to “Blur” and select the option titled “Gaussian Blur”.
Use 27 pixels for the radius and apply the filter. Once the above steps have been done, duplicate the layer multiple times until the basic form is clearly visible on the screen. Here we have duplicated the layer 9 times, and merged all the layers into a single layer. Make sure all the previous steps have been completed appropriately before proceeding.
Step 3 –Adjusting the Brightness/Contrast
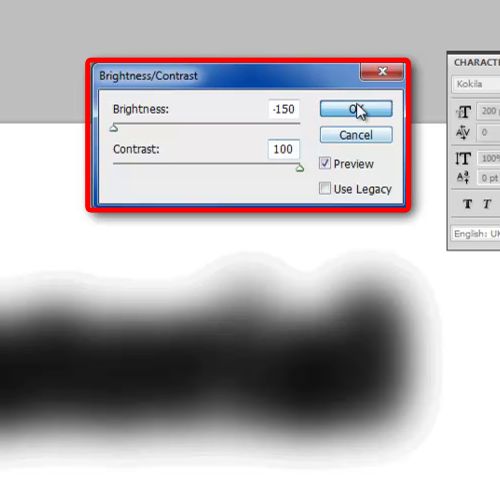
With that done, go to the image menu, move over to “Adjustment” and click on the “Brightness/Contrast” option.
A new pop up window will appear on your screen when you will be required to decrease the brightness to -150 and increase the contrast level to 100.
Step 4 – Switching to Grayscale Mode
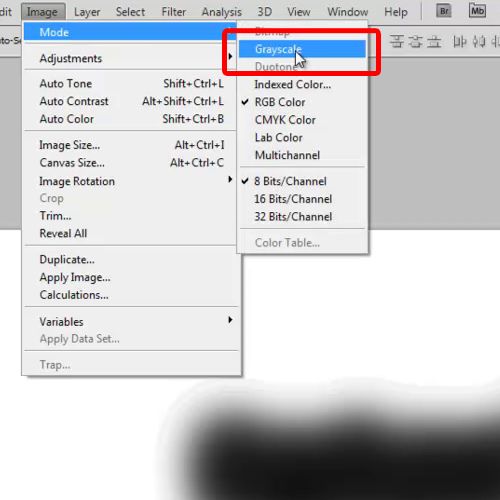
Now open up the Image menu once more. Next, move over to Mode and click on the “Grayscale” option. Don’t flatten the image and discard all the previous color information.
Step 5 – Using the Bitmap Mode
Once this has been done, you must now open up the image menu once more. Move over to Mode, select the “Bitmap” option and flatten all the layers.
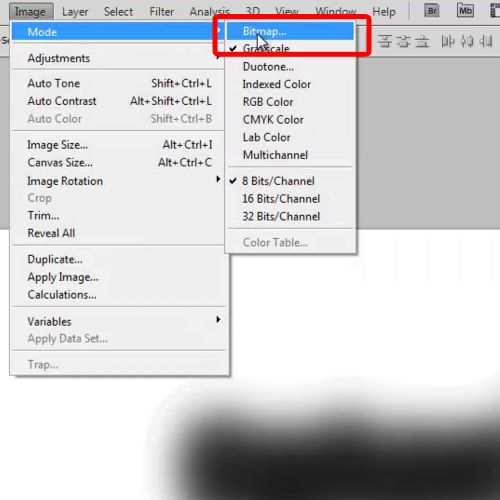
Step 6 – Setting the Resolution and method
Now, set the output to 72 pixels per inch and use the Halftone Screen method for the conversion. This will bring the necessary changes to your image.
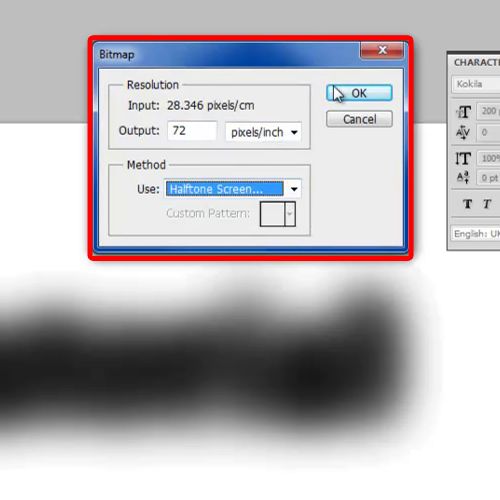
Step 7 –Using the Halftone Screen
In the next window, set the frequency to 8 lines per inch, angle to 45 degrees and shape to round. Click on the “Ok” button and there you have it, a created Photoshop texture appears that be used for design purposes.
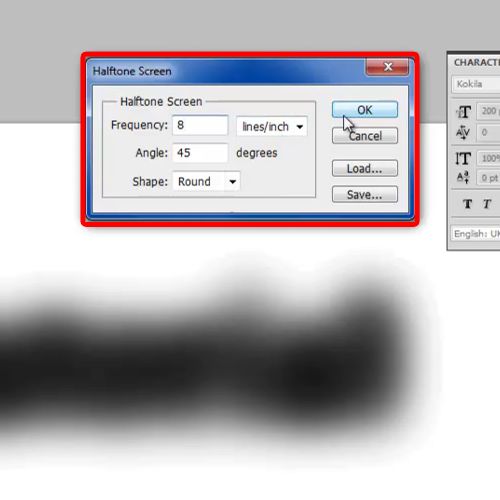
Step 8 – Adding text
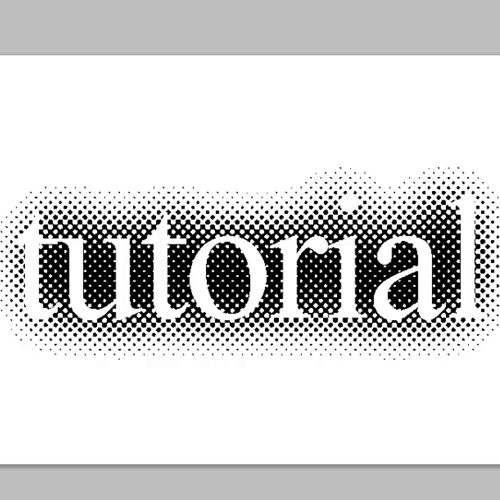
Now we will add the text, using the same font style as before and place it in the centre of the image. This marks the completion of our procedure and the final product is ready on your screen. You can even further add this effect in a design and use different Photoshop brushes to enhance the overall output.
 Home
Home