Animations are more expressive and interesting then still images. Many people consider it difficult to create an animation however it’s not difficult at all. There are many graphic applications available which allows you to design and create animations easily. Adobe Flash is one of such applications which offer many helpful tools to make different types of visual animations like morphing, blurring, picture masking, tweening etc.
In this tutorial you will learn to apply masking effects over cursor movement in just few simple steps.
Step # 1 – Import an Image
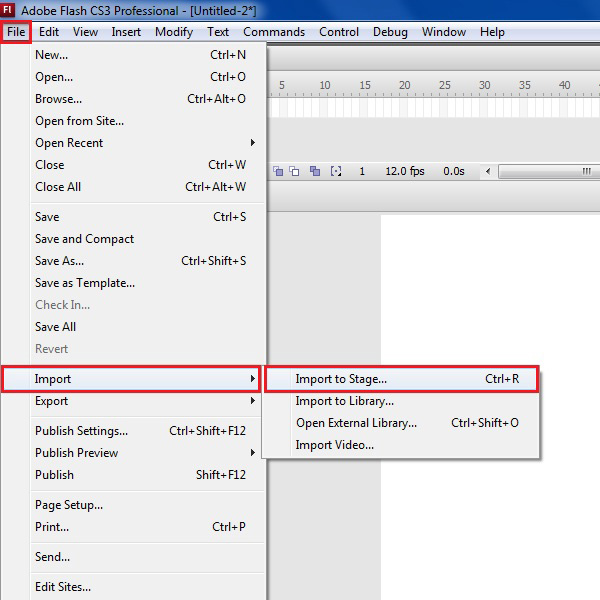
On the main page of Adobe Flash, go to the “File” menu which is located at the top left corner of the screen. Click on it and select the “Image” option from the menu. Now click on the “Import to Stage” option from the list.
Step # 2 – Select a Background Image
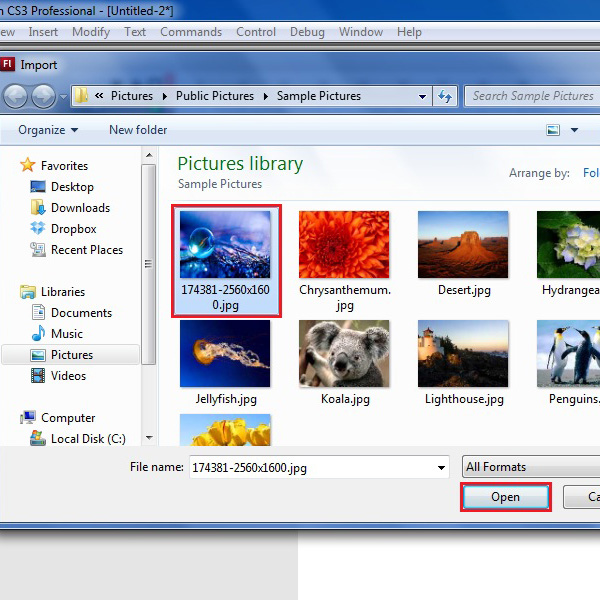
Now choose an image from the browser menu and click on the “Open” button to import it on the main page.
Step # 3 – Adjust the Image Size
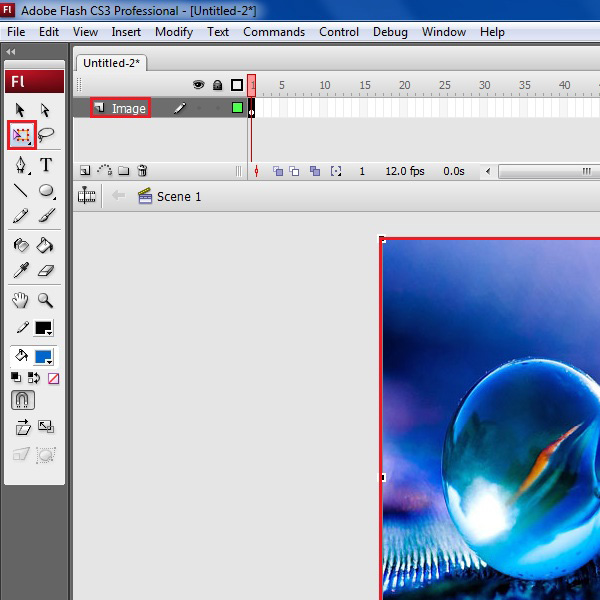
Once the image is displayed, select the “Transform” tool from the menu and adjust its size to fit according to the page. Now double click on the name of this layer and change it to “Image” which defines its content.
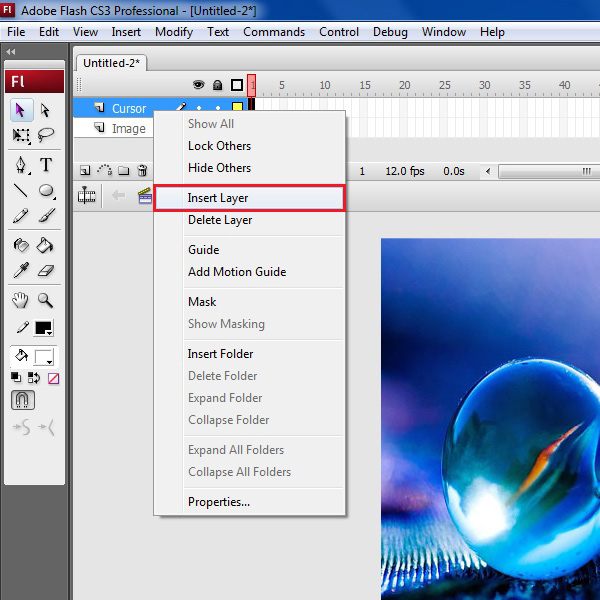
Step # 4 – Insert a New Layer
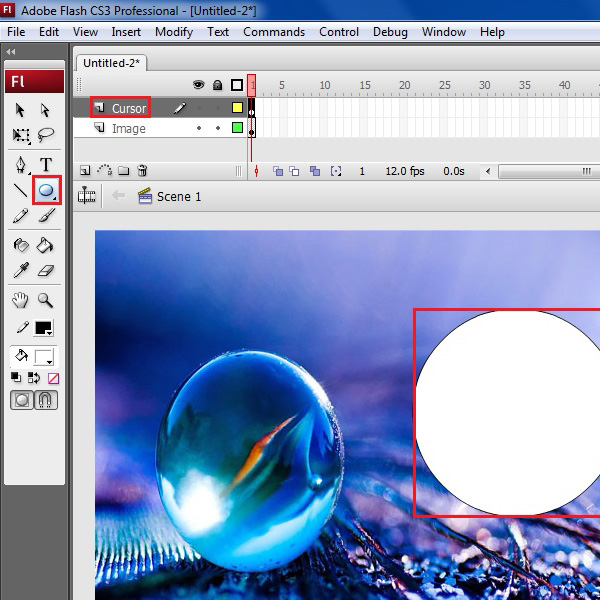
Now add a new layer by right clicking on the existed layer and select the “Insert layer” option form the menu.

Step # 5 – Draw a Circle
Change the name of this new layer to “Cursor”. Now select the “Circular” drawing tool from the menu and draw a circle on the page.
Step # 6 – Convert to Symbol
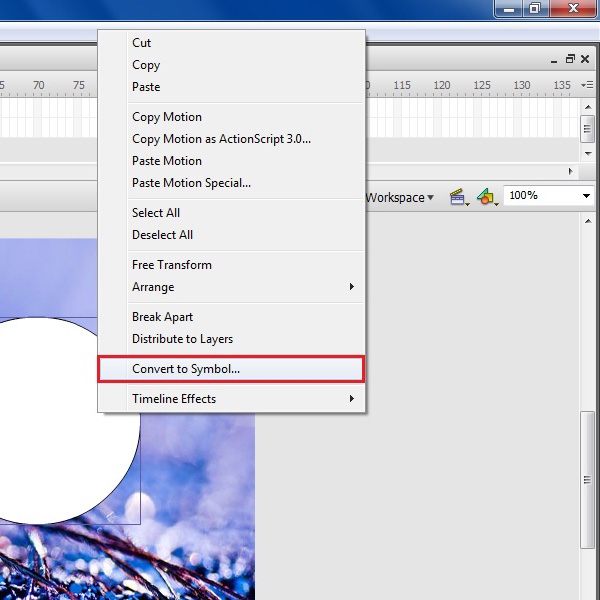
Right click on the circular shape and select the “Convert to symbol” option from the menu to convert it into a symbol.
Step # 7 – Choose a Movie Clip
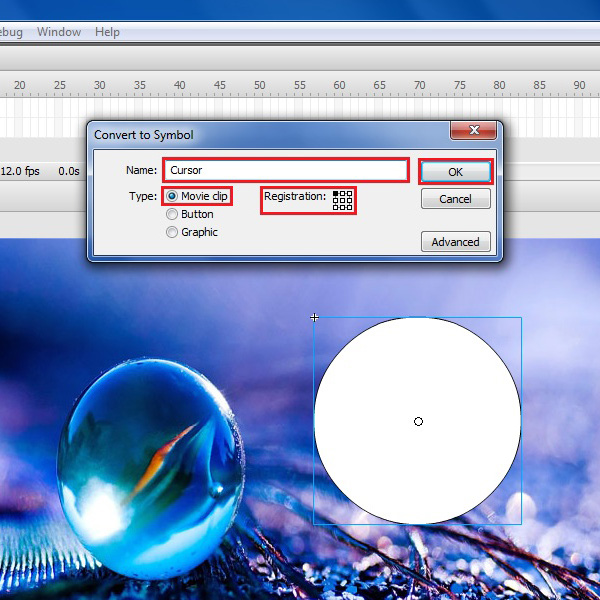
A new window will open in which you can see some options for the symbol. Choose the “Movie clip” option and enter its name as “Cursor”. Select a top left corner of the “Registration” option and click on the “OK” button to create a cursor movie clip.
Step # 8 – Open the Properties Panel
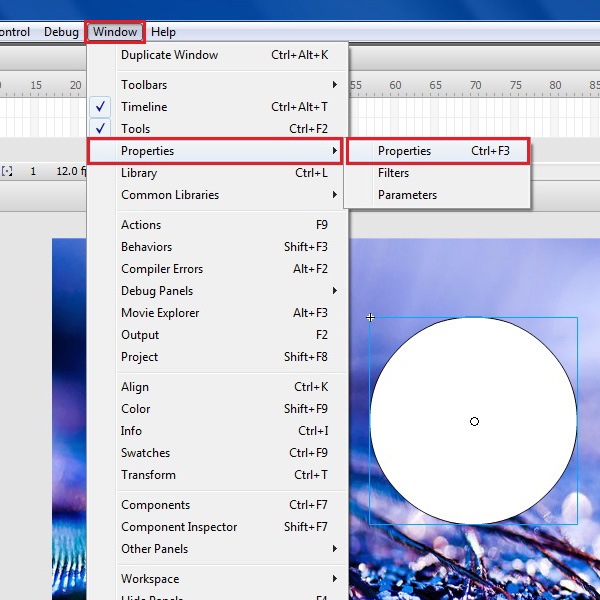
Now as the circle is converted into a movie clip, go to the “Windows” menu and select the “Properties” option to open the properties panel.
Step # 9 – Choose an Instance Name
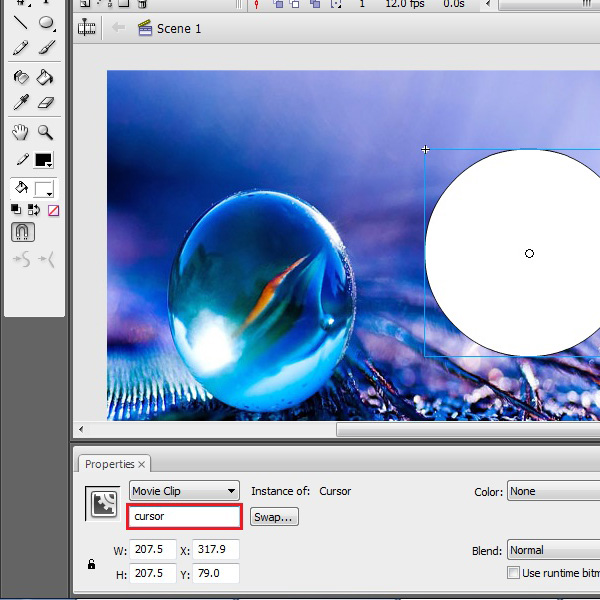
In the properties panel, you will see a text box available in the left corner. Click on it and enter the instance name as “Cursor”.
Step # 10 – Add a New Layer
Close the properties panel as we don’t need it now. Go to the layer’s panel and add a new layer in the animation scene.
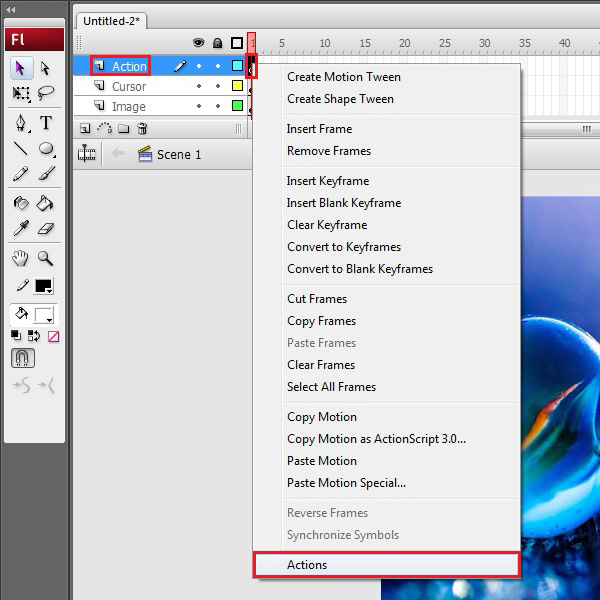
Step # 11 – Open the Actions Panel
Change the name of this new layer to “Action”. Now right click on the first frame of this new layer and select the “Actions” option from the menu.
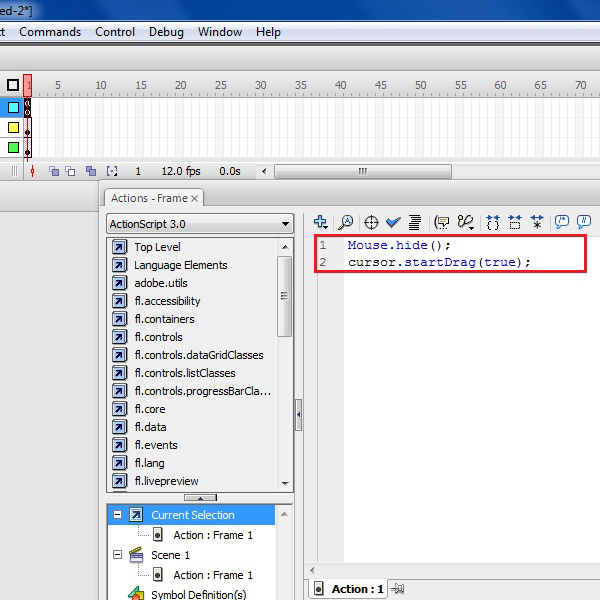
Step # 12 – Enter an Action Code
Once the action window is opened, click on the action panel and enter the following code:
“mouse.hide();”
“cursor.startDrag(true);”
This action will hide the cursor arrow and move the “Cursor” movie clip along with the mouse pointer.
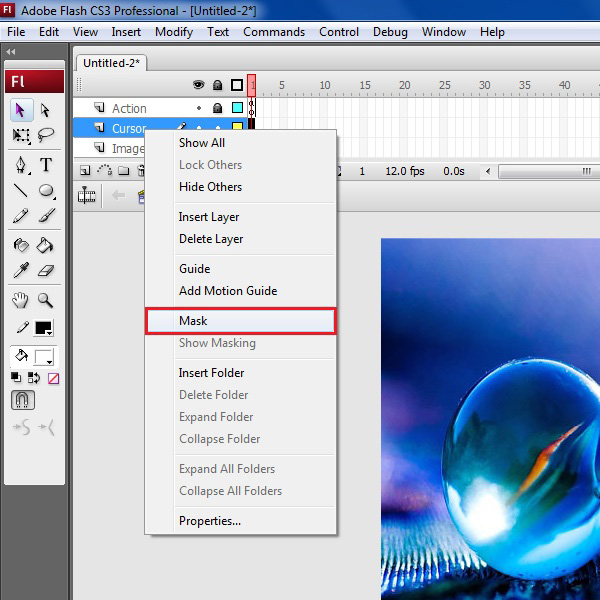
Step # 13 – Create a Mask
Now close the actions window and right click on the “Cursor” layer. Select the “Mask” option from the menu to convert it into a mask.
Once done, you will see that the cursor layer is now masked over the image.
Step # 14 – Test the Animation
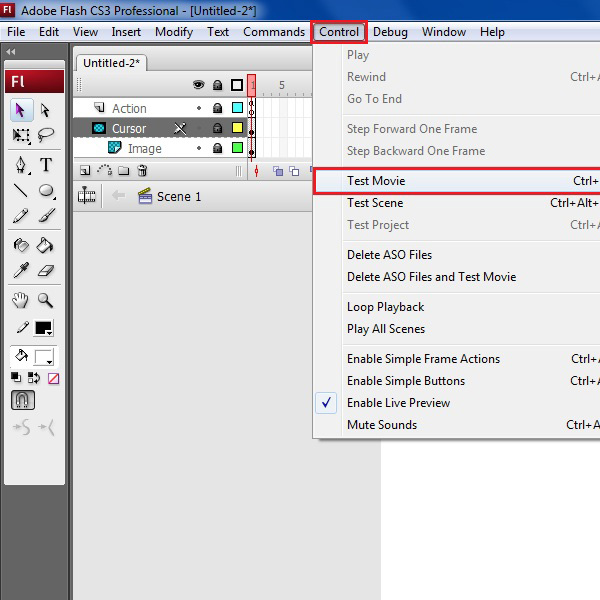
Go to the “Control” menu and select the “Test Movie” option from the list to play and test your animation.
Step # 14 – Review the Animation
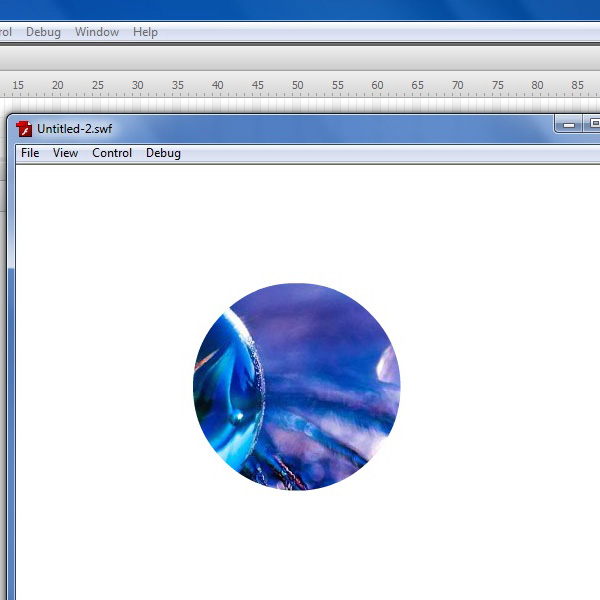
After loading the test window, you can see that the masking effect is working perfectly over the image.
 Home
Home