Gmail is one of the largest email service providers in the world. It has expanded its services to different needs of the internet over time and gives many features in its email service. Such as controlled spam, unlimited storage space, chat, labs etc. In Gmail you can set your text styling, color, and size as per your preference by setting defaults in that manner. It reduces chances of any corrections in formatting if the defaults are set as per your preferences.
Follow this step by step tutorial to learn How to define fonts, font color and font size in Gmail.
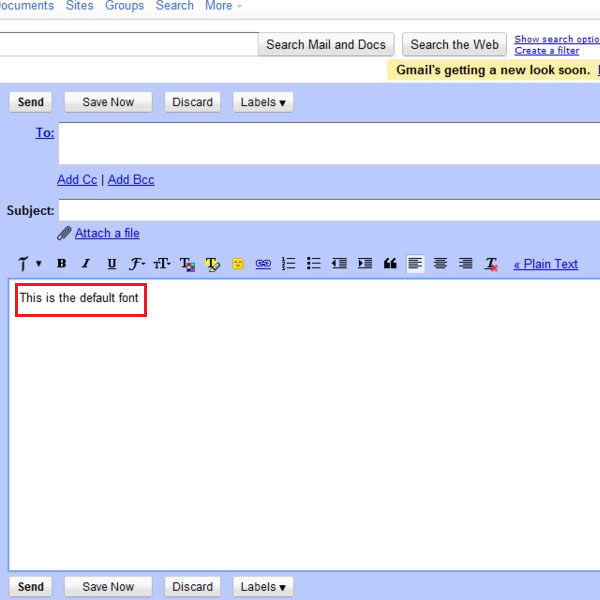
Step #1: Checking the default font
To begin, sign into Gmail by going to www.gmail.com, type the username and password and click Sign in. In the main Gmail inbox page, click on the ‘Compose’ button on the top left of the page. The Compose window will open where you can type text and attach files to communicate to others via email. In the text field of the Compose window, type ‘This is the default font’. The font style, color and size are set on your Gmail by default.
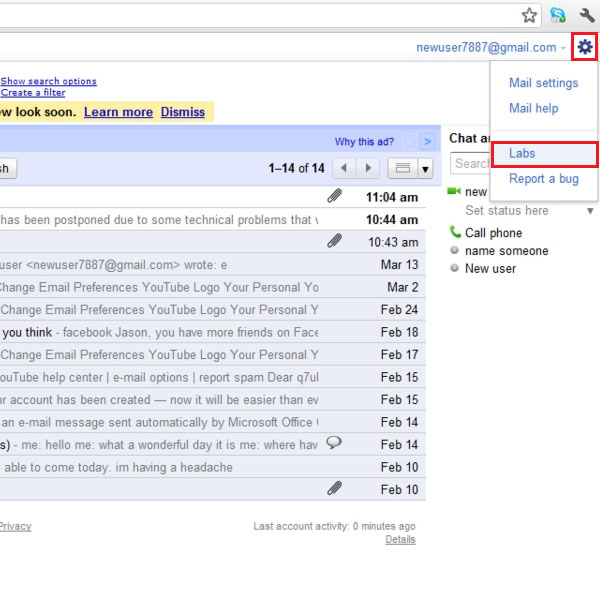
Step # 2: Open Labs
You can access Gmail Labs by go to the gear shaped icon on the top right side which denotes Settings. Click on the icon to open the drop down menu, in this menu, move the cursor down to the ‘Labs’ tab and click.
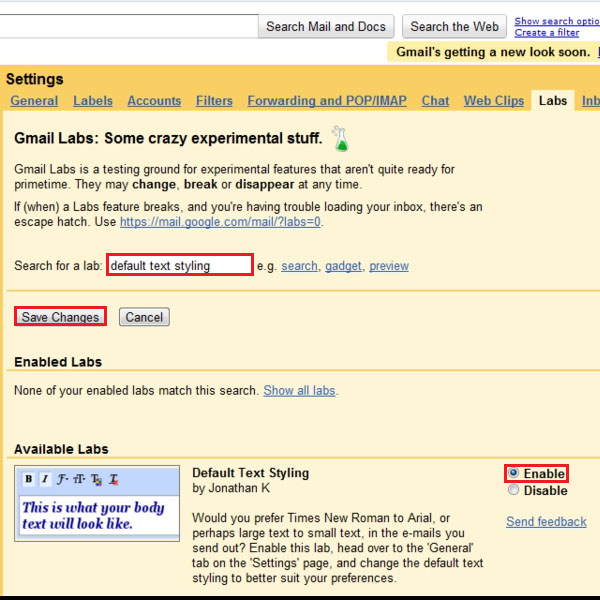
Step # 3: Enable Default Text Styling
In the Labs page, there is a search field, where you can type in your searches. Type ‘Default text styling’ in the search field and press Enter. The results of Available labs will include the Default Text Styling Lab, here click on the Enable option and move your cursor to the ‘Save changes’ button and click to ensure that all changes are saved before the window is closed.
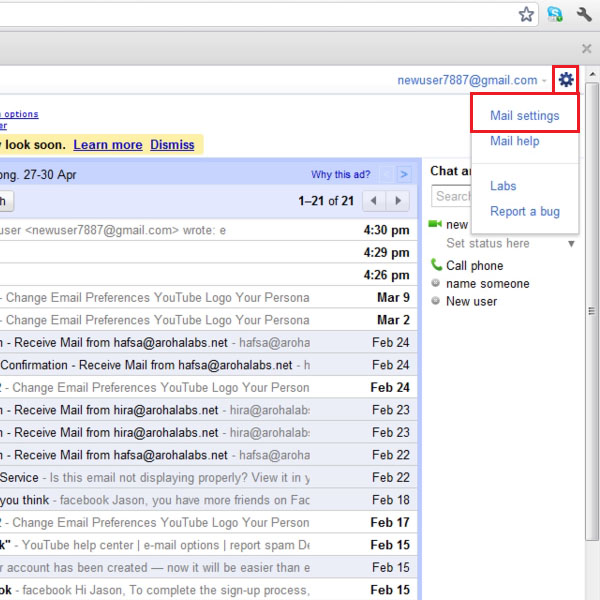
Step # 4: Open Mail Settings
Back in the main Gmail page, again click on the gear shaped Settings option and move your cursor to the ‘Mail Settings’ and click on it. This will open the Mail Settings page.
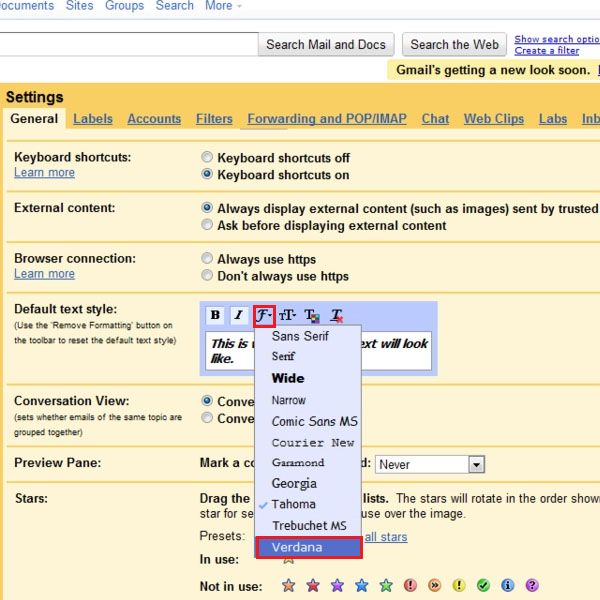
Step # 5: Make changes to Default text style
In the Mail Settings page, you can scroll down till the Default text style section is in the screen. In this section, make changes to the font style, as you can see in the picture, you can change the font style from ‘Tahoma’ to ‘Verdana’.
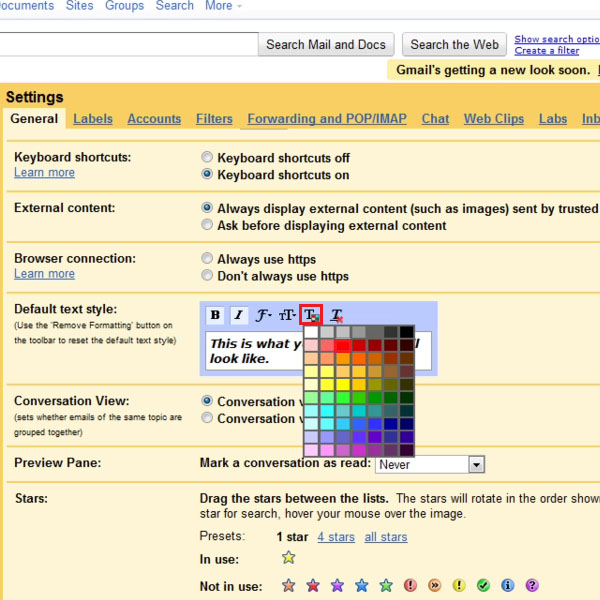
Step # 6: Make changes to Default text color
In this section you can also change to default color of the font as shown in the picture, by clicking on the icon with a T and a color palette.
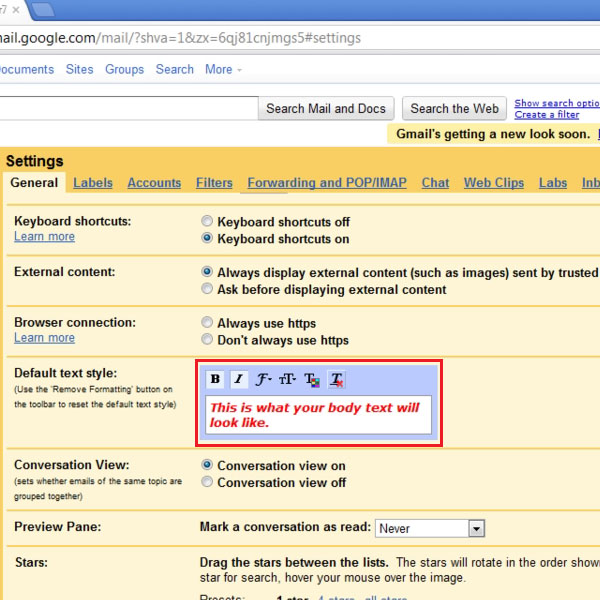
Step # 7: View the Set font style
You can then see the sample of the font style, size, color etc in the small sample window as shown in the picture.
Step # 8: Click ‘Save Changes’
In the Mail Settings window, after you have finished making changes to the font settings, scroll down to the end of the page and click on ‘Save change’. Ensure to save the changes you made before exiting the page.
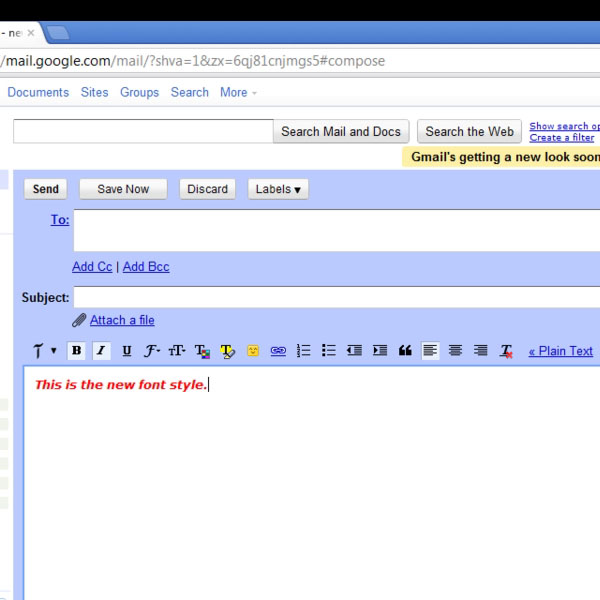
Step # 9: Type in Compose window
To see how the new font style is being used, go to the Compose window and start typing in the Compose window. As you can see that the text is now typing as it was set in the Mail settings.