In this tutorial, we will guide you through a step by step process on how to geotag your photos. There has been a radical movement towards geo location and location based applications. You can easily specify a location where a picture was taken using the Google Maps application in Picasa. You can download the two applications and embed the location where the picture was taken. Furthermore, geotagging photos also allows your picture to be viewed via a satellite map that is rendered by Google Maps.
Before learning how to geotag pictures, log on to the two URL’s to download Picasa and Google Maps:
picasa.google.com
earth.google.com
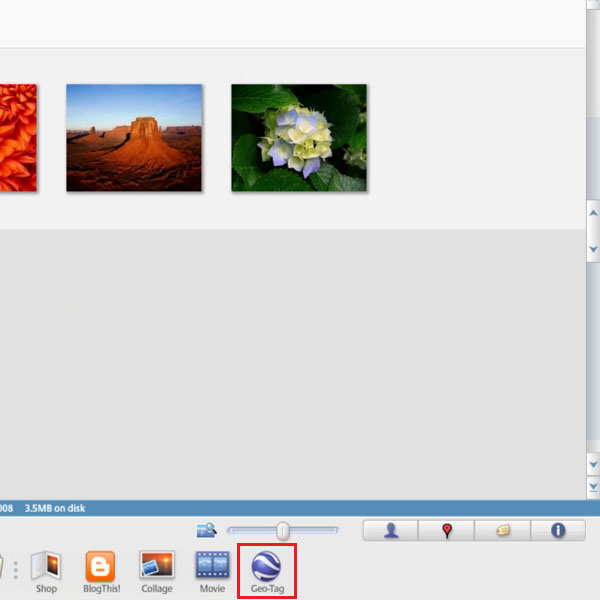
Step 1 – Choosing an Image on Picasa:
Open up Picasa and choose an image or a folder, full of images, that you want to geo tag. Simply choose the image and click on the Geo Tag option, located at the bottom photo tray, highlighted in the image below.
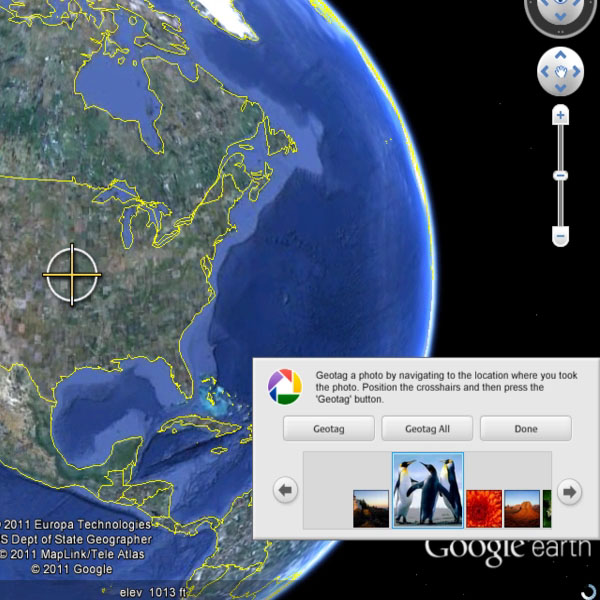
Step 2 – Working with Google Earth
Once you have clicked on the Geo Tag button, Google Earth will open up with a small Picasa window located on the bottom right corner of the application. From the photo tray, choose the image that you want to geo tag.
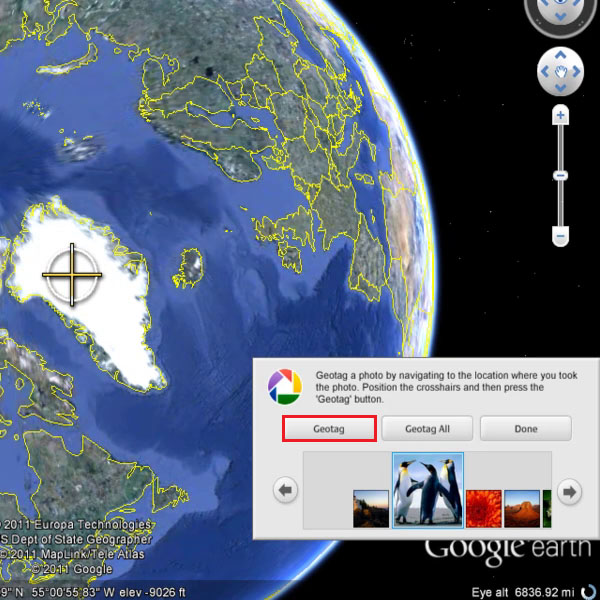
Step 3 – Navigate and Geotag:
Navigate to the location where the picture was taken. Point the yellow cross hairs to the location which you want to tag. Once done, simply click on the Geotag button, highlighted in the image below, to geotag the image with the corresponding location. You can also choose the Geotag All option to tag all the images in a folder with the same location. Once you are done with this step, click on the “Done” button to save the location. Exit from Google Earth and click on the Yes button once the notification message pops up. This would save the location that you have tagged.
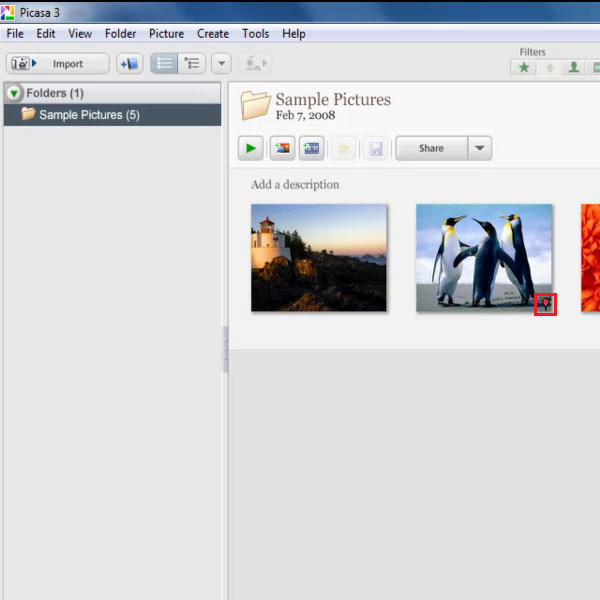
Step 4 – Geotag Icon:
In Picasa, you would see the a small icon at the bottom of the thumbnail, highlighted in the image below. This means that your image has been geo tagged.
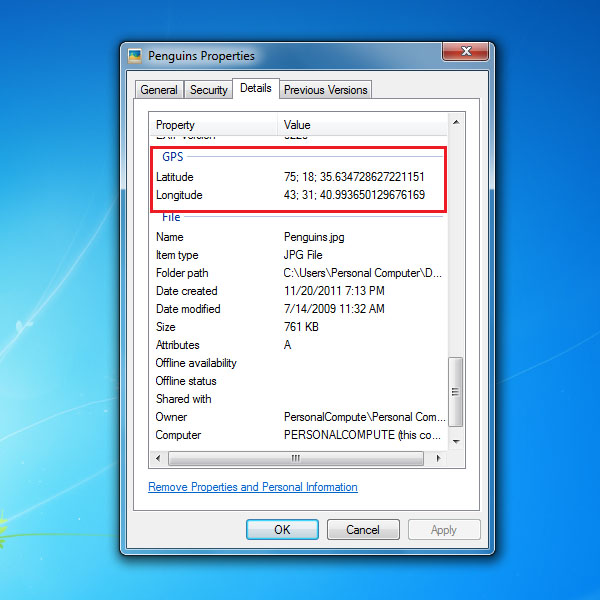
Step 5 – Image Properties:
Right click on the image that you have geo tagged, and go to properties. Move over to the Details tab and scroll down. You would see the longitude and latitude information, check the highlighted section in the image below.