Google Docs is a part of Google and allows you to store, edit, share, create, print and publish documents. It is a free service which provides its users with 10 GB of storage capacity. People can work with other users and that too in real time. In this Google Docs tutorial, we will help you get started with Google docs and show you how to go about it.
Follow this step by step guide to learn how to log in to Google docs and get familiar with the interface.
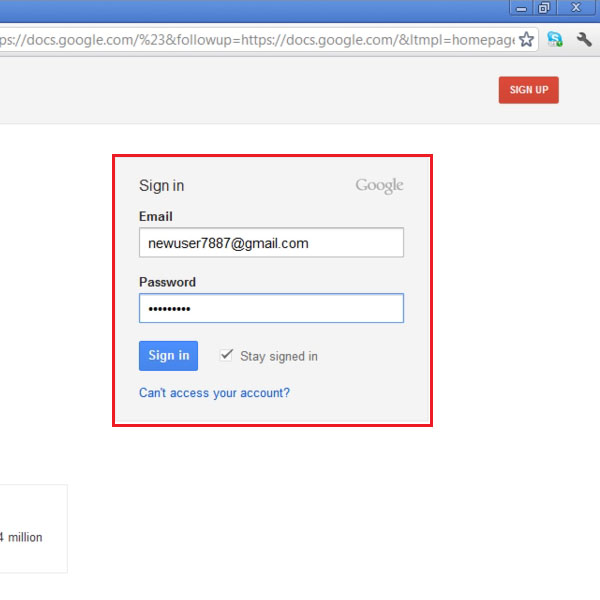
Step # 1 – Sign in to Google docs
First of all, go to the URL: docs.google.com in your browser and a login page will appear where you will be required to enter your email id and password. Once entered, click on the “sign” button to log in to your account.
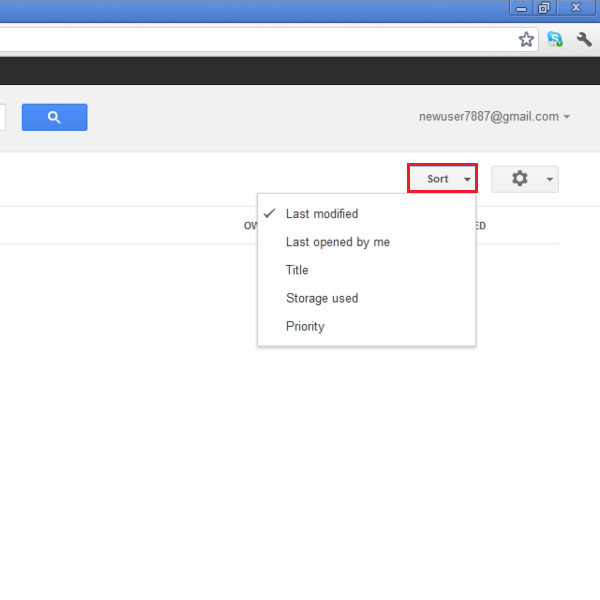
Step # 2 – Click on Sort button
On the right hand side of your screen, click on the “sort” button and a drop down menu will appear. From the drop down menu, choose any one of the sorting options such as “last modified, last opened by me, title, Storage used or priority”. You can select any of these sorting options and your documents will be sorted as per your choice.
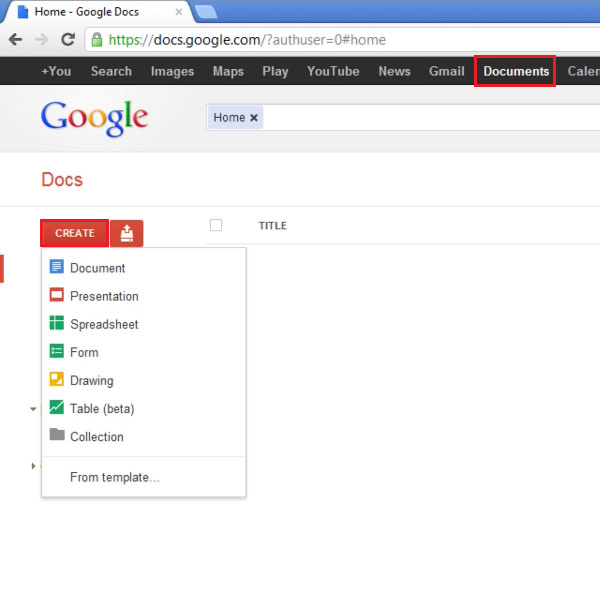
Step # 3 – Click on the Create button
The create button which is placed on the left hand side of your screen allows you to create new document, presentation, spreadsheet, form, drawing, table, etc. Simply click on the “create” button and when the drop down menu appears select any one of the options in order to create a document.
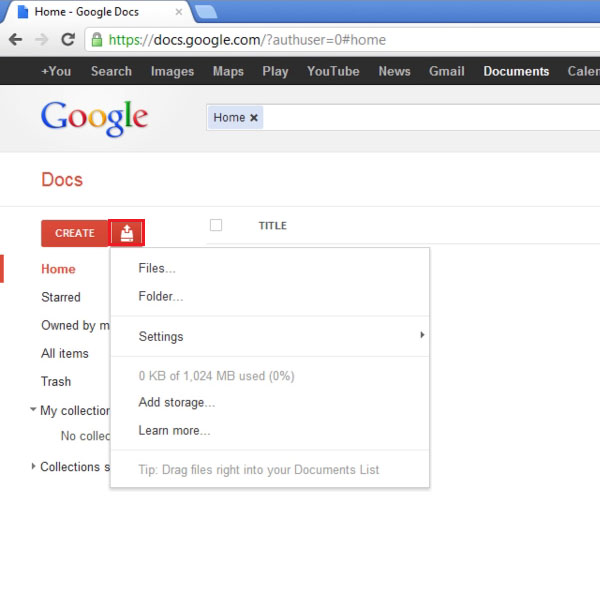
Step # 4 – Click on Upload button
The upload button allows you to upload files and folders. It also allows you to go to the settings and use the “add storage” option as well. Whenever you want to upload a file or folder from your computer, simply click on this button and select the file or folder you want to upload. A new window will appear from where you can browse for the file or folder that you want to upload.
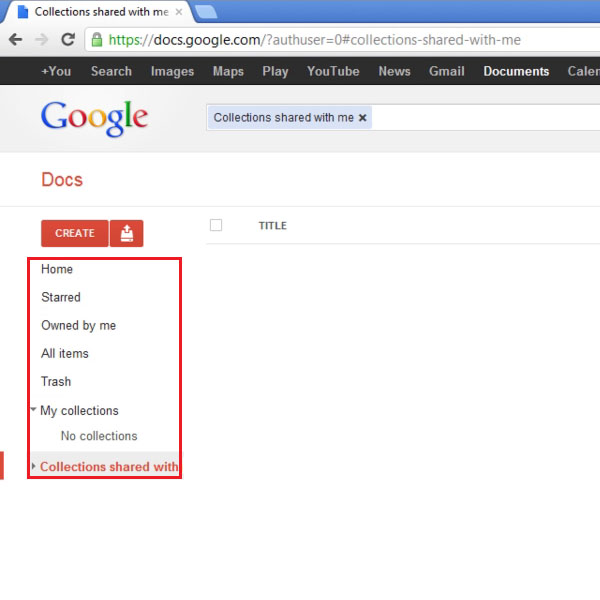
Step # 5 – Looking at the side menu
The menu appearing on the left side of your screen helps you to access your documents. The documents can be accessed easily from here. You can go to the home category to view the home page or go to the “Starred” category to view the documents which are starred. You can also access the trash can from the side menu in case you accidently deleted a document and want to restore it back. Click on the “collections shared by me” category and you will be able to view the documents other people have shared with you.
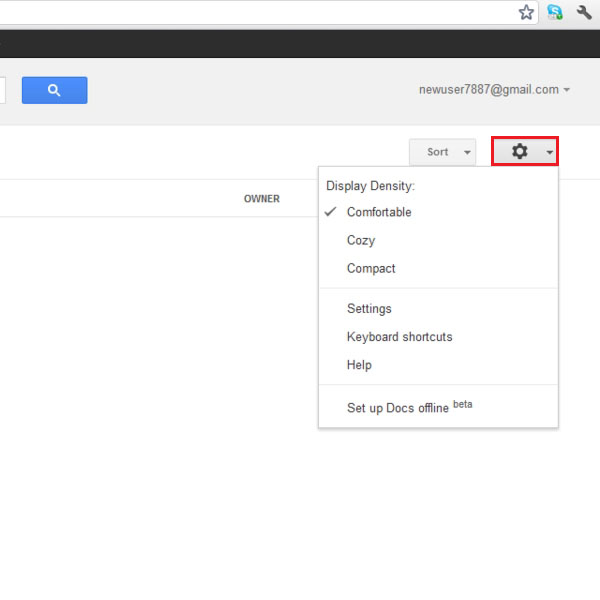
Step # 6 – Clicking on the Settings button
On the extreme right hand side is the “settings” button. Click on it and from the drop down menu, you can choose the “display density”, go to the “settings” and view the keyboard shortcuts available. You can also choose the “help” option from the drop down menu.